Microneedling with PRP (the Vampire Facial) commonly produces temporary redness and swelling. This guide explains what to expect, provides a detailed day‑by‑day aftercare timeline for minimizing inflammation, highlights how to avoid complications, and explains safe spacing with Botox, fillers, lasers, and peels so you maximize results and minimize risks.
What to Expect Immediately After Microneedling with PRP
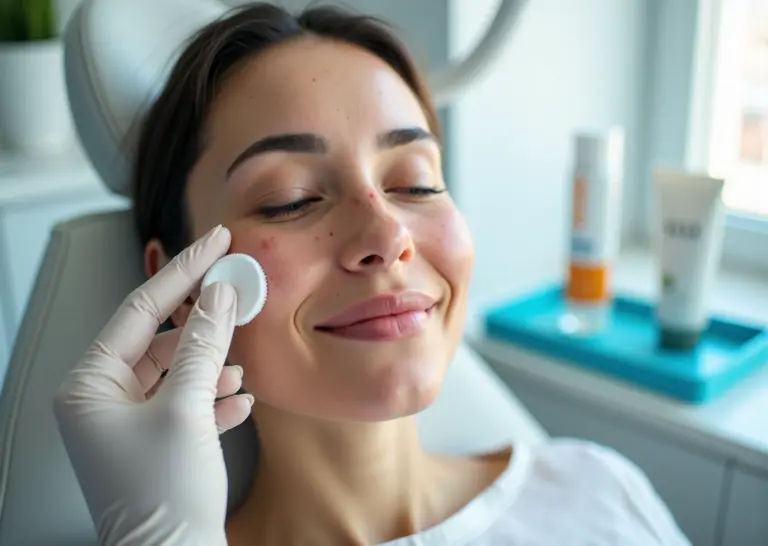
You just looked in the mirror. It is intense. If you just finished a microneedling with PRP session, often marketed as the Vampire Facial, your face probably looks like you fell asleep in the sun for six hours. This reaction is completely normal. In fact, that bright red flush is a sign that the treatment is working exactly as intended. To manage your recovery effectively, you need to understand what is happening physiologically right now and why your skin is reacting this way.
The Mechanism: Why Your Skin Reacts
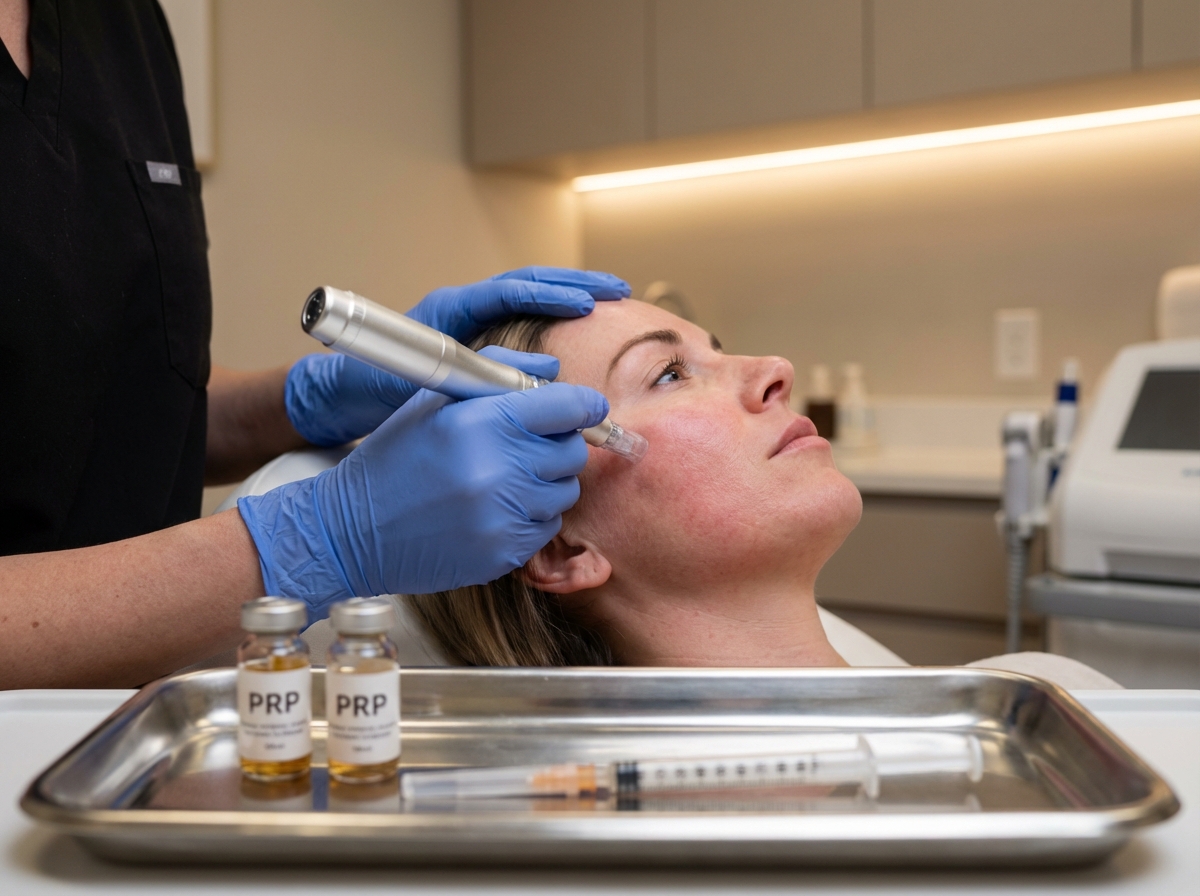
To understand the redness, we have to look at the trauma we just intentionally caused. Microneedling creates thousands of tiny, controlled punctures in the dermis and epidermis. These are called microchannels. Depending on the specific device and your skin goals, these needles penetrated anywhere from 0.5 mm to 2.5 mm deep. This physical trauma triggers an immediate acute inflammatory response. Your body perceives an injury and rushes blood to the surface to repair it.
When we add Platelet-Rich Plasma (PRP) to the equation, we are changing the chemical environment of that wound. The PRP is painted over these open microchannels, allowing it to soak deep into the dermis. Platelets are not just for clotting; they are packed with growth factors like PDGF (Platelet-Derived Growth Factor) and VEGF (Vascular Endothelial Growth Factor). These proteins act as signal callers, telling your cells to regenerate and build new collagen.
While this speeds up long-term healing, the immediate application of PRP can sometimes make the area look more swollen or “full” initially compared to dry microneedling. This is simply due to the volume of fluid being reintroduced to the tissue and the potent biological activity kicking off right away.
Sensations and Pain Management
A common concern is whether the addition of PRP increases pain. Generally, the fluid acts as a lubricant that makes the gliding of the pen smoother. The primary difference is the discomfort of the blood draw prior to the procedure. Most clinics use a strong topical numbing cream for 20 to 40 minutes before starting, making the treatment very tolerable. You might feel a scratching sensation or vibration, but sharp pain is uncommon once numbed.
Immediate Visible Reactions
Right now, and for the next few hours, your skin is in a state of high alert. The most common reaction is erythema—medical speak for redness. This can range from a mild pink flush to a deep, angry crimson depending on how aggressive the treatment was. You might also see:
- Pinpoint Bleeding: This usually stops before you leave the clinic, but you might see tiny dried spots. This is common with needle depths over 1.0 mm.
- Edema (Swelling): Your skin might feel puffy or tight. This is a combination of the physical trauma and the fluid from the PRP.
- Bruising: This is less common but happens, especially around the eyes or jawline where the skin is thinner or vascularity is higher.
- Heat and Tightness: Most people describe the sensation as a severe sunburn. Your skin will feel hot to the touch and tight when you move your face.
The intensity of this redness usually peaks within the first 24 to 72 hours. This is the critical window for aftercare and redness management. By day three, most of the angry red fades to a pinkish hue, similar to a resolving sunburn.
Factors That Influence Your Recovery Speed
Recovery is highly individual and depends on several variables. It is rarely just one thing.
Needle Depth and Device Type
The depth of penetration is the biggest predictor of downtime. A superficial treatment (0.5 mm) to boost product absorption might leave you pink for 24 hours. A deep treatment (2.0 mm or more) for acne scars will cause significant redness that can last 3 to 5 days. The device matters too. Modern motorized pens enter the skin vertically and cleanly. Older manual derma rollers enter at an angle and tear the skin as they roll out, often causing more unnecessary trauma and longer recovery times.
Practitioner Technique
An experienced provider knows how to adjust needle speed and pressure. Aggressive overlapping passes or pressing too hard can increase bruising and swelling without necessarily improving results. The goal is a uniform pattern of injury, not maceration of the tissue.
Skin Phototype and Age
Your genetics play a role. On the Fitzpatrick scale, lighter skin types (I-II) tend to show redness more dramatically but often clear up quickly. Darker skin types (IV-VI) might not look as red initially but are at higher risk for post-inflammatory hyperpigmentation (PIH) if the inflammation isn’t managed correctly. Age is also a factor. As we get older, our cellular turnover slows down. A 25-year-old might bounce back in 48 hours, while a 50-year-old might need an extra day or two for the inflammation to subside.
Lifestyle and Medications
What you put in your body affects how you heal. Smoking is a major hindrance; it constricts blood vessels and limits the oxygen reaching your healing skin, significantly prolonging redness. Medications are equally important. Anticoagulants or blood thinners will increase bleeding during the procedure and bruising afterward. Even taking NSAIDs like ibuprofen or aspirin in the days leading up to your appointment can increase bleeding and bruising. Conversely, sticking to a clean diet and staying hydrated helps flush out inflammation.
Recent Skincare History
If you used retinoids, acids, or exfoliants right up until the day of your treatment, your skin barrier was already compromised. This makes the skin more fragile and the reaction to microneedling more severe. This is why most protocols advise stopping these actives 3 to 7 days before your appointment.
PRP vs. Microneedling Alone: The Healing Difference
There is a misconception that adding PRP makes the recovery harder. The opposite is usually true. While the initial fluid might add temporary fullness, the growth factors in PRP actually accelerate the healing cascade. Studies and clinical observations suggest that patients treated with microneedling with PRP often see their redness resolve faster than those who opt for microneedling alone. The platelets help modulate the inflammatory response, transitioning the skin from the “injury” phase to the “repair” phase more efficiently.
Realistic Expectations for the First 3 Days
Managing your expectations prevents panic. Here is the realistic recovery timeline you should prepare for:
Day 0 (Treatment Day): You will look sunburned and feel tight. Do not plan social events. Your skin is an open wound.
Day 1 (24 Hours Later): The redness may still be visible, but the heat should subside. You might look like you have been at the gym or in a sauna. Swelling is usually at its peak here.
Day 2-3: The bright red fades to pink. You might notice some dryness or flaking as the skin begins to turn over. This is not the time to pick at your face.
If you are still bright red, hot, or seeing pus after 72 hours, that is not part of the normal recovery timeline and warrants a call to your provider. However, for the vast majority of patients, the “scary” phase is short-lived, paving the way for the collagen production that follows.
Day by Day Aftercare Steps and Practical Timeline
The success of your treatment relies heavily on how you handle the next few days. While the procedure itself triggers the healing response, your home care determines whether that response leads to smooth, glowing skin or unnecessary irritation. This timeline breaks down exactly what to do—and what to skip—to manage redness and speed up your recovery.
Immediate 0–24 Hours: The “Do Not Touch” Phase
Your skin is currently working hard to absorb the platelet-rich plasma (PRP) and close the thousands of microchannels created during the session. The golden rule for the first evening is minimal interference.
- Cleansing: Do not wash your face for at least 6 to 8 hours after the appointment. Ideally, leave the dried PRP on your skin overnight to maximize growth factor absorption. If you absolutely must cleanse before bed due to discomfort, rinse gently with lukewarm water only—no soap, no scrubbing.
- Managing Redness and Heat: You will likely feel a sunburn-like sensation. This is normal. If the heat is uncomfortable, you can use a cold compress. Wrap an ice pack in sterile gauze or a clean, thin cloth. Apply it for 10–15 minutes every hour. Never put ice directly on the skin, as the barrier is compromised and frost injury can happen faster than usual.
- Sleep Position: Sleep on your back with your head elevated on two pillows. This helps drain fluid and reduces morning swelling (edema), which is common around the eyes. Change your pillowcase to a fresh, clean one to prevent bacterial transfer.
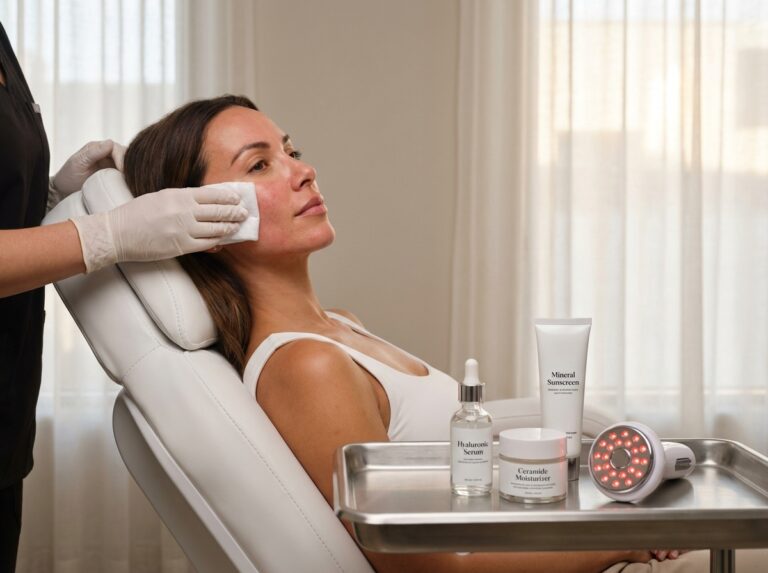
- Products: Apply nothing except what your provider gave you (usually a specific post-procedure hyaluronic acid or barrier cream). Avoid all makeup, sunscreen, and active skincare.
24–72 Hours: Peak Redness and Hydration
This is often the most visually intense period. Your skin may look bright red or pink, feel tight, and be dry to the touch. The microchannels are closing, but the barrier is still repairing itself.
- Cleansing: You can now wash your face morning and night. Use a gentle, pH-balanced, non-foaming cleanser. Use your hands and lukewarm water. Avoid washcloths, cleansing brushes, or sponges, which are too abrasive right now.
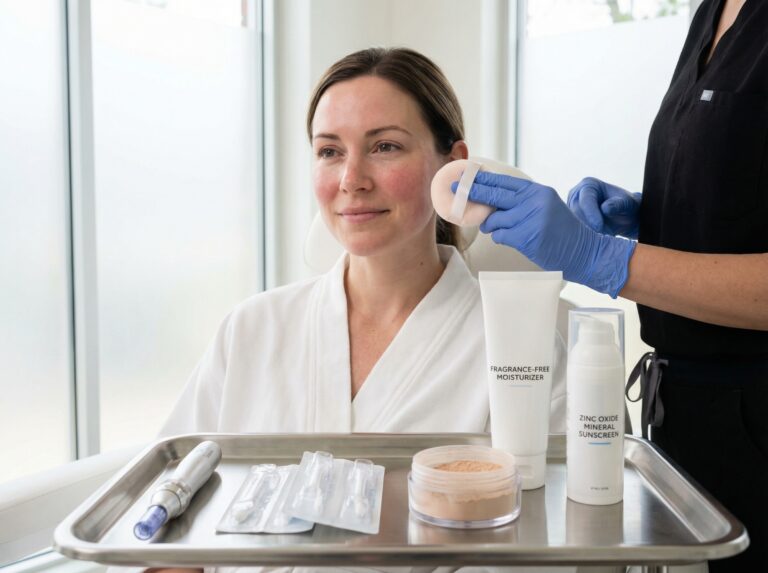
- Skincare: Focus entirely on hydration and protection. Your skin is losing water faster than usual (transepidermal water loss). Apply a high-quality hyaluronic acid serum followed by a non-irritating, fragrance-free moisturizer. Look for ingredients like ceramides or petrolatum if your skin feels exceptionally dry.
- Sun Protection: This is non-negotiable. If you go outside or sit near a window, apply a mineral sunscreen (zinc oxide or titanium dioxide) with SPF 30+. Avoid chemical sunscreens for now, as they can sting and cause irritation on compromised skin.
- Makeup: Ideally, wait 48 to 72 hours before applying makeup. If you must wear it after 24 hours, use a mineral powder foundation. It allows the skin to breathe better than heavy liquids. Crucial: Use clean brushes or a new sponge. Old tools harbor bacteria that can cause infection in healing pores.
- Lifestyle Restrictions:
- Exercise: Skip the gym. Sweat contains bacteria and salt that can irritate healing skin. Avoid heavy exertion, saunas, steam rooms, and hot yoga for 72 hours.
- Alcohol and Blood Thinners: Avoid alcohol for at least 48 hours. It dilates blood vessels and can increase redness and swelling. Continue avoiding NSAIDs (like ibuprofen) if possible, as they can interfere with the inflammatory cascade necessary for collagen production. Tylenol (acetaminophen) is fine for discomfort.
Days 3–7: The Peeling Phase
Redness usually subsides to a pink hue, and you might notice skin flaking or peeling. This is a sign of rapid cell turnover.
- Texture Changes: Your skin might feel like sandpaper. Do not pick, pull, or scrub the flakes. Picking can lead to scarring or hyperpigmentation. Let the skin shed naturally.
- Skincare Adjustments: Continue with the gentle cleanser and heavy hydration. You can stop the cold compresses now. If you are prone to bruising, any lingering discoloration can be covered with makeup.
- Restarting Actives: Continue to avoid “active” ingredients. Even if your skin looks healed, the new tissue is sensitive.
Product Safety Guide (First 7 Days)
Knowing what to put on your face is just as important as knowing what to keep off it.
| Safe to Use (Green Light) | Avoid Strictly (Red Light) |
|---|---|
| Hyaluronic Acid Serums | Retinoids (Retin-A, Retinol, Tretinoin) |
| Fragrance-free Ceramides | Vitamin C Serums (L-Ascorbic Acid) |
| Mineral Sunscreen (Zinc/Titanium) | Alpha/Beta Hydroxy Acids (Glycolic, Salicylic) |
| Petrolatum-based ointments (if dry) | Benzoyl Peroxide |
| Gentle, creamy cleansers | Alcohol-based toners |
| Mineral makeup (after 24-48h) | Physical scrubs or exfoliating brushes |
Weeks 1–2: Returning to Normal
By day 7, most visible recovery is complete for superficial to moderate treatments. Deeper treatments (1.5mm+) may still show faint pinkness.
- Resuming Routine: You can slowly reintroduce your usual skincare. Start with Vitamin C serums around day 7–10 to boost collagen production. Wait until day 10–14 to restart retinoids or strong exfoliants, and start using them every other day to test tolerance.
- Hair Removal: You can resume waxing, threading, or using depilatory creams after day 14.
Long Term (Weeks 3–6): Collagen Remodeling
While the surface looks healed, the real work is happening underneath. Microneedling statistics indicate that collagen production ramps up significantly during this phase.
- Sun Care: New collagen is extremely susceptible to UV damage. Be diligent with sunscreen to prevent post-inflammatory hyperpigmentation (dark spots), especially if you have a darker skin tone.
- Follow-up: This is the time to assess your results. Most providers recommend a series of treatments. PRP facial results are cumulative, so sticking to the schedule (usually every 4–6 weeks) is key for maximum improvement.
Example Daily Routine: The First Week
Keep it simple. Overloading your skin will only slow down the healing process.
Morning
- Cleanse with lukewarm water and a gentle, creamy cleanser. Pat dry with a clean towel.
- Apply a generous layer of Hyaluronic Acid serum.
- Apply a barrier-repair moisturizer (fragrance-free).
- Finish with Mineral SPF 30+.
Evening
- Cleanse gently to remove sunscreen and impurities.
- Apply Hyaluronic Acid serum.
- Apply a slightly thicker layer of moisturizer or an occlusive balm if your skin feels tight.
- Sleep on a clean pillowcase.
Advanced Tips to Minimize Redness
If you have a social event coming up or just want the redness gone faster, consider these additional steps:
* LED Light Therapy: If your provider offers it or you have an FDA-cleared home device, red light therapy (630–660 nm) can be used starting 24–48 hours post-procedure. It helps reduce inflammation and speeds up cellular repair.
* Antihistamines: If you are experiencing significant itching or swelling (which can make redness look worse), an over-the-counter antihistamine like Claritin or Zyrtec during the first 2 days can help calm the histamine response.
* Topical Arnica: For patients prone to bruising or lingering redness, topical arnica gel applied to intact skin (after 24 hours) can help clear discoloration faster.
Recognizing and Managing Complications and Safe Combination with Other Treatments
Most patients heal from microneedling with PRP without any major issues. You follow the timeline, the redness fades, and the skin glows. But biology is unpredictable. Sometimes the skin reacts more intensely than we expect. Knowing the difference between a normal recovery and a complication is the key to safety.
Recognizing Potential Complications
You need to know what falls outside the normal healing curve. We expect redness and some swelling. We do not expect escalating pain.
Prolonged Redness (Erythema)
Redness usually fades to pink and disappears within 3 to 7 days for standard treatments. If you had a deep treatment for acne scars, low-grade pinkness might last a few weeks. However, if your skin remains bright red or feels hot to the touch after 72 hours, this is a red flag. It could indicate an allergic reaction to a topical product or an infection.
Significant Bruising
Since PRP involves drawing blood and microneedling creates tiny injuries, some bruising is normal. This is especially true around the eyes and jawline. These bruises typically resolve in 7 to 14 days. If you have extensive purple or black bruising that keeps spreading, it might signal a bleeding issue or a medication interaction.
Infection Signs
Infections are rare when clinics use sterile, single-use cartridges. If bacteria get into the microchannels, symptoms usually show up between day 3 and day 7. Watch for these warning signs:
- Pain that gets worse instead of better.
- Yellow or green pus oozing from the skin.
- Redness that spreads quickly beyond the treated area.
- Fever over 100.4°F.
Cold Sore Reactivation (HSV)
The trauma from the needles can wake up the herpes simplex virus if you have a history of cold sores. This often looks like a cluster of tiny, painful blisters appearing 24 to 48 hours after the procedure. If you have ever had a cold sore, your provider should prescribe an antiviral medication like valacyclovir to take before and after the treatment.
Pigmentation Changes
Post-inflammatory hyperpigmentation (PIH) is a risk for darker skin tones (Fitzpatrick types IV-VI). The inflammation from the needles can trigger melanin production, leaving dark spots. This usually appears 2 to 4 weeks later. Strict sun protection is your best defense here. Interestingly, while risks exist, microneedling has been shown to outperform injections for treating melasma in some studies, but it requires careful management to avoid making pigment worse.
When to Call the Clinic
You should never feel like you are bothering your provider. It is their job to ensure you heal safely. Call your clinic immediately if you experience:
- Fever or chills.
- Pus or cloudy discharge.
- Heat and redness that expands after the first 48 hours.
- Severe pain not relieved by Tylenol.
- Blisters or sores on the face.
- Darkening of the skin that persists.
Risk Reduction Strategies
Preventing complications starts before the first needle touches your skin. A clean medical history is vital.
Medications and Supplements
Bleeding is the enemy of a quick recovery. Blood thinners prevent clotting and lead to excessive bruising. Most clinics will ask you to stop taking NSAIDs (like ibuprofen or aspirin) for 48 to 72 hours before your appointment. You should also pause supplements that thin the blood for about a week. This includes fish oil, vitamin E, ginkgo biloba, and garlic supplements.
Sterile Technique
This is non-negotiable. Your provider must use a new, sterile needle cartridge. They should open it in front of you. The PRP preparation must also be sterile. If the clinic looks messy or they reuse equipment, leave. The risk of cross-contamination or bacterial infection is not worth it.
Safely Combining Treatments
We often want to do everything at once to save time. However, layering too many procedures can overwhelm the skin and cause prolonged inflammation. You need to space treatments out to minimize risks and let the skin barrier repair itself.
Here is a guide on how to combine treatments safely.
| Treatment | Recommended Spacing | Rationale |
|---|---|---|
| Botox / Dysport | Wait 1–2 weeks before or after | Microneedling causes swelling. If you do it too soon after Botox, the fluid could move the toxin to unwanted muscles. |
| Dermal Fillers | Wait 2 weeks after filler | You want the filler to settle. Needling over fresh filler carries a small risk of displacing the product or introducing bacteria to the filler site. |
| Chemical Peels | Wait 2–4 weeks | Peels remove the top layer of skin. Microneedling punctures it. Doing them too close together creates too much inflammation and increases burn risks. |
| Laser Facials | Wait 2–4 weeks | Lasers rely on heat. Microneedling relies on physical trauma. Stacking these inflammatory triggers can lead to hyperpigmentation or scarring. |
| Body Sculpting | Individualized (1–2 weeks) | Non-surgical body treatments cause systemic inflammation. It is best to let the body calm down between sessions. |
Special Considerations
Pregnancy and Breastfeeding
Doctors generally advise against elective cosmetic procedures during pregnancy. While PRP is your own blood, the infection risk and the stress on the body are unnecessary. Wait until you are no longer pregnant or breastfeeding.
Autoimmune Conditions
Patients with autoimmune diseases or those on immunosuppressants need a personalized plan. Your healing response might be slower. The risk of infection is higher. Always consult your primary specialist before booking a treatment scheduling.
Current Trends
It is worth noting that patient interest shifts over time. Recent data suggests a drop in PRP treatments in 2024 and 2025 as people explore other regenerative options. However, for those who choose it, following these safety protocols remains the standard for good results.
Always consult with your treating provider for personalized intervals. They know your skin history and the specific depth of the treatment they performed.
Final Takeaways and Recovery Checklist
You have made it through the procedure, and now the real work begins. While the needles and the plasma do the heavy lifting in the clinic, how you handle the next two weeks determines the quality of your results. It is easy to underestimate the recovery phase because the downtime is relatively short compared to surgery, but your skin is currently in a vulnerable state of controlled injury. It needs specific support to rebuild collagen and utilize those growth factors effectively.
Recovery is not just about waiting for the redness to fade. It is an active process where you protect the micro-channels created during the session. If you rush back to the gym or your retinol cream too early, you risk irritation or infection. If you skip sunscreen, you risk hyperpigmentation. The goal here is to give you a clear, no-nonsense plan to navigate the days ahead without second-guessing every symptom.
The Essential Recovery Checklist: First 14 Days
This checklist covers the non-negotiables. Stick to these, and you will likely see a smoother, faster recovery.
- Do keep it clean. For the first 24 hours, leave your skin alone. After that, wash your face twice a day with lukewarm water and a gentle, non-foaming cleanser. Your skin barrier is compromised, so harsh soaps are out.
- Do hydrate constantly. Your skin will experience increased transepidermal water loss (TEWL) for about 3 to 7 days. Apply a high-quality hyaluronic acid serum followed by a simple, fragrance-free moisturizer or an occlusive like petrolatum if your provider suggests it.
- Do change your pillowcase. Sleep on a fresh, clean pillowcase for the first three nights. Bacteria from old bedding can easily enter the open micro-channels and cause breakouts or infection.
- Do sleep elevated. Prop yourself up with an extra pillow for the first two nights. This helps drain excess fluid and significantly reduces morning swelling, especially around the eyes.
- Do apply mineral sunscreen. Once your skin has re-epithelialized (usually day 2 or 3), wear a mineral SPF 30+ containing zinc oxide or titanium dioxide every single day. Chemical sunscreens can sting and cause irritation on healing skin.
- Do use cold compresses. If you feel heat or throbbing in the first 48 hours, apply a cold compress wrapped in sterile gauze for 10 minutes at a time. Never put ice directly on your skin.
- Don’t touch your face. This is the hardest one. Your hands carry bacteria. Unless you are cleaning your face or applying aftercare products with freshly washed hands, keep them away.
- Don’t sweat it out. Avoid heavy exercise, saunas, steam rooms, and hot showers for at least 72 hours. Sweat contains bacteria and salt that can irritate open channels, and the heat will increase inflammation and redness.
- Don’t wear makeup immediately. Wait at least 24 to 48 hours before applying makeup. When you do resume, use clean brushes and mineral-based products to let the skin breathe.
- Don’t pick or peel. You might experience flaking around day 3 or 4. Do not pull at the skin. Picking can lead to scarring and disrupt the remodeling process. Let it slough off naturally.
- Don’t use active ingredients. Stop all retinoids (Retin-A, retinol), Vitamin C, alpha hydroxy acids (AHAs), and beta hydroxy acids (BHAs) for 7 to 14 days. Your skin is too sensitive for chemical exfoliation right now.
- Don’t drink alcohol. Try to avoid alcohol for 72 hours post-procedure. It dehydrates the body and dilates blood vessels, which can prolong redness and increase bruising.
Recovery from microneedling with PRP is generally manageable and straightforward if you respect the process. Everyone heals at a different pace, so do not compare your day 3 to someone else’s day 3. Trust the timeline, protect your investment with sunscreen, and keep your skin hydrated. If you follow these guidelines and attend your scheduled follow-up visits, you are setting the stage for the best possible outcome—healthier, more resilient skin.
Sources
- Are We Over PRP? Patient Interest Is Shifting, Data Says – NewBeauty — In 2024, a third of practices reported seeing a downturn in the number of PRP treatments. And in 2025, that number grew to 42 percent.
- Microneedling Outperforms Injections in Melasma PRP Study — Specifically, microneedling led to a 70.21% improvement in MASI scores, while microinjection achieved a 36.6% improvement. The percentage of …
- US PRP And Stem Cell Alopecia Treatment Market Size 2024 To 2034 — The US PRP and stem cell alopecia treatment market size was exhibited at USD 255.25 million in 2024 and is projected to hit around USD 630.84 million by 2034.
- Platelet-Rich Plasma Applications, The Past 5 Years: A Review Article — This review article aims to provide an overview of PRP's applications and evidence over the past 5 years in randomised controlled trials.
- Microneedling Statistics 2025-2024, Stats, Facts Data Trends, Costs — Microneedling statistics reveal that with four sessions spaced one month apart, the treated skin has a remarkable 400% increase in collagen and elastin …
- US Microneedling Market Size, Growth Report 2035 — The microneedling market is projected to grow at a 10.31% CAGR from 2024 to 2035, driven by increasing demand for minimally invasive cosmetic procedures and …
- Microneedling with Minoxidil Insights 2025 – Open MedScience — By 2025, microneedling will no longer be considered experimental and will be widely accepted in dermatology as a supportive treatment for hair …
- PRP Facial Results in 2025: Timeline, Longevity, and What to … — Recent studies show patient satisfaction rates exceeding 80% when PRP is incorporated into facial rejuvenation protocols, with measurable …
- Phase I Clinical Trial: Evaluating the Efficacy, Safety, and Patient … — This study compared PRP injection and microneedling methods for treating AGA to determine their relative effectiveness. Both approaches …
Legal Disclaimers & Brand Notices
Vampire Facial® and Vampire Facelift® are registered trademarks of Charles Runels, MD. The specific procedures described in this article are generic representations of platelet-rich plasma (PRP) treatments and are not affiliated with, endorsed by, or certified by the trademark owner.
The content provided in this article is for informational purposes only and does not constitute professional medical advice, diagnosis, or treatment. Always seek the advice of your physician or another qualified health provider with any questions you may have regarding a medical condition, recovery protocol, or treatment plan. Never disregard professional medical advice or delay in seeking it because of something you have read in this article.
All product names, logos, and brands, including but not limited to Botox® and Dysport®, are the property of their respective owners. All company, product, and service names used in this text are for identification purposes only. Use of these names, logos, and brands does not imply endorsement or affiliation.