Microneedling is a popular non-invasive skin rejuvenation procedure that creates controlled micro-injuries to stimulate collagen production. The first 48 hours are crucial: proper cleansing, soothing, sun protection, and activity modifications reduce complications and improve outcomes. This guide covers evidence-based steps for hours 0–6, 6–24, and 24–48, plus interactions with Botox, fillers, lasers, and chemical peels.
How Microneedling Works and the Critical 0–6 Hour Window
The moment the needles stop moving is when your recovery actually begins. Your skin is currently in a state of controlled trauma. It feels hot, tight, and likely looks like a moderate to severe sunburn. This heat is a sign that the inflammation cascade has started. This process is necessary for collagen production, but it must be managed carefully to avoid complications.
The next six hours are the most volatile period of your recovery. Your micro-channels are wide open, acting like tiny tunnels directly into your dermis. This makes your skin incredibly absorbent—increasing topical product penetration by up to 1000 percent—but also highly susceptible to bacteria and irritation.
Immediate Actions: The First 60 Minutes
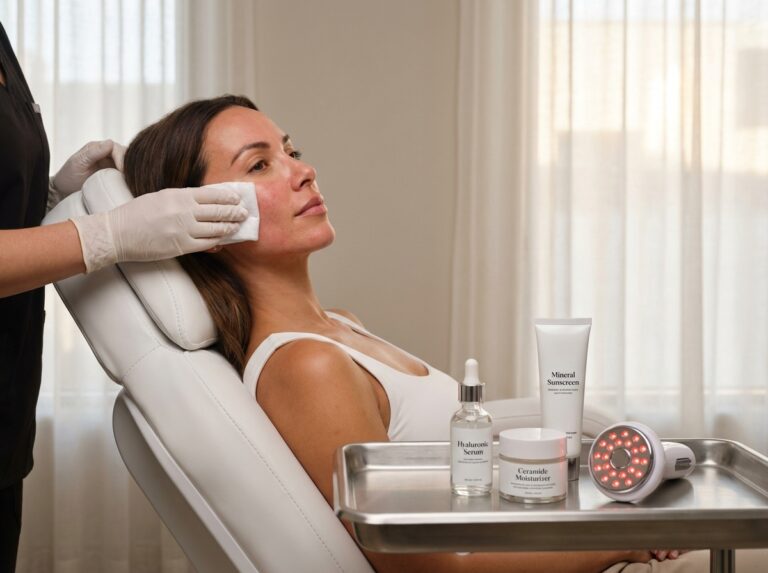
If you had this done professionally, your clinician likely applied a layer of hyaluronic acid or a specific post-procedure gel. **Do not touch it.** Let that product sit. It acts as a temporary seal while providing hydration.
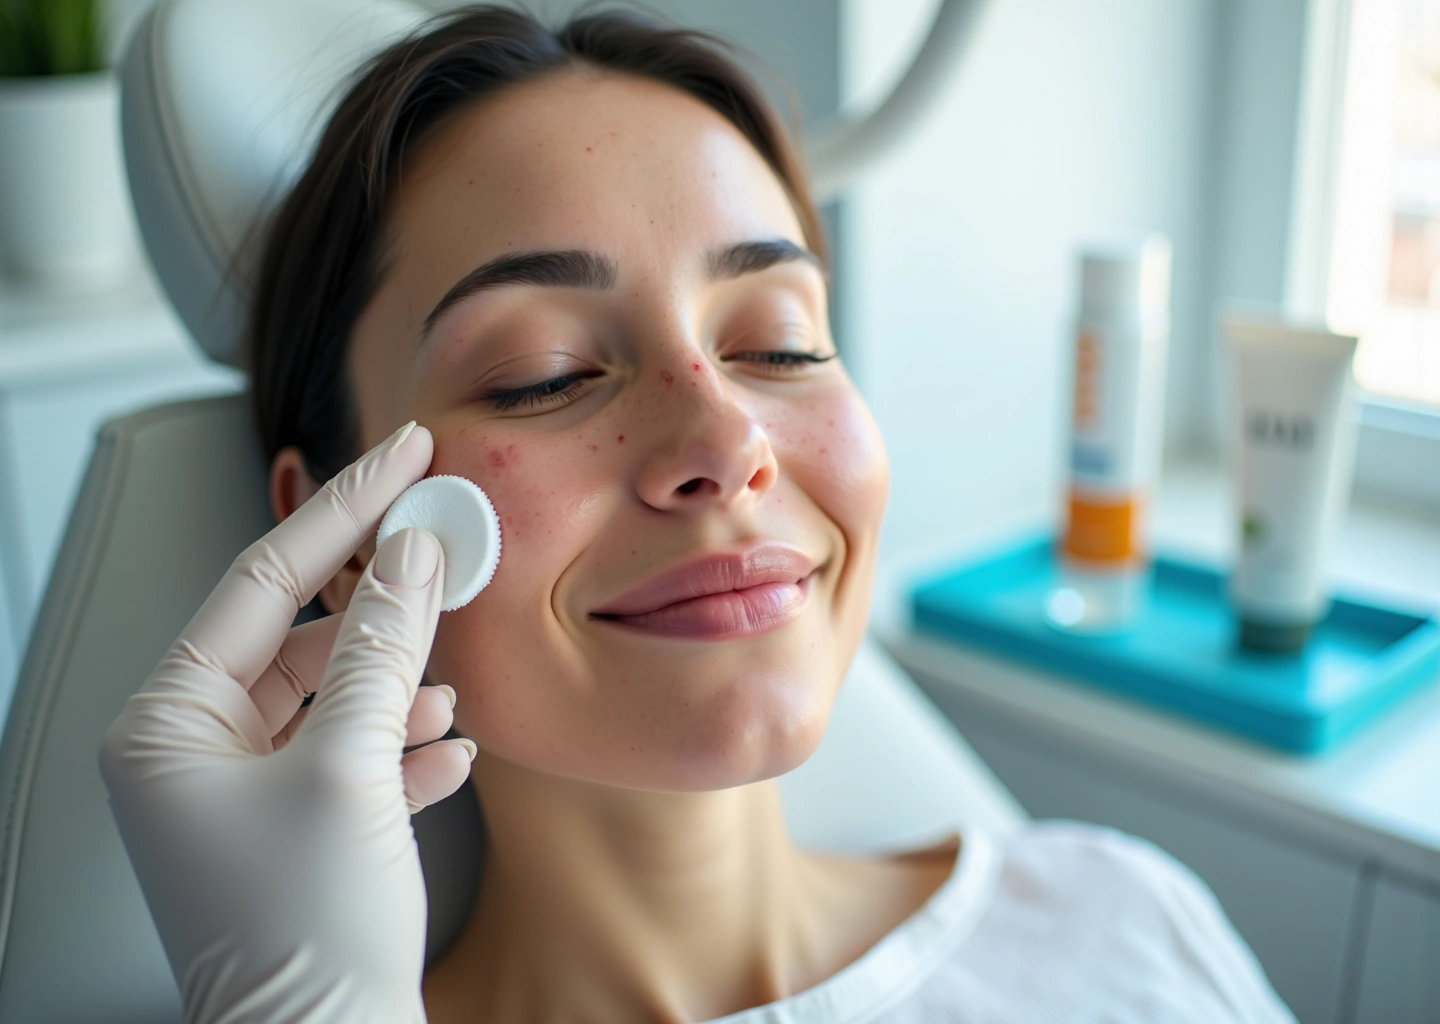
For at-home microneedling users, your first step is sanitation. Before you even look in the mirror, disinfect your device with 70% isopropyl alcohol and store it in its case. If you used a single-use dermaroller or needle cartridge, dispose of it immediately in a sharps container or heavy plastic bottle. Never reuse a needle cartridge; even with sanitization, microscopic tissue remains, creating a high infection risk.
Once the tool is safe, apply a high-quality, pure hyaluronic acid serum. Do not use the same serum bottle you use daily if the dropper has ever touched your skin before. Use a fresh ampoule or a pump dispenser to ensure sterility.
Numbness and Hidden Risks
If your clinician used a topical anesthetic cream, your face might feel numb for 2 to 4 hours. Lidocaine numbness can mask pain signals, making you vulnerable to accidental injury. You might scratch an itch and tear the skin without realizing it, or drink a hot beverage and burn your lip.
Be hyper-aware of your movements. Do not eat messy foods that might require wiping your mouth. Drink through a straw if possible. Avoid leaning your face on your hand while sitting or resting your phone against your cheek.
Handling Dressings and Cleansing
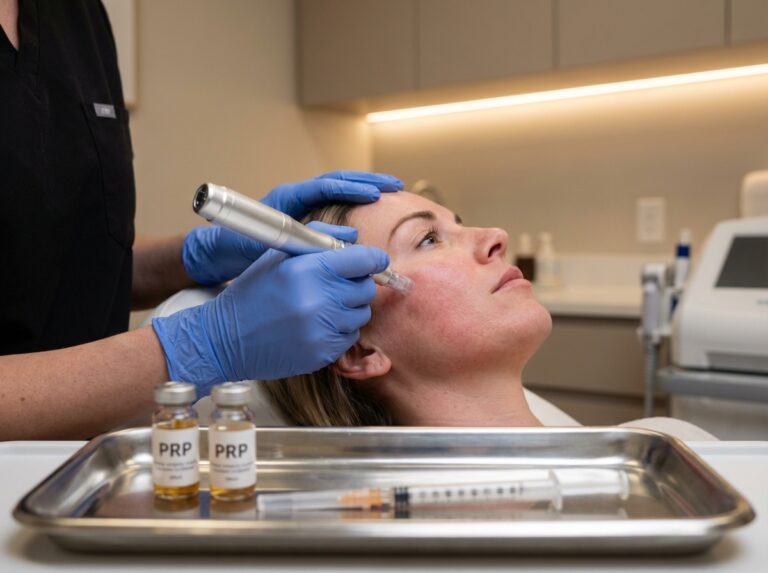
Most microneedling procedures do not require bandages. However, if you had a particularly aggressive treatment or a combination therapy with PRP (Platelet-Rich Plasma), you might have a dried layer of plasma or a light dressing on the skin.
Leave this alone for at least four hours. The blood and plasma contain growth factors that aid healing. Washing them off too soon reduces the efficacy of the treatment.
**When to Wash:**
You should generally wait at least 4 to 6 hours before rinsing your face. Many clinicians recommend waiting until the next morning. If you must rinse due to discomfort or instruction:
- Wash your hands thoroughly with antibacterial soap for 30 seconds.
- Use cool or lukewarm water only. Hot water will increase inflammation and pain.
- Do not use a cleanser yet unless specifically given a post-procedure wash by your dermatologist. Surfactants and fragrances in standard cleansers will sting open channels.
- Use your hands to splash water. Do not use washcloths, sponges, or cleansing brushes. These harbor bacteria and are too abrasive.
- Pat dry with a clean paper towel. Do not use a fabric towel.
Managing Pain, Inflammation, and Bleeding
**Pinpoint Bleeding**
Pinpoint bleeding is a common endpoint for professional treatments, especially those deeper than 1.0 mm. It usually stops within minutes of the treatment concluding. If you notice spots of blood surfacing once you are home, do not rub. Dab gently with a sterile gauze pad. If the bleeding is persistent, apply light pressure with the gauze for five minutes.
**Pain Medication**
The anesthesia will wear off within an hour or two, leaving a stinging or burning sensation. If you are in pain, take **Acetaminophen (Tylenol)**.
**Do not take NSAIDs** like ibuprofen (Advil), aspirin, or naproxen. NSAIDs are anti-inflammatory drugs. Since microneedling relies on the body’s natural inflammatory response to trigger collagen production, taking anti-inflammatories can theoretically blunt your results. Furthermore, NSAIDs thin the blood, increasing the risk of bruising and prolonging pinpoint bleeding.
**Cold Compresses**
You can use cold to manage the heat, but you must be careful. Direct ice can cause frostbite on numb or compromised skin.
* Wrap a clean ice pack or frozen peas in a sterile gauze or fresh paper towel.
* Apply for 10 minutes, then remove for 10 minutes.
* Repeat only if the heat is unbearable.
The Role of Topical Serums
Your skin is currently a sponge. Absorption rates are significantly higher right now. This is beneficial for hydrating ingredients but dangerous for active ingredients.
Safe to Apply:
- High-molecular weight Hyaluronic Acid (hydrates the surface).
- Peptides (specifically formulated for post-procedure).
- Ceramides (helps repair the barrier, usually better after the first 6 hours).
Strictly Avoid (First 6–24 Hours):
- Vitamin C (L-ascorbic acid is acidic and will sting/irritate).
- Retinoids or Retinol.
- Alpha Hydroxy Acids (Glycolic, Lactic).
- Beta Hydroxy Acids (Salicylic).
- Makeup of any kind.
- Sunscreens (chemical or mineral) should generally be avoided until the next morning to prevent clogging open channels.
Red Flags: When to Call the Clinic
While side effects like redness and swelling are standard, certain symptoms require immediate medical attention.
| Symptom | Status | Action |
|---|---|---|
| Redness and heat | Normal | Hydrate and rest. |
| Pinpoint bleeding | Normal | Dab with sterile gauze. |
| Heavy bleeding (dripping) | Warning | Apply pressure. Call clinic if >10 mins. |
| Fever over 100.4°F | Emergency | Seek medical care immediately. |
| Cold sore outbreak | Warning | Call clinic for antiviral prescription. |
| Dizziness or fainting | Emergency | Go to ER or Urgent Care. |
Dos and Don’ts: The First 6 Hours
Strict adherence to these rules significantly lowers your risk of infection and granulomas.
DO:
- Keep your hair pulled back and off your face.
- Change your pillowcase to a fresh, clean one before sleeping.
- Drink plenty of water to support internal hydration.
- Stay indoors to avoid UV exposure and pollution.
DON’T:
- Do not touch your face. This is the #1 cause of post-procedure infection.
- Do not apply makeup. Not even mineral powder.
- Do not sweat. No gym, no sauna, no hot yoga. Sweat contains bacteria and salt that irritates open wounds.
- Do not shower with hot water. The steam can increase swelling.
- Do not drink alcohol. It dehydrates you and increases bruising.
- Do not smoke or be around second-hand smoke. It constricts blood vessels and slows healing.
Clinician Checklist for Patients
If you are a provider, print this simple checklist for your patients to take home. It helps reduce panic calls and improves compliance.
Post-Microneedling Home Checklist (0-6 Hours)
Right Now: Leave the serum applied in the office on your skin. Do not touch.
Pain: Take Tylenol (Acetaminophen) if needed. Avoid Ibuprofen/Advil.
Hygiene: Wash hands before touching near your face. Sanitize your phone screen.
Evening Routine: Rinse face gently with cool water only if instructed. Apply the provided HA serum.
Sleep: Sleep on your back with an extra pillow to reduce swelling.
Emergency Contact: [Insert Clinic Phone Number]
Ongoing Care: Hours 6 to 24
Once the initial numbness wears off, your skin will likely feel tight and warm. The period between 6 and 24 hours post-treatment is critical for preventing infection and locking in moisture. Your microchannels are still open or just beginning to close.
The First Cleanse
You should generally wait at least 6 to 8 hours before washing your face. Many clinicians recommend waiting until the next morning. When you do cleanse, you must be incredibly gentle.
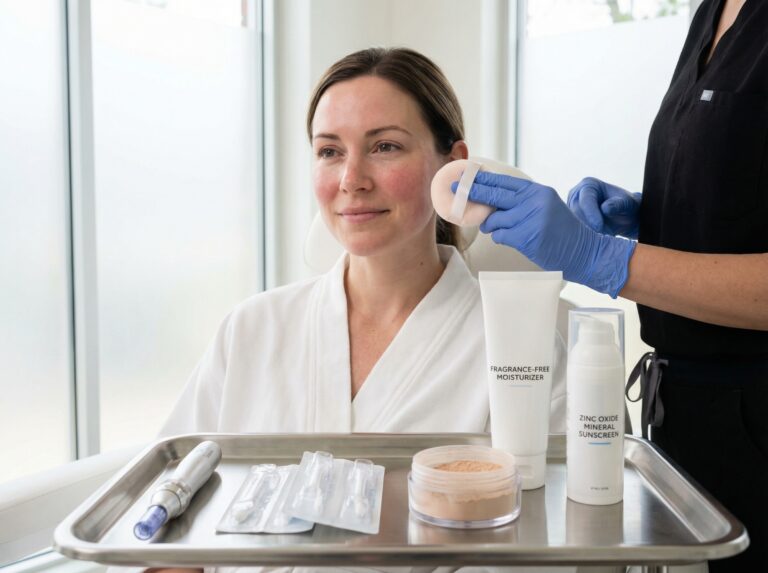
Use lukewarm water. Hot water will increase inflammation and discomfort, while cold water might not effectively remove debris. Select a gentle, non-foaming cleanser that is fragrance-free and designed for sensitive skin. Avoid any cleansers containing exfoliating beads, acids, or benzoyl peroxide.
Apply the cleanser with clean hands using a light touch. Rinse thoroughly by splashing water on your face. Pat your skin dry with a fresh, clean towel or a disposable paper towel. Do not rub.
Hydration and Topical Products
Your skin loses water rapidly during this phase. Keeping it hydrated reduces tightness and supports the healing process.
Safe products to use:
- Hyaluronic Acid Serums: The gold standard for post-microneedling care. It binds moisture to the skin without clogging pores.
- Barrier Repair Creams: Look for formulas with ceramides or peptides that specifically claim to repair the skin barrier.
- Petrolatum or Occlusives: If your treatment was deep or aggressive, your provider might suggest a thin layer of an occlusive ointment like Aquaphor to create a seal.
- Post-Procedure Balms: Use any specific balm provided by your dermatologist exactly as directed.
Products to avoid:
Do not use active ingredients yet. Retinoids, Vitamin C serums, and exfoliating acids must stay on the shelf. These potent ingredients can cause chemical burns or granulomas when applied to open microchannels. Only apply topical antibiotics or steroid creams if your clinician specifically prescribed them.
Managing Swelling and Discomfort
Swelling often peaks within the first 24 hours. You might notice puffiness around the eyes or jawline. Use cold compresses (wrapped in cloth, never direct ice) for 10 minutes at a time.
Your sleeping position matters. Sleep on your back with your head elevated on two pillows. This gravity-assisted position helps drain excess fluid from the face and reduces morning puffiness.
Lifestyle Adjustments
You need to keep your internal body temperature stable. Avoid environments or activities that induce sweating or flushing.
* **Strenuous Exercise:** Heavy workouts increase blood flow to the face and cause sweating. Sweat contains bacteria that can irritate open pores.
* **Heat Exposure:** Stay out of saunas, steam rooms, and hot tubs.
* **Swimming:** Avoid pools, lakes, or the ocean. Chlorine and natural bodies of water carry bacteria that pose a serious infection risk.
* **Alcohol Consumption:** Alcohol acts as a vasodilator, widening blood vessels which can increase bruising and swelling.
Sun Protection Guidelines
Direct sun exposure is dangerous during this window. Your skin has lost its natural protection. If you must go outside, physical protection like a wide-brimmed hat is your best defense.
You can typically apply sunscreen 24 hours after the procedure once the microchannels have closed. Choose a mineral sunscreen containing zinc oxide or titanium dioxide (SPF 30 or higher). These sit on top of the skin rather than absorbing into it. Chemical sunscreens can sting and cause allergic reactions on compromised skin.
Makeup and Cosmetic Use
It is best to keep your skin completely bare for the full 24 hours. Makeup brushes and sponges are often teeming with bacteria. Applying foundation over open channels can lead to clogged pores and infection. If you absolutely must wear makeup after the initial 24-hour period, use mineral-based powder makeup and freshly washed brushes.
Care and Warning Signs: Hours 24 to 48
By the time you hit the 24-hour mark, the initial shock to your skin is wearing off. The micro-channels are closing, but your skin barrier is still significantly compromised. This specific window is when the risk of infection drops, but the risk of irritation and dehydration peaks due to Transepidermal Water Loss (TEWL).
Expected Progression: What Normal Looks Like
During this phase, the intense erythema (redness) should start to subside, often fading to a pinkish hue. If you have a darker skin tone, you might not see redness; instead, you might notice a deepening of pigment or a slight greyish cast. This is a crucial time to monitor for Post-Inflammatory Hyperpigmentation (PIH).
Sensory Changes
Your skin will likely feel tight, as if it is two sizes too small for your face. You might also experience:
- Desquamation (Peeling): Mild flaking often starts around the mouth and nose. Do not pick at it.
- Texture: The skin may feel like sandpaper as the old stratum corneum lifts off.
- Plumping: You might see an immediate “glow” or plumpness. Be aware that this is often residual swelling (edema) rather than new collagen.
The Care Plan: Hours 24 to 48
Your routine shifts slightly now from pure protection to active barrier support.
Cleansing and Moisturizing
Continue using a gentle, non-foaming cleanser with lukewarm water. Hydration is your primary job right now. Since your barrier is leaky, moisture escapes rapidly. Apply your hyaluronic acid serum or prescribed post-procedure balm 4 to 6 times a day. If your skin feels tight, it is asking for moisture.
Sun Protection
This is the biggest change from the first day. You must apply sunscreen if you are near a window or going outside. Use a 100% mineral sunscreen (Zinc Oxide or Titanium Dioxide) with a minimum SPF of 30. Chemical sunscreens convert UV rays into heat, which exacerbates inflammation.
Reintroducing “Normal” Life
Makeup
You can technically wear makeup after 24 hours, but only if absolutely necessary. Stick to mineral powder foundations. If you have any pinpoint bleeding or open areas, wait another 24 hours.
Exercise
You can resume light exercise after 48 hours if the redness has significantly faded, you feel no stinging, and swelling has resolved. Avoid saunas, hot yoga, or swimming pools for at least 72 hours to 5 days.
Skincare Actives Timeline
Do not rush back to your anti-aging products. Your skin absorbs products much deeper right now, which can turn a helpful serum into a chemical burn.
| Product Type | Wait Time | Reason |
|---|---|---|
| Vitamin C | 3-5 Days | Low pH can cause stinging and granulomas. |
| Retinoids (Retin-A, Retinol) | 5-7 Days | Increases cell turnover too aggressively on healing skin. |
| Exfoliating Acids (AHA/BHA) | 5-7 Days | Can destroy the new barrier forming. |
Warning Signs and Complications
Most side effects are mild, but you must be vigilant. If you notice these signs, do not wait for your follow-up appointment.
Infection Indicators
Infections are rare but usually appear within the first 48 hours. Look for:
- Worsening Redness: If the redness spreads or gets brighter after day 2.
- Heat: The skin feels hot to the touch relative to the rest of your body.
- Purulent Drainage: Yellow or green fluid. (Clear fluid is usually normal serum).
- Lymphangitic Streaking: Red lines trailing away from the treated area. This is a medical emergency.
- Fever: A temperature over 100.4°F.
Immediate First Aid
If you suspect a reaction or infection:
1. Stop all products. Wash the area gently with cool water.
2. Do not apply anti-itch creams or over-the-counter antibiotic ointments (like Neosporin) without instruction, as these are common allergens.
3. Contact your provider immediately. If you have streaking redness or fever and cannot reach your clinic, go to urgent care.
Adjunctive Treatments and Follow-Up
PRP (Platelet-Rich Plasma): If you had PRP, do not wash it off until the next morning to maximize absorption.
LED Light Therapy: Red light therapy is safe and beneficial 24 hours post-treatment to reduce inflammation. Avoid blue light immediately after if your skin is very dry.
Documentation: Take a photo of your skin every morning for the first 5 days to track the reduction in redness.
Frequently Asked Questions
What if I have a cold sore or active acne?
If you have a history of cold sores, you should have started an antiviral medication before the treatment. Microneedling can trigger a flare-up. If you feel a cold sore coming on in the first 48 hours, call your provider immediately for a prescription. Do not treat over it.
For active acne, you should not microneedle directly over pustules or cysts. This spreads bacteria across the face. If you develop a whitehead in the first 48 hours, leave it alone. Do not pick or pop it.
Can I combine microneedling with Botox or fillers?
You generally cannot do these on the exact same day in the same area without specific clinical protocols.
* Botox: Wait 14 days between microneedling and Botox. Microneedling right after Botox risks spreading the toxin; microneedling before causes swelling that obscures the injection sites.
* Fillers: Wait 28 days after getting fillers before microneedling that area. The pressure can displace the filler, and there is a risk of delayed inflammatory nodules.
Is microneedling safe during pregnancy or while breastfeeding?
Microneedling is not recommended during pregnancy due to a lack of safety data and hormonal skin sensitivity. Breastfeeding is generally considered safe, but you must be careful about the topical anesthetics used. Inform your provider if you are nursing so they can choose safe numbing products.
What should I do if I am on blood thinners or supplements?
Blood thinners (prescription or supplements like fish oil, Vitamin E, Ginkgo Biloba) increase the risk of bruising and pinpoint bleeding. If you are on prescription blood thinners, do not stop them without your doctor’s permission; simply expect more bruising. If you take optional supplements, it is best to stop them 7 days before treatment and wait 48 hours after treatment to resume.
How soon will I see results and how many sessions are typical?
You will see an immediate “glow” once the redness fades after 2 or 3 days due to swelling and exfoliation. Real collagen production takes 4 to 6 weeks. Most patients need a series of 3 to 6 sessions spaced 4 to 6 weeks apart to see significant changes in acne scars or deep wrinkles.
Guidance on Other Cosmetic Treatments
Mixing treatments too closely can damage the skin barrier or cause hyperpigmentation.
| Treatment Type | Wait Time | Reason for Delay |
|---|---|---|
| Chemical Peels | 2 weeks | Peels exfoliate the top layer. Microneedling penetrates it. Doing both too close together destroys the barrier and causes burns. |
| Laser Facials | 4-6 weeks | Lasers generate heat. Your skin needs to fully heal from the physical trauma of needling before handling thermal trauma. |
| Body Sculpting | 2 weeks | If treating the same area, wait until inflammation subsides. |
| Dermaplaning | 1-2 weeks | Scraping the skin right after needling is too aggressive. Let the flaking finish naturally first. |
Key Takeaways: Action Checklist
The success of your treatment relies heavily on how you handle these first two days. You do not need a complicated routine right now; you need protection and hydration.
Immediate Actions (0 to 6 Hours)
* **Do not touch your face.** Your hands carry bacteria.
* **Skip the wash.** Do not wash your face yet.
* **Manage the heat.** Use a clean, dry cold compress if needed. No direct ice.
* **Avoid makeup completely.**
* **Stay indoors.** Avoid direct sunlight entirely.
The First Evening and Morning (6 to 24 Hours)
* **First cleanse.** Wash after 6–8 hours (or next morning) with cool water and hands only.
* **Hydrate.** Apply high-quality hyaluronic acid serum.
* **Sleep elevated.** Prop your head on two pillows to reduce morning puffiness.
* **Change your pillowcase.**
The Critical Healing Phase (24 to 48 Hours)
* **Start Sun Protection.** Apply mineral-based sunscreen (SPF 30+) if near windows or outside.
* **Cleanse gently.** Use a mild, non-foaming cleanser.
* **Keep hydrating.** Apply HA serum whenever skin feels tight.
* **No sweating.** Avoid the gym, saunas, or hot showers.
* **Monitor for infection.** Watch for yellow discharge, increasing heat, or spreading redness.
Beyond 48 Hours
* **Makeup:** Mineral makeup is safe after 48 hours.
* **Actives:** Wait 3–5 days for Vitamin C and 5–7 days for Retinoids/Acids.
* **Exercise:** Resume light workouts after 3 days if redness has subsided.
Healing is a passive process. You have done the hard work by getting the treatment. Now you must have patience and let your body initiate the repair process without interference.
Sources
- 48 Hours After Microneedling: A Recovery Guide | MDPen Skincare
- What to Expect After Microneedling: Day-by-Day Recovery Guide
- The First 48 Hours: Aftercare Guide for Microneedling, Laser & Fillers
- Microneedling After Care & Healing Timeline | Skin Vitality
- What to Expect During and After a Microneedling Session?
- Microneedling Aftercare Tips to Support the Best Results – PCA Skin
- A Complete Guide To PRP Microneedling Recovery – Texas …
- Microneedling Aftercare | King Aesthetics Med Spa New York