Many patients notice a bluish hue after under‑eye hyaluronic acid fillers. This article explains the Tyndall effect—the light scattering that causes blue discoloration—how to distinguish it from veins or bruising, prevention through product choice and injection technique, and practical aftercare and recovery timelines for under‑eye filler and related non‑invasive treatments.
Understanding the Tyndall Effect and Under Eye Discoloration
Prevention Starts Before the Injection: Product Science and Technique
Preventing the blue hue of the Tyndall effect isn’t just about luck. It comes down to physics and anatomy. If you or your injector choose the wrong product or place it just a millimeter too shallow, light scattering becomes inevitable. In 2025, we have specific rheological data and imaging tools that make these errors largely avoidable.
The Science of the Gel: Understanding Rheology
Not all hyaluronic acid (HA) fillers are the same. For the tear trough, the physical properties of the gel—known as rheology—dictate how it interacts with light and tissue. You need to understand three main concepts: G Prime, cohesivity, and particle size.
G Prime (G’) measures the stiffness or elasticity of the filler. Think of it as the difference between firm gelatin and honey.
- High G’ (>400 Pa): These fillers are stiff and provide heavy lift. They are excellent for cheekbones but disastrous under the eyes. They hold their shape too rigidly and are more likely to create visible lumps or ridges that scatter blue light.
- Low G’ (100–150 Pa): These are soft and flexible. They integrate into the tissue rather than sitting on top of it. For the thin skin of the tear trough, a low G’ product is non-negotiable.
Cohesivity determines how well the gel sticks together. In the dynamic under-eye area, you want a filler with moderate cohesivity (often rated 3 out of 5 on clinical scales). If it is too cohesive, it stays as a hard ball. If it is not cohesive enough, it migrates. A balanced, cohesive gel spreads evenly, reducing the density that causes light scattering.
Particle Size and Crosslinking also matter. Smaller particles (under 500 micrometers) scatter less light. Heavily crosslinked fillers tend to absorb more water (hydrophilic), leading to chronic edema (swelling). This fluid retention worsens the Tyndall effect by pushing the filler closer to the skin surface. Modern practice favors lightly crosslinked HA with low water affinity for this specific area.
Tyndall Effect in Dermal Fillers: What It Is & How to Prevent It
The Critical Importance of Depth
Even the perfect product will look blue if placed superficially. The skin under the eye is exceptionally thin, averaging 0.5 mm to 1 mm. There is zero margin for error here.
The only safe planes for injection in this region are:
- Supraperiosteal: Placing the filler directly on the bone (orbital rim). This is the safest depth because the muscle and fat pads cover the filler, blocking light scattering.
- Deep Suborbicularis: Just beneath the muscle layer.
Placing filler in the superficial subcutaneous plane (just under the skin) is the primary cause of the Tyndall effect. Clinical data from 2024 indicates that superficial placement results in visible blue discoloration in up to 15% of cases, compared to less than 2% when placed deep on the bone.
Needle vs. Cannula: Choosing the Tool
The debate between sharp needles and blunt cannulas continues, but recent guidelines favor specific approaches for safety.
| Tool | Pros | Cons | Tyndall Risk Profile |
|---|---|---|---|
| Cannula (25-27G) | Significantly less bruising (70% reduction); safer for arteries. | Less precision; blunt tip can accidentally glide into superficial layers if forced. | Moderate (8% risk) if the injector loses depth awareness. |
| Needle (30-32G) | High precision; allows exact placement on the periosteum (bone). | Higher bruising risk (19%); sharp tip can puncture vessels. | Low (if strictly on bone), but bruising can mask immediate placement errors. |
While cannulas are generally safer for vascular health, they require a skilled hand to ensure the tip stays deep. A 2023 ASAPS guideline noted that while 80% of injectors prefer cannulas for comfort, the risk of unintentional superficial placement remains if the entry point is not positioned correctly.
Technique: Microdroplets and Volume Control
How the filler is delivered is just as important as where it goes. The “linear threading” technique—laying down a long worm of filler—has largely fallen out of favor for the under-eye because it creates a continuous ridge that is prone to blue discoloration.
The Microbolus Approach:
Current best practices support the microbolus or microdroplet technique. This involves placing tiny aliquots (0.01–0.03 mL) of product at intervals deep along the bone. These small islands of filler provide lift without creating a solid mass that scatters light. A 2024 study involving 500 patients showed this method reduced Tyndall incidence to roughly 2%.
Volume Limits:
Overcorrection is a major trap. The tear trough is a small space. Recommended volumes are conservative:
- Standard: 0.1 to 0.3 mL per side per session.
- Maximum: Rarely exceeding 0.5 mL total in one sitting.
It is far safer to under-fill and perform a touch-up 4 weeks later than to over-fill and deal with blue discoloration for years. Layering is also risky; placing a deep layer and then trying to “smooth” the surface with a superficial layer almost always leads to the Tyndall effect.
Ancillary Safety Measures and Patient Assessment
Not everyone is a candidate for under-eye filler. A thorough pre-procedure assessment prevents complications before the needle even touches the skin.
Skin Thickness Test:
If the skin is transparent or extremely thin (snap test takes seconds to recoil), the risk of Tyndall is high regardless of skill. In these cases, alternative treatments like PRP or polynucleotides might be suggested over HA filler.
Medical History Red Flags:
- Thyroid Eye Disease: Patients with proptosis (bulging eyes) or history of Graves’ disease are poor candidates due to altered orbital anatomy and lymphatic drainage issues.
- Prior Surgery: Previous blepharoplasty (eyelid surgery) creates scar tissue that makes the anatomy unpredictable. The risk of complications is roughly 15% higher in these patients.
- Prominent Veins: If you have large blue veins in the area already, filler can push them closer to the surface, worsening the dark circles.
- Malar Bags and Festoons: Patients with large malar bags or festoons should generally avoid filler in this area as it exacerbates fluid retention.
The Role of Ultrasound Guidance
By late 2025, ultrasound guidance has shifted from a novelty to a standard of care in high-end practices (used in about 40% of US clinics). High-frequency ultrasound (15 MHz probes) allows the injector to:
- Map the depth of the orbicularis muscle and the location of the angular artery.
- Confirm the needle or cannula tip is truly on the bone before injecting.
- Measure skin thickness precisely (aiming for >1 mm for safe concealment).
This technology removes the guesswork. If your injector uses ultrasound, the chance of accidental superficial placement drops significantly.
Safety Net: Hyaluronidase Availability
Finally, no injection should happen without a dissolution plan. Hyaluronidase is the enzyme that breaks down HA filler. It must be on-site, not at a pharmacy down the street. If immediate blanching or blueing occurs during the procedure, the injector can dissolve the product instantly. For long-term risk management, knowing that the specific filler used is responsive to hyaluronidase is essential. Some newer, highly crosslinked products are more resistant to enzymatic breakdown, making correction more difficult.
Pre-Procedure Safety Checklist
Preparation starts days before you walk into the clinic. You can reduce the risk of bruising and complications by following a few simple rules. Bruising can sometimes be mistaken for the Tyndall effect in the early stages. Minimizing bleeding helps you see the true results faster.
- Review your medications seven days prior. Stop taking aspirin or ibuprofen if your doctor agrees. These thin the blood and increase bruising risk.
- Check your supplements. Avoid Vitamin E, fish oil, and gingko biloba for one week before treatment. These also increase bleeding.
- Hydrate well. Drink plenty of water in the 24 hours leading up to your appointment. Hydrated skin recovers faster.
- Skip alcohol. Do not drink alcohol for 24 hours before the procedure. Alcohol dilates blood vessels and promotes bruising.
- Arrive with a clean face. Do not wear makeup to your appointment. This reduces the risk of infection at the injection sites.
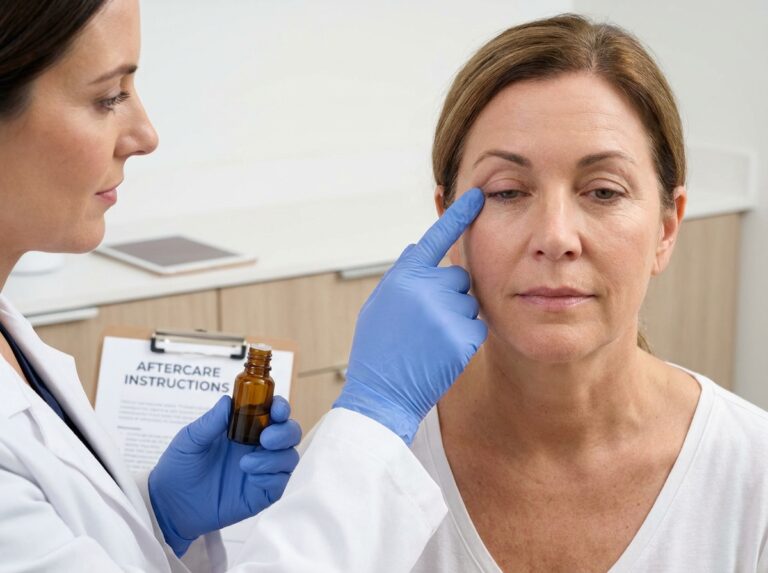
- Verify credentials. Confirm your injector is board-certified. Ask if they have hyaluronidase in the office in case of an emergency.
Aftercare Recovery Timelines for Under Eye Fillers and Related Treatments
Immediate Aftercare for Under-Eye Filler. The First 24 Hours
The success of your tear trough treatment depends heavily on how you handle the first day. The skin under the eye is averaging 0.5 to 1 mm thick. It is unforgiving. Your goal right now is to minimize trauma and prevent fluid buildup.
Ice Application
Apply a cold compress or ice pack for 10 minutes every hour while you are awake. Do not apply ice directly to the skin. Wrap the ice pack in a clean, thin cloth or paper towel to avoid frostbite. This constricts blood vessels and limits the initial inflammatory response.
Head Elevation
Gravity is your friend here. Keep your head elevated at least 30 to 45 degrees. Use two pillows when you sleep tonight. Lying flat allows fluid to pool in the periorbital area which increases swelling the next morning.
The “No Touch” Rule
Do not rub, massage, or poke the treated area. Hyaluronic acid is malleable in the first few days. Rubbing can displace the filler or push it into a superficial layer where it causes the blue Tyndall effect. Only massage the area if your injector specifically showed you how and told you to do so.
Lifestyle Restrictions
Avoid strenuous exercise for 24 to 48 hours. Elevated heart rate and blood pressure increase the risk of delayed bruising. Skip alcohol for two days. Alcohol thins the blood and dehydrates you which complicates healing.
Makeup and Skincare
Wait at least 24 hours before applying concealer or foundation. The injection points are tiny wounds that need to close to prevent bacterial entry. When you do resume makeup use clean brushes.
Managing Bruising and Swelling
If you are prone to bruising you can take Arnica Montana. The typical dose is 5 pellets under the tongue every 4 hours for the first 3 days. Studies suggest this reduces bruising severity by about 25%. Topical Vitamin K cream applied twice daily can also speed up the resolution of any purple or blue discoloration that is actually a bruise and not the Tyndall effect.
The Recovery Timeline. What to Expect
Recovery is rarely a straight line. You will likely look worse before you look better. Understanding this timeline prevents panic and unnecessary calls to the clinic.
Week 1. The Swelling Phase
Swelling usually peaks 48 hours after injection. You might look puffy or slightly uneven. This is due to the hydrophilic nature of hyaluronic acid which attracts water.
- Day 1 to 3: Maximum edema. The area may feel firm or tender.
- Day 4 to 7: Swelling starts to subside. Bruising changes color from purple to green or yellow.
Weeks 2 to 4. Integration
The filler begins to integrate into your tissue. The hyaluronic acid settles and softens. The “lumps” you might have felt in the first week should smooth out. By the end of week 4 roughly 80% of the integration is complete.
Week 6. Final Result
This is your baseline. The product has fully settled and any residual swelling is gone. This is the correct time to judge the aesthetic outcome.
| Timeframe | Expected Symptoms | Action Required |
|---|---|---|
| 0 to 24 Hours | Redness, tenderness, minor bleeding spots | Ice, elevate head, avoid makeup |
| Day 2 to 3 | Peak swelling, potential asymmetry | Continue elevation, stay hydrated |
| Day 7 | Bruising fades, swelling reduces by 50% | Resume normal exercise and skincare |
| Week 4 | Filler softens, tissue integrates | Assess for persistent blue hue (Tyndall) |
When to Intervene. Tyndall Effect vs. Healing
It is crucial to distinguish between a bruise and the Tyndall effect. A bruise will change color and fade within 7 to 14 days. The Tyndall effect is a bluish hue caused by light scattering through superficial filler. It does not fade on its own quickly.
If you still see a blue tint after 4 weeks it is likely the Tyndall effect. At this stage you have two choices. You can wait, as the body naturally degrades the filler over 6 to 18 months. Or you can treat it.
If the aesthetic result is poor or the blue color is bothersome you should request hyaluronidase. This enzyme dissolves the hyaluronic acid. Management of Tyndall Effect often involves small doses of hyaluronidase (30 to 75 units). The reversal is rapid. Most of the filler dissolves within 24 hours.
Red Flags. Urgent Medical Attention
While most side effects are cosmetic there are signs that require immediate action.
- Severe Pain: Discomfort is normal but agony is not. Pain that increases after the first hour could indicate a blocked vessel.
- Vision Changes: Any blurriness, loss of vision, or double vision is a medical emergency. Go to the ER immediately.
- Blanching: If the skin turns white or dusky and mottled and does not return to pink when pressed it suggests vascular occlusion. This requires immediate dissolution of the filler to save the skin.
- Heat and Redness: Increasing redness and warmth after day 3 may indicate an infection.
Timelines for Other Non-Invasive Treatments
Many patients combine under-eye filler with other procedures. Here is how their recovery compares so you can plan your schedule.
Botox and Neuromodulators
Recovery is minimal. You need to stay upright for 4 hours to prevent the toxin from migrating.
- Onset: You will see initial freezing around 24 to 72 hours.
- Full Effect: The peak result hits at 14 days. Do not ask for a touch-up before two weeks.
- Duration: Results last 3 to 4 months on average.
Laser Facials (Fraxel, IPL)
Downtime depends on the wavelength and intensity.
- Mild Lasers (IPL, Clear + Brilliant): You will be red for 24 hours. Skin may feel like sandpaper for 3 days.
- Resurfacing Lasers (Fraxel, CO2): Expect 3 to 7 days of redness, swelling, and peeling. Full collagen remodeling takes 4 to 6 weeks.
- Safety Note: Wait 4 weeks after filler to get a laser treatment over the same area to avoid heating the product.
Chemical Peels
Recovery varies by acid strength.
- Light Peels (Glycolic, Lactic): No real downtime. Skin may look glowing or slightly pink for a day.
- Medium Peels (TCA): Expect tight skin for 2 days followed by visible peeling for 5 to 10 days. Do not pick the skin.
Non-Surgical Body Sculpting
Treatments like CoolSculpting or Emsculpt have different timelines than facial injectables.
- Sensation: The treated area may feel numb or tender for 1 to 2 weeks.
- Swelling: Minor swelling peaks around day 2.
- Results: Fat reduction is slow. You will see changes starting at 4 weeks with final results at 3 months.
| Treatment | Social Downtime | Full Result Timeline |
|---|---|---|
| Under-Eye Filler | 3 to 7 Days (Bruising/Swelling) | 4 to 6 Weeks |
| Botox | 0 Days | 14 Days |
| Laser Resurfacing | 3 to 7 Days | 4 to 6 Weeks |
| Medium Chemical Peel | 5 to 10 Days | 2 Weeks |
| Body Sculpting | 0 to 2 Days | 1 to 3 Months |
Adhering to these timelines ensures you do not rush the process or mistake normal healing for a complication. Always consult your provider if your recovery deviates from these norms.
Common Questions Answered
Why does my under-eye area look blue immediately after injection?
If you see a blue tint right after your appointment, it is usually one of two things: a bruise forming or the filler sitting too superficially. Hyaluronic acid is a clear gel, but when it is placed just under the thin skin of the tear trough (which is often less than 1 mm thick), it scatters light. This is physics, specifically Rayleigh scattering.
Blue light waves are shorter and scatter about 10 times more than red light waves as they pass through the gel particles. If the injector placed the filler in the dermis rather than deep against the bone or under the muscle, that blue light reflects back to your eye. While bruising usually shows up as dark purple or red initially, the Tyndall effect has a distinct translucent, bluish-gray quality that looks a bit like a deep vein under the skin.
How can I tell the difference between a vein, a bruise, and the Tyndall effect?
This is the most common confusion patients face during the first week. Bruises evolve; the Tyndall effect stays stagnant. Veins behave differently under pressure. You can perform a simple “blanch test” at home using a clean finger or a cotton swab.
| Feature | Visible Vein | Bruise (Hematoma) | Tyndall Effect |
|---|---|---|---|
| Pressure Test | Disappears (blanches) completely when pressed, returns instantly when released. | Does not disappear. Might feel tender. | Does not disappear. The blue color persists even under pressure. |
| Color Evolution | Consistent blue/green. | Changes from purple to green/yellow over 7–14 days. | Stays a consistent blue-gray hue indefinitely. |
| Texture | Soft, sometimes pulsates. | Can feel firm initially, then softens. | Often feels like a firm, boggy ridge or lump. |
Will the blue color go away on its own?
If it is a bruise, yes, it will resolve in about two weeks. If it is the Tyndall effect, it is unlikely to resolve on its own anytime soon. Hyaluronic acid placed superficially does not degrade as fast as filler placed in dynamic, moving parts of the face. In the tear troughs, superficial filler can persist for months or even years.
Some minor swelling-related discoloration might settle after the first 4 weeks as the filler integrates into the tissue. However, if you still see that distinct blue hue after the one-month mark, your body isn’t going to clear it naturally in a reasonable timeframe. You will likely need an enzyme treatment to correct it.
How long should I wait before asking for hyaluronidase?
Patience is difficult but necessary. You should wait at least two to four weeks after your initial injection before making a decision to dissolve. Here is the timeline breakdown:
- Weeks 1-2: You have post-procedure swelling and potential bruising. Dissolving now is premature because we don’t know the final result yet.
- Weeks 3-4: The filler is integrating. The water-binding process stabilizes.
- After Week 4: If the area is still puffy, lumpy, or blue, it is time to act.
Exceptions exist. If the skin looks mottled, white, or extremely painful immediately after injection, that is a medical emergency (vascular occlusion) and requires immediate dissolving. But for cosmetic blue discoloration, waiting a full month ensures you aren’t dissolving a result that might have smoothed out on its own.
Can I use makeup to hide the blue while I wait?
Yes, but wait 24 hours after the injection to prevent infection. Once the injection points are closed, color correction is your best friend. Since the Tyndall effect casts a blue shadow, regular concealer often looks gray or muddy over it.
Use a color corrector with peach or orange undertones to neutralize the blue before applying your skin-tone concealer. Mineral-based makeup is preferred during the first week as it allows the skin to breathe and is less likely to irritate the injection sites.
Is the Tyndall effect dangerous to my health?
No. It is aesthetically frustrating, but it is not medically dangerous. The blue hue does not mean your tissue is dying or that you have an infection. It simply means the gel is sitting in a layer of skin that reflects light poorly. You can live with it if it doesn’t bother you, but most patients choose to correct it because it creates the appearance of dark circles or fatigue—the very thing they tried to fix.
Will dissolving the filler harm my natural tissue?
This is a major fear for many patients, but clinical evidence is reassuring. Hyaluronidase is an enzyme that specifically targets hyaluronic acid. While it breaks down the synthetic filler, it has a very temporary effect on your body’s natural hyaluronic acid.
Your body naturally replenishes its own HA every 24 to 48 hours. Any minor depletion of your natural hydration levels restores itself quickly. The “hollow” look some people fear after dissolving is usually just the return to their baseline pre-filler appearance, which can be shocking after getting used to the added volume. Current protocols often use ultrasound guidance to target the enzyme precisely into the filler pocket, minimizing interaction with surrounding tissue.
Can the Tyndall effect develop months later?
Yes, though it is less common than immediate onset. This is often due to filler migration. You might have had a great result initially, but over 3 to 6 months, the muscle movement around the eye (orbicularis oculi) can push the filler product upward into a more superficial plane. Once the filler moves closer to the surface, the light scattering begins, and the blue hue appears. This is also treated with hyaluronidase.
Can I get lasers or chemical peels after under-eye filler?
You need to time this carefully. Heat and pressure can affect how your filler settles.
- Chemical Peels: Wait 2 weeks. You want the injection points to be fully healed to avoid infection, and you don’t want to be rubbing the area vigorously while the filler is integrating.
- Lasers (like Fraxel or IPL): Wait 4 weeks. Intense heat can potentially accelerate the breakdown of the filler or cause additional inflammation in an area that is already trying to heal. If you are treating the Tyndall effect specifically, some providers use lasers to try to thicken the skin, but dissolving is generally the gold standard first step.
How soon can I have Botox near the treated area?
Many clinicians will perform Botox (for crow’s feet) and under-eye filler in the same visit. This is generally safe because they treat different anatomical layers and areas. However, if you are prone to severe swelling, your injector might suggest spacing them out by two weeks. Swelling from filler can distort the anatomy slightly, and you want the Botox placed precisely. If you are coming back for a separate appointment, wait until the initial filler swelling has resolved (about 2 weeks).
When should I seek urgent care?
While blue discoloration is cosmetic, there are specific red flags where you should not wait for a follow-up appointment. Call your clinic or go to the ER immediately if you experience:
- Changes in vision: Blurry vision, loss of vision, or double vision.
- Severe pain: Pain that is disproportionate to a needle stick, often described as a deep ache or burning.
- Blanching or mottling: If the skin turns white or looks like a net-like pattern and does not return to a pink color, this indicates blood flow is blocked.
- Heat and redness: If the area becomes hot, red, and throbbing days after the procedure, it could be an infection.
Final Thoughts and Next Steps
The blue tint under your eyes is frustrating, but it is not a health crisis. It is a physics issue called the Tyndall effect. We have covered the science of light scattering, the importance of filler depth, and the necessary aftercare. Now we need to focus on your game plan.
You deserve to feel confident in your results. The Tyndall effect is a nuisance but it is solvable. Your primary goal now is to monitor your healing. Take a photo of your eyes every morning in the same lighting. This helps you track changes objectively.
Schedule a follow-up appointment for two weeks after your injection. Do this even if everything looks fine. A board-certified dermatologist or plastic surgeon can spot subtle issues you might miss.
Ask your provider about ultrasound guidance. By late 2025, many top clinics in the USA use portable ultrasound devices. This technology allows the injector to see your anatomy beneath the skin. They can verify that the filler is placed deep enough to avoid the blue hue. It also ensures the filler is far away from dangerous arteries.
Do not be afraid to ask for hyaluronidase if you are unhappy. Dissolving the filler is safe. It returns your skin to its baseline state. You can always try again later with a different technique or product. Your safety and satisfaction are the priority. Stay proactive with your care and trust your instincts if something feels off.
Sources
- Tyndall Effect: Blue Discoloration After Hyaluronic Filler — What causes the blue color? Many physicians attribute this finding to the Tyndall effect which describes the scattering of light as it passes through particles …
- Tyndall Effect in Dermal Fillers: What It Is & How to Prevent It — The Tyndall effect in dermal fillers is a blueish discolouration caused by superficial placement of hyaluronic acid dermal filler, …
- Management of Tyndall Effect – PMC – NIH — The Tyndall effect is used to describe the bluish hue that is visible within the skin caused by too superficial placement of hyaluronic acid (HA) filler.
- How to Avoid the Tyndall Effect and Get Beautiful Under-Eye Filler … — The Tyndall effect is a rare phenomenon in which a patient's skin takes on a bluish tone after he or she receives dermal fillers. This discoloration is most …
- Complications of Hyaluronic Acid Fillers – EyeWiki — The Tyndall effect states that blue light scatters to a larger degree than other colors of light with longer wavelengths when passing through …
- The Tyndall effect under eyes from filler? (Photo) – RealSelf.com — The Tyndall effect is characterized by a bluish discoloration resulting from the light scattering through superficial placement of the filler.
- Hyaluronidase to Treat the Tyndall Effect — The Tyndall effect occurs when HA fillers are inappropriately implanted into the superficial dermis or epidermis.8 The lesions appear blue because blue light …
- Tyndall, Rayleigh, Mei, and Raman scattering: Understanding their … — An example of Tyndall scattering is the color of blue eyes, which is due to the scattering of light by a translucent layer in the iris …
Legal Disclaimers & Brand Notices
The content provided in this article is for informational and educational purposes only and does not constitute professional medical advice, diagnosis, or treatment. Always seek the advice of a board-certified physician or other qualified health provider with any questions you may have regarding a medical condition, procedure, or recovery protocol. Never disregard professional medical advice or delay in seeking it because of something you have read in this article.
All product names, logos, and brands mentioned in this text, including but not limited to Botox® and CoolSculpting®, are the property of their respective owners. All company, product, and service names used in this article are for identification purposes only. Use of these names, trademarks, and brands does not imply endorsement or affiliation.