CO2 laser resurfacing produces dramatic skin renewal but also demands careful early care. This survival guide walks you through the critical first seven days after an ablative CO2 treatment: what’s normal, exactly what to do each day, red flags to watch for, and how this recovery compares to Botox, fillers, chemical peels, and other non‑surgical procedures.
How CO2 Laser Resurfacing Works and What to Expect
CO2 laser resurfacing is not a lunchtime facial. It is a controlled medical procedure that vaporizes skin cells to force regeneration. Understanding exactly what happens to your tissue helps you manage the intense physical response you will see in the mirror.
The Mechanism of Action
The CO2 laser emits light at a 10,600 nm wavelength. Water molecules within your skin cells absorb this energy instantly. The absorption generates intense heat and vaporizes the targeted tissue. This process is called ablation. The laser removes the epidermis and heats the underlying dermis. This thermal injury triggers a wound-healing cascade. Your body rushes to repair the damage by producing new collagen and elastin.
We categorize treatments into two main types based on how the beam is delivered.
Full-Field Ablative CO2
This is the traditional method. The laser removes 100% of the epidermis in the treated area. It creates a raw, open wound across the entire surface. The results for deep wrinkles and severe sun damage are dramatic. The recovery is equally intense. You will have significant weeping and a longer path to re-epithelialization.
Fractional CO2
Most modern treatments use this method. The laser beam is broken into thousands of tiny shafts of light. These shafts create microthermal zones or microscopic columns of injury deep into the skin. Bridges of healthy, untreated skin remain between these columns. These bridges act as a reservoir for healing cells. They allow the skin to close the wounds much faster than full-field ablation.
Clinical Goals and Tissue Response
You choose this laser for structural changes rather than temporary plumping. The heat causes immediate collagen contraction. This tightens the skin right away. The secondary healing phase stimulates long-term collagen synthesis. This targets static wrinkles, acne scars, and uneven texture.
The tissue response follows a predictable biological timeline.
Immediate Erythema and Edema
You will look red and swollen immediately after the procedure. The heat trapped in the skin causes inflammation. This is a necessary signal for your body to send repair cells to the area.
Serous Exudate
Your skin will weep a clear or yellowish fluid called serous exudate for the first 24 to 48 hours. This is plasma leaking from the open micro-wounds. It is a normal part of the inflammatory phase. This fluid dries to form a crust.
Crusting and Bronzing
As the treated epidermal debris dries out, your skin takes on a rough, bronze texture. It looks like sandpaper. These are the dead cells protecting the new skin forming underneath.
Re-epithelialization
New skin cells migrate from the hair follicles and the edges of the wound to cover the raw area. Re-epithelialization typically occurs 6 to 7 days after treatment. Once this layer is complete, the risk of infection drops significantly.
Recovery Timeline vs. Non-Invasive Procedures
Recovery from CO2 laser is distinct from injectables or superficial peels. Botox and fillers involve needle pricks with zero downtime. Chemical peels may cause flaking but rarely leave open wounds. CO2 laser creates a controlled burn that requires wound care.
The Downtime Reality
Most patients need 7 to 14 days before their skin is healed enough to be considered socially presentable. You might feel ready for video calls by day 5, but redness often persists. The pink hue indicates ongoing remodeling and can last for weeks or months.
| Procedure | Mechanism | Typical Downtime | Skin Barrier Status |
|---|---|---|---|
| Botox/Dysport | Neuromodulation | 0 days | Intact |
| Dermal Fillers | Volume addition | 0-2 days (swelling) | Intact |
| Light Chemical Peel | Chemical exfoliation | 1-3 days | Intact or slight flake |
| Fractional CO2 | Thermal ablation | 5-7 days | Compromised |
| Full Ablative CO2 | Full ablation | 10-14+ days | Removed |
Risk Factors and Skin Types
Your Fitzpatrick skin type determines your risk profile. The Fitzpatrick scale classifies skin from Type I (very fair, always burns) to Type VI (very dark, never burns).
Fitzpatrick I-III
Lighter skin types generally tolerate CO2 resurfacing well. The main risks are prolonged redness and infection. Scarring is possible if the laser settings are too aggressive or if infection occurs.
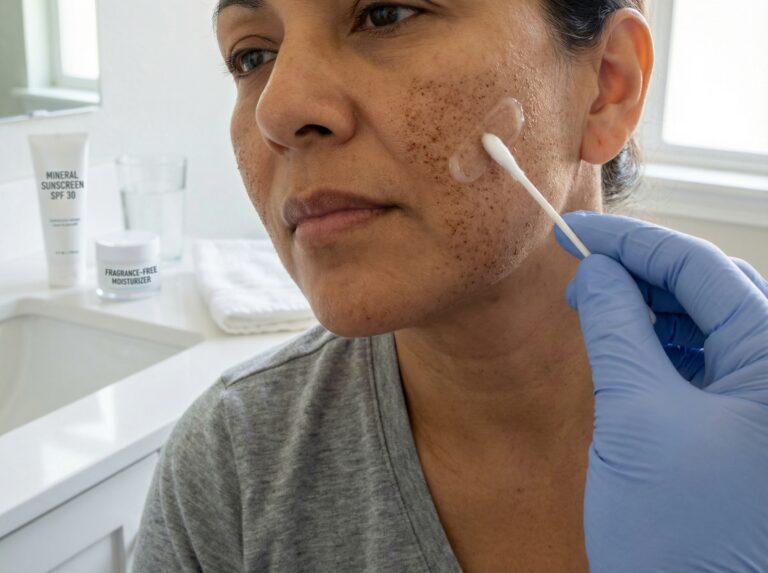
Fitzpatrick IV-VI
Darker skin types have a higher concentration of melanin. Melanin absorbs laser energy. This creates a higher risk of thermal injury outside the target zone. The most common complication is Post-Inflammatory Hyperpigmentation (PIH). This manifests as dark brown patches that appear after the initial healing. Strict pre-treatment preparation and sun avoidance are non-negotiable for these skin types.
Why Early Aftercare Matters
The first 7 days determine your safety and your aesthetic outcome. The goal during this week is not to look good. The goal is to keep the wound moist and clean.
Allowing the skin to dry out leads to thick scabs. Scabs can cause scarring. Keeping the area occluded with ointment speeds up re-epithelialization by up to 50%. Preventing infection is equally critical. A bacterial or viral infection during the first week can turn a cosmetic procedure into a medical emergency. It can deepen the wound and cause permanent scarring.
Full results from CO2 laser skin resurfacing usually appear within three to six months. The collagen remodeling continues long after the surface has healed. Your adherence to the aftercare protocol in the first week sets the foundation for these long-term gains.
You must prepare your environment and your skin before the laser ever touches your face. The next section outlines the specific steps you need to take in the days leading up to your appointment.
Pre Procedure Checklist and Risk Reduction Strategies
Preparation is the single biggest variable you can control in CO2 laser resurfacing. While the laser does the heavy lifting, the state of your skin before the beam hits it dictates how safely you heal. You cannot simply walk into this appointment like a standard facial. This is a controlled trauma to the skin, and your body needs to be primed to respond correctly.
If you skip these steps, you risk complications like hyperpigmentation, prolonged redness, or infection. The weeks leading up to your appointment are about reducing inflammation and removing any barriers to rapid healing.
Medical History and Medication Review
Your provider needs a complete picture of your health. This is not the time to withhold information about supplements or casual prescriptions. Certain compounds thin the blood or alter how your skin reacts to light.
Isotretinoin (Accutane) Timeline
This is the most critical screening question. If you have taken isotretinoin in the past 6 to 12 months, you are likely not a candidate for CO2 resurfacing yet. Isotretinoin suppresses the sebaceous glands, which are essential for re-epithelialization (skin regrowth) after the laser removes the top layers. Treating too soon can lead to delayed healing and severe scarring.
Blood Thinners and Supplements
Bleeding and bruising can complicate the procedure and recovery. You will typically need to stop taking aspirin, ibuprofen, naproxen, and other NSAIDs at least 10 days before treatment. This restriction often extends to supplements like Vitamin E, fish oil, gingko biloba, and ginseng. Discuss pain management alternatives, such as acetaminophen, with your doctor for the pre-procedure period.
Photosensitizing Medications
Some antibiotics (like doxycycline or tetracycline) and diuretics make your skin hypersensitive to light. Review your current prescriptions with your laser specialist to determine if you need to pause them.
Skincare Adjustments and Pigmentation Control
Your home routine must change roughly two to four weeks before your date. The goal is to calm the melanocytes (pigment-producing cells) and remove potential irritants.
Stop Active Exfoliants
Discontinue the use of topical retinoids (tretinoin, retinol, retinaldehyde), alpha-hydroxy acids (glycolic, lactic), and beta-hydroxy acids (salicylic) 7 to 14 days prior. These products thin the stratum corneum. While that is usually good for glow, laser resurfacing requires a stable epidermal barrier to predict the depth of penetration accurately.
Pigmentation Prevention (Pre-Treatment Bleaching)
Patients with Fitzpatrick skin types III through VI are at higher risk for Post-Inflammatory Hyperpigmentation (PIH). The heat from the laser can trigger melanin production as a defense mechanism. To counter this, providers often prescribe a tyrosinase inhibitor, such as hydroquinone (4%), to be used for 2 to 4 weeks before the procedure. This suppresses the pigment cells so they do not overreact to the thermal injury.
Strict Sun Protection
You cannot have a tan. A tan indicates active melanin. Laser energy targets water in the skin, but melanin also absorbs energy. If you are tanned, the laser may burn the surface rather than penetrating to the deeper dermis, causing blisters or permanent white spots. Use a broad-spectrum mineral sunscreen (SPF 50+) and physical hats for at least 4 weeks prior.
Antiviral Prophylaxis
Cold sores are a major concern with full-field or aggressive fractional CO2 resurfacing. The intense heat and stress on the skin can reactivate the Herpes Simplex Virus (HSV), even if you have not had an outbreak in years.
Who Needs It
Anyone with a history of cold sores or fever blisters must take antiviral medication. Many providers now prescribe prophylaxis (Valacyclovir or Acyclovir) to all patients regardless of history, as the first outbreak can sometimes be triggered by the laser itself. An outbreak during the raw healing phase can lead to viral scarring, which is difficult to correct.
Dosing Schedule
Typically, you start the medication 24 hours before the procedure and continue for 5 to 10 days post-treatment until the skin has re-epithelialized.
Lifestyle Factors
Smoking Cessation
Nicotine constricts blood vessels and reduces the oxygen supply to healing tissues. This significantly slows down collagen production and increases the risk of skin necrosis or infection. You should stop smoking (including vaping) at least 2 weeks before and 2 weeks after the procedure.
Alcohol Consumption
Alcohol dehydrates the body and increases inflammation. Avoid alcohol for 48 hours before your appointment to ensure your tissues are hydrated and to reduce bleeding risk.
Home Recovery Supply Checklist
You will not want to leave your house for the first few days. The “social downtime” for CO2 laser is real. Stocking your recovery station beforehand is essential for a low-stress week.
| Category | Essential Item | Purpose |
|---|---|---|
| Wound Care | Sterile Saline or Wound Spray | For gentle cleansing without tap water bacteria. |
| Occlusive | Petroleum Jelly (Vaseline/Aquaphor) | Creates a seal to keep the wound moist and prevent scabbing. |
| Dressings | Non-stick gauze pads | To dab oozing areas without pulling off new skin. |
| Cleansing | Ultra-gentle, non-foaming cleanser | Cetaphil or CeraVe (creamy formulas) for days 3-4+. |
| Cooling | Clean washcloths & distilled water | For making cool compresses (vinegar soaks if prescribed). |
| Comfort | Extra pillows | To sleep elevated and reduce facial swelling. |
| Protection | Broad-brimmed hat & Mineral SPF | For the first trip outside after re-epithelialization. |
Prescription Pick-Up
Fill your prescriptions (painkillers, antibiotics, antivirals) three days before your appointment. You do not want to be waiting at a pharmacy with a red, burning face.
Counseling and Expectations
A thorough consultation should cover the psychological aspect of recovery. The first week is visually intense.
Realistic Recovery Expectations
Understand that you will look worse before you look better. Swelling, oozing, and crusting are normal. Recovery times will vary depending on your treatment, but generally, full re-epithelialization takes 6 to 7 days. Redness can persist for weeks or months. Knowing this prevents panic on Day 3 when swelling peaks.
Staged Treatments
If you have deep acne scars or significant rhytids, one session may not be enough. Your provider should clarify if this is a “one and done” aggressive treatment or part of a series of lighter fractional treatments. Managing this expectation helps you plan your downtime and budget.
Emergency Contacts
Before you leave the clinic, ensure you have an after-hours number. You need to know who to call if you experience extreme pain not helped by medication, fever over 100.4°F, or signs of infection like yellow, foul-smelling discharge. Do not rely on general office voicemail during the weekend.
Logistics for Procedure Day
Transportation
Most CO2 procedures involve oral sedation (like Valium) or strong painkillers. You cannot drive yourself home. Arrange for a trusted friend or family member to pick you up. Rideshare services are generally not recommended immediately post-sedation unless you have a companion with you.
Clothing
Wear a button-down shirt or a top with a wide neck. You will have a thick layer of ointment on your face, and pulling a tight t-shirt over your head will be messy and painful.
Daily Survival Plan for Days 0 through 7
The first week after CO2 laser resurfacing is not a spa vacation. It is a medical recovery process that demands patience, discipline, and a strong stomach. You have essentially controlled-burned the top layers of your skin to force regeneration. The mirror will not be your friend this week, but your routine will be.
This guide breaks down exactly what to do from the moment you leave the clinic through the first week.
Day 0: The First 24 Hours (Immediate Aftermath)
The anesthesia is wearing off, and the heat is setting in. Your skin will feel like it has a severe sunburn. This is normal. The goal right now is simple: keep the heat down and the moisture up.
The Drive Home and Evening
Keep a cool air vent directed toward your face (but not blasting directly into your eyes). If your provider applied a bio-occlusive dressing or a thick layer of ointment, leave it alone. Do not touch your face with unwashed hands.
Cooling Strategy
You need to manage the thermal energy trapped in your skin. Use ice packs wrapped in sterile gauze or a clean soft cloth. Apply them for 10–15 minutes every hour. Never put ice directly on the treated skin. The cold helps, but the “sunburn” sensation may persist for 6 to 12 hours.
Ointment Application
Your skin must not dry out. Not even for a minute. If you are not using a dressing, you will likely be instructed to apply a thick layer of petroleum jelly (Vaseline) or a prescribed occlusive balm (like Aquaphor). You should look greasy. If the skin feels tight, you need more ointment.
Sleep Setup
Do not sleep flat. Fluid accumulates where gravity takes it. Prop yourself up on two or three pillows or sleep in a recliner. Cover your pillowcase with an old towel you don’t mind ruining—the ointment and serous fluid (oozing) will stain.
Days 1–2: The Swelling and Weeping Phase
This is usually the most physically uncomfortable period. Most patients feel ready to resume video calls by day five, but right now, you might struggle to open your eyes fully due to edema.
Managing the “Ooze”
Your skin will weep a yellow, clear fluid. This is serous fluid, a sign of healing, not necessarily infection. It will mix with the ointment to create a gooey layer. Do not panic. Gently blot—do not rub—excess fluid with sterile gauze.
The Vinegar Soak Routine (If Prescribed)
Many surgeons recommend acetic acid soaks to prevent yeast and bacterial infections while cleaning the skin.
The Recipe: 1 teaspoon of plain white vinegar in 1 cup of cool distilled water.
The Method: Soak clean gauze in the solution, lay it over the face for 10–15 minutes, then gently wipe away the old ointment and crust. Repeat this 3–4 times a day.
Hygiene and Hair Washing
You can usually wash your hair carefully after 24 hours. Use a handheld showerhead if possible, or wash your hair in the sink to control the water flow. Use baby shampoo to ensure that if any suds run down your forehead, they won’t sting your sensitized skin. Keep the shower stream off your face entirely.
Activity Restrictions
No bending over. Tying your shoes or picking something up off the floor increases blood pressure in the face, leading to throbbing pain and more swelling. Squat down if you must, keeping your head above your heart.
No hot showers. Steam and heat dilate blood vessels, which triggers inflammation. Lukewarm body showers only, keeping the face dry or gently splashed with cool water.
Days 3–5: Crusting and The Itch
The weeping stops, and the skin begins to tighten and darken. You may look “bronzed” or like you have dark brown crusts. This is the dead skin preparing to slough off.
Debridement Rules
You will feel an urge to scrub the rough texture off. Don’t. Prematurely removing crusts causes scarring.
Cleaning: Continue your vinegar soaks or use a gentle, non-detergent cleanser (like Cetaphil or CeraVe) using only your fingertips. Use a circular motion with zero pressure. The water should do the work.
Switching Products
Around day 4 or 5, if the skin is no longer weeping, your doctor might allow you to switch from heavy petroleum jelly to a lighter, but still heavy, moisturizer (like Vanicream). However, if you still have open raw areas, stick to the ointment.
Re-epithelialization Signs
You know healing is happening when the dark crusts flake off naturally, revealing bright pink skin underneath. This new skin is incredibly fragile. Re-epithelialization typically occurs 6 to 7 days after treatment, but this varies by depth.
Days 6–7: Sloughing and Social Re-Entry
By the end of the week, the bulk of the heavy peeling should be done. You are left with fresh, pink, tender skin.
The Makeup Question
You can only apply makeup once the skin is fully closed (re-epithelialized). If it stings when you apply a moisturizer, it is too soon for makeup. If you are healed, use a mineral-based, clean makeup. Avoid old brushes that harbor bacteria.
Sun Protection is Non-Negotiable
Your new skin has zero protection against UV rays. Even 5 minutes near a window can trigger hyperpigmentation. Apply a physical (mineral) sunscreen with Zinc Oxide or Titanium Dioxide, SPF 30+, every morning, even if you stay indoors.
Fractional vs. Full-Field: Adjusting Your Expectations
The intensity of your treatment dictates the speed of this timeline.
| Feature | Fractional CO2 | Full-Field (Ablative) CO2 |
|---|---|---|
| Weeping Duration | 1–2 Days | 3–5 Days |
| Swelling Peak | 24 Hours | 48–72 Hours |
| Social Downtime | 5–7 Days | 10–14 Days |
| Cleaning | Gentle wash usually sufficient | Vinegar soaks often mandatory |
Patient Survival Checklist
- Pre-Made Ice Packs: Have 4–5 gel packs in the freezer so you can rotate them constantly.
- Clean Pillowcases: Change your pillowcase every single night to prevent infection.
- Antihistamines: The itching on days 3–5 can be maddening. Ask your provider if you can take Benadryl or Zyrtec at night.
- Hydration: Drink water. Your skin is pulling moisture from your body to heal.
Sample “Out of Office” Reply
You will not want to be on Zoom. Trust me. Set expectations early.
“I am currently out of the office recovering from a minor medical procedure. I will be checking emails periodically but will not be available for video calls until [Date]. Thank you for your understanding.”
When to Call the Clinic (First Follow-Up)
Your first follow-up is usually scheduled for day 7 or day 10. However, if you notice increasing pain after day 2, yellow/green pus (distinct from clear yellow serum), or cold sores appearing, call immediately. Most patients need 7 to 14 days before their skin is healed enough to be considered “socially presentable.” Do not rush the process.
Managing Pain, Swelling and Early Complications
Managing the physical aftermath of CO2 laser resurfacing requires a balance between patience and vigilance. The first few days often look and feel alarming. Your face may swell significantly, and the sensation of heat can persist. Distinguishing between a normal inflammatory response and a developing complication is the most critical skill you need right now.
Controlling Pain and Inflammation
Pain management is not just about comfort. It keeps your blood pressure stable, which helps minimize bleeding and bruising. Most patients find the discomfort manageable with a strict schedule of over-the-counter medications, but you need to choose the right ones.
Analgesic Strategy
Acetaminophen (Tylenol) is generally the safest baseline medication. It reduces pain without affecting blood clotting. Take it according to the package directions or your surgeon’s specific schedule. Many providers advise against Non-Steroidal Anti-Inflammatory Drugs (NSAIDs) like ibuprofen, aspirin, or naproxen for the first 48 to 72 hours. These medications inhibit platelet function and can increase the risk of pinpoint bleeding or prolonged oozing. If your doctor explicitly approves ibuprofen to help with swelling, follow their dosage strictly. Otherwise, stick to acetaminophen.
Prescription Management
For deep ablative resurfacing, your provider might prescribe a stronger narcotic pain reliever for the first night or two. Take this only if necessary. If you find yourself needing heavy narcotics past day three, that is an outlier. Pain that escalates significantly after the first 48 hours is not typical and warrants a call to the office.
Non-Pharmacologic Measures
Cold compresses are essential during the first 48 hours. Use clean gauze soaked in ice water or a gel pack wrapped in a sterile cloth. Never apply ice directly to bare, treated skin. Apply the cold for 10 to 15 minutes every hour while awake. This constricts blood vessels and numbs the nerve endings.
Sleep Elevation
Gravity is your enemy right now. Fluid accumulates in the loose tissues of the face, particularly around the eyes. Sleep with your head elevated above your heart. Use two or three pillows or sleep in a recliner. This simple mechanical action significantly reduces the “balloon” effect many patients see in the mirror on day two.
Recognizing Infection vs. Normal Healing
The line between normal wound healing and infection blurs with CO2 lasers because the “normal” look is quite messy. The laser creates a controlled thermal injury. Your body responds by rushing fluid and white blood cells to the surface.
Understanding Exudate
You will see a yellow, serous fluid oozing from the skin. This is normal. It dries into a yellow or honey-colored crust. Re-epithelialization typically occurs 6 to 7 days after treatment, and until that happens, this oozing is part of the biological dressing your body creates. It is not pus.
Signs of Bacterial Infection
True infection presents differently. Look for discharge that is thick, opaque, and greenish or creamy white rather than clear yellow. A foul odor that persists even after cleaning is a warning sign. Increased redness that spreads outward from the treated area (cellulitis) or heat that returns after the initial post-procedure fire has died down requires immediate attention. A fever over 101°F is a systemic sign that bacteria may have entered the bloodstream.
Viral Reactivation and Other Risks
Bacterial infection is not the only threat. The trauma of the laser can wake up dormant viruses or cause structural issues if swelling is uncontrolled.
HSV Reactivation
Herpes Simplex Virus (cold sores) is a major concern. The laser energy depletes the skin’s local immune resources, allowing the virus to surge. It often does not look like a typical blister. It may appear as a cluster of tiny, painful erosions or simply an area that hurts much more than the rest. If you feel a specific stinging, burning, or “tingling” sensation different from the general heat, call your doctor. Most providers prescribe prophylactic antivirals (like Valacyclovir) starting before the procedure. Finish the entire course.
Ectropion Risk
Ectropion is a condition where the lower eyelid pulls away from the eye, exposing the inner red conjunctiva. This can happen if aggressive resurfacing near the eye causes the skin to tighten too rapidly or if severe swelling pulls the lid down. While often temporary, it requires management to prevent dry eye damage. If you cannot close your eye completely while sleeping, or if the lower lid looks droopy and red, notify your clinic. They may recommend aggressive lubrication or taping the eye shut at night.
Preventing Hypertrophic Scarring
Scarring often results from picking. The crusts that form are attached to the healing dermis. Pulling them off prematurely tears the delicate new cells underneath. Keep the area moist with your prescribed ointment. Never scrub. If a crust is ready to come off, it will slide away with gentle cleansing. If it resists, leave it alone.
Wound Care Technique to Minimize Trauma
How you touch your face matters as much as what you put on it. Mechanical friction causes inflammation and potential scarring.
The Soak Method
Do not rub the skin. Instead, use the “soak and pat” method. If your doctor recommends vinegar soaks (usually 1 teaspoon of white vinegar in 1 cup of cool water), soak a clean gauze pad in the solution and lay it gently over the face. Let it sit for 10 to 15 minutes. The acidity helps control bacteria and yeast, and the moisture softens the crusts. When you remove the gauze, some debris will come with it naturally.
Application of Ointment
Wash your hands thoroughly before touching your face. Apply your occlusive ointment (Aquaphor, Vaseline, or specific post-laser balm) in a thin layer. You do not need a thick cake of product, just enough to prevent the air from drying out the raw surface. Thick layers can trap heat and bacteria, leading to milia (tiny white cysts) or acne breakouts later.
Decision Tree: When to Call the Clinic
Use this guide to decide if your symptoms are part of the process or a medical priority.
| Symptom | Assessment | Action |
|---|---|---|
| Swelling | Eyes nearly swollen shut on Day 2-3. | Normal. Continue ice and elevation. |
| Pain | Stinging sensation, manageable with Tylenol. | Normal. Stay ahead of the pain dosing. |
| Pain | Deep, throbbing pain that is getting worse, not better. | Red Flag. Call the clinic immediately. |
| Oozing | Clear, pink, or yellow fluid. | Normal. Keep cleaning gently. |
| Discharge | Thick green, white, or gray pus. Foul smell. | Red Flag. Urgent evaluation needed. |
| Skin Color | Dark bronzing or raw red appearance. | Normal. Part of the peeling process. |
| Skin Color | Bright red streaks spreading down the neck. | Red Flag. Possible cellulitis. Call now. |
| Blisters | Cluster of painful spots or erosions. | Red Flag. Possible HSV. Needs antivirals. |
Recovery is a day-by-day process. By Day 7, the risk of acute infection drops significantly as the skin barrier closes. Recovery times will vary depending on your treatment depth, but vigilance in this first week prevents complications that could affect your long-term results.
Transition After Day 7 and Long Term Skin Recovery
You have made it through the hardest part. By day seven, the raw, oozing phase is usually behind you, and you are entering a period that requires patience more than pain management. The skin has likely closed up, a process we call re-epithelialization, which typically happens between days 5 and 7 for fractional treatments and up to day 14 for deeper, fully ablative work. Now the focus shifts from wound care to barrier restoration and redness management.
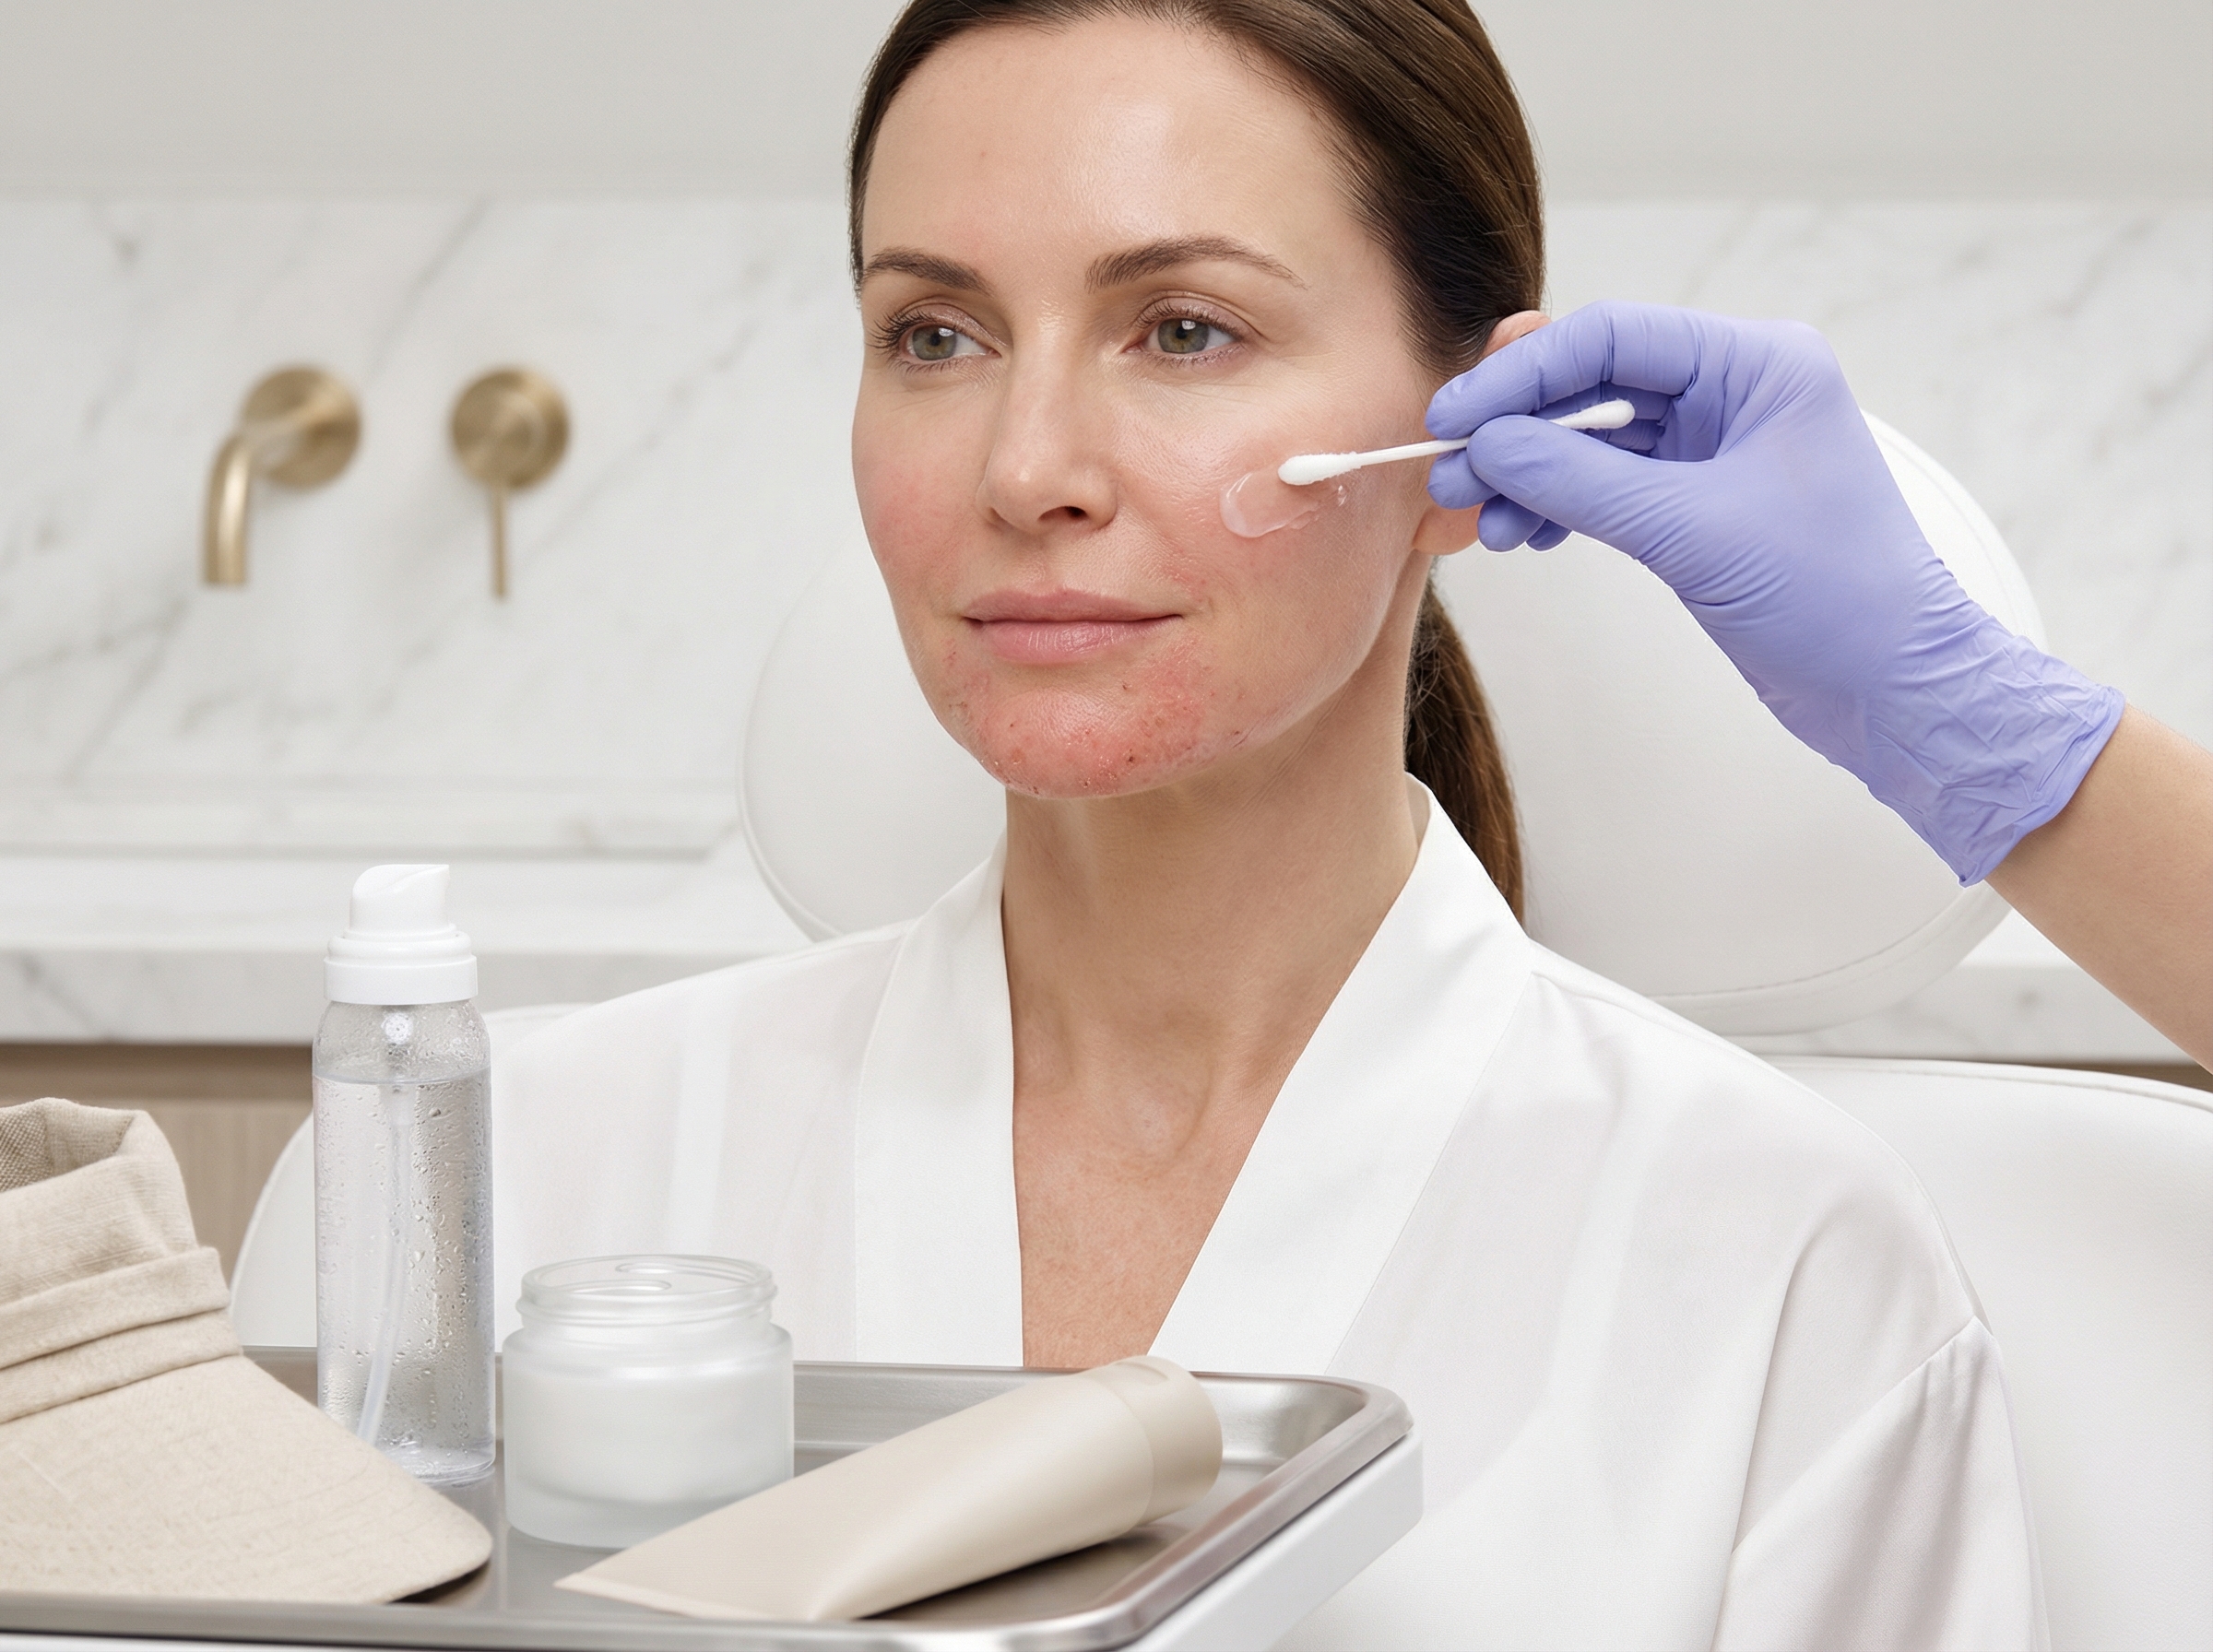
The “Pink Phase” and What to Expect
Once the old skin sloughs off, you will see brand new, baby-pink skin underneath. This is not a complication. It is a sign that the treatment worked. This redness, or erythema, indicates a strong inflammatory response which triggers the collagen production you paid for. While most people feel socially presentable between days 7 and 14, the pink hue can persist much longer.
Understanding Erythema Duration
For lighter fractional treatments, the pinkness fades in a few weeks. For aggressive CO2 resurfacing, a mild pink undertone can last one to three months. This is often more pronounced when you get hot, exercise, or drink alcohol. It is vital to understand that this color change is temporary and fades as the dermis matures. Once the skin is fully healed (after day 10), you can use a green-tinted primer to neutralize the pink tones.
Patient Script for Social Situations
If friends or colleagues ask about your skin, you don’t need to overexplain. A simple script works best: “I had a laser treatment to rebuild collagen. The redness means it’s healing exactly how it should, and it will fade over the next few weeks.” This sets a boundary and frames the recovery as a positive medical process rather than a cosmetic mishap.
Timeline for Returning to Normal Life
Getting back to your routine requires a staged approach. Rushing this can compromise your results or lead to infection. Here is a realistic timeline for reintroducing activities.
| Activity | Typical Wait Time | Why Wait? |
|---|---|---|
| Makeup | 7–10 Days | Applying makeup too early can trap bacteria in healing follicles. Wait until all crusting is gone. Use new brushes and mineral-based products first. |
| Light Exercise | 7–10 Days | Walking is fine immediately. Avoid heavy sweating, which contains salt and bacteria that irritate new skin. |
| Heavy Workouts | 14 Days | Intense heat and increased blood pressure can worsen swelling and prolong redness. |
| Dental Work | 2–3 Weeks | Stretching the mouth for a dental exam can tear fragile new skin around the perioral area. |
| Hair Dye | 2 Weeks | Chemicals from hair dye can run onto the face during rinsing and cause severe contact dermatitis on sensitized skin. |
| Injectables | 4 Weeks | Wait for swelling to fully resolve before assessing the need for Botox or fillers. |
Skincare: Reintroducing Active Ingredients
Your skin barrier is currently impaired. It holds moisture poorly and is incredibly permeable to irritants. The goal right now is to mimic the skin’s natural barrier until it can function on its own. Keep your routine boring. If a product tingles or stings, wash it off immediately.
Phase 1: Days 7–28 (Barrier Repair)
Focus exclusively on hydration and protection. Use gentle, non-foaming cleansers. For moisture, look for humectants like hyaluronic acid and glycerin to draw water in, followed by occlusives containing ceramides or squalane to seal it. Avoid fragrances, essential oils, and acids.
Phase 2: One Month Post-Procedure
Once the skin feels stable and is no longer sensitive to touch, you can introduce antioxidants. A high-quality Vitamin C serum is excellent at this stage to help brighten the skin and protect against free radicals. Start using it every other morning to test tolerance.
Phase 3: Weeks 4–8 (Resurfacing Agents)
This is the trickiest timing to judge. Retinoids (tretinoin, retinol) and exfoliating acids (AHAs/BHAs) are crucial for long-term maintenance, but introducing them too early causes inflammation. Most providers recommend waiting 4 to 8 weeks. Start with a low concentration twice a week and increase slowly. If you see renewed redness or peeling, stop and wait another week.
Photoprotection Strategy
Sun protection after CO2 laser is not optional. The fresh skin has no melanin protection and is highly susceptible to UV damage. Even five minutes of exposure can trigger Post-Inflammatory Hyperpigmentation (PIH), leaving you with brown patches that are difficult to reverse.
The Mineral Requirement
Chemical sunscreens convert UV rays into heat, which is the last thing your inflamed skin needs. You must use a mineral sunscreen containing Zinc Oxide or Titanium Dioxide with an SPF of 30 to 50. These sit on top of the skin and reflect light. Zinc also has mild soothing properties.
Physical Barriers
Sunscreen is not enough during the first month. You need physical barriers. Wear a wide-brimmed hat and large sunglasses when outside. If you are driving, be aware that UVA rays penetrate car windows. Use the visor or wear a mask if necessary. This level of vigilance is required for at least 3 months, or until all pinkness has completely resolved.
Long-Term Maintenance and Adjunctive Therapies
CO2 laser is a major investment, and protecting that investment requires a long-term view. While the initial healing takes two weeks, the collagen remodeling process continues for months. Full results from CO2 laser skin resurfacing usually appear within three to six months as the dermal structure rebuilds. To maximize this, you might consider staged treatments later on.
Platelet-Rich Plasma (PRP)
Some providers use PRP immediately during the laser procedure, but it can also be used as a follow-up treatment 4 to 6 weeks later to boost healing and collagen synthesis.
Microneedling and Non-Ablative Lasers
Once you have fully healed (typically after 3 months), lighter treatments like microneedling or non-ablative lasers (like LaseMD or Clear + Brilliant) can help maintain the glow and texture improvements without the downtime of another CO2 session. These act as “boosters” to keep the fibroblast activity high.
Monitoring for Late Complications
While rare, complications can appear after the first week. If you notice raised, itchy red areas, this could be the start of hypertrophic scarring. This is most common along the jawline or neck. Contact your provider immediately if you see this, as topical steroids or injections can reverse it if caught early. Similarly, if you notice persistent white bumps (milia), these are just trapped dead skin cells and can be easily extracted by your aesthetician.
Recovery is not a straight line. You will have days where your skin looks great and days where it looks blotchy. This fluctuation is normal. Stick to the protocol, keep the skin hydrated, and protect it from the sun. The results are worth the wait.
Final Takeaways and Next Steps
We have covered the science, the daily grim realities, and the specific questions that keep patients up at night. Now we need to consolidate this into a practical strategy. You have invested significant money and downtime into CO2 resurfacing. The difference between a good result and a great one often comes down to how strictly you adhere to the protocol during these first 168 hours.
The Core Survival Rules
Success relies on a few non-negotiable pillars. If you ignore everything else, pay attention to these five concepts. They are the foundation of safe healing.
Preparation determines recovery speed
Your skin reacts better when it is primed. We discussed stopping retinoids and exfoliants beforehand, but the internal prep matters just as much. If you smoke, you must stop. Nicotine constricts blood vessels and starves the healing tissue of oxygen. This is not a suggestion. It is a requirement for avoiding necrosis and scarring. Having your antiviral medication ready is also critical. You want that in your system before the laser even touches your face to prevent a herpes outbreak triggered by the heat.
Moisture is your best friend
There is a temptation to let the skin “breathe” or dry out. Do not do this. Your goal is to maintain a moist wound environment 24/7 for the first few days. This speeds up re-epithelialization, which typically happens around days 6 or 7. You will likely use a vinegar soak or saline solution to clean the skin, followed immediately by a thick layer of occlusive ointment like Aquaphor or a prescribed balm. If you see a dry patch or a scab forming, you are not lubricating enough.
The sun is the enemy
I cannot stress this enough. Your new skin has absolutely no defense mechanism against UV radiation. It is raw and vulnerable. Even five minutes of exposure through a car window can trigger post-inflammatory hyperpigmentation that lasts for months. You need to live like a vampire for the first week. Once the skin heals, you move to a strict regimen of mineral sunscreen with an SPF of 30 to 50. Chemical sunscreens might sting, so stick to physical blockers like zinc oxide.
Don’t pick the flakes
Around day 3 or 4, your face will start to look like it is peeling off. It will itch. It will look messy. You must let this dead skin slough off naturally during your gentle cleansing sessions. If you pick, pull, or scrub at these flakes, you risk tearing the delicate new skin underneath. That leads to scarring and infection. Sit on your hands if you have to.
Manage your expectations
You will not look beautiful on day 7. You will look pink, raw, and perhaps a bit shiny. This is normal. The “wow” factor comes later. Collagen remodeling is a slow biological process that continues for 3 to 6 months. The redness is actually a good sign that your blood flow is supporting that remodeling. Be patient with the mirror.
Timeline for Follow-Up Visits
You are not doing this alone. Your provider needs to see you to ensure the healing trajectory is correct. While every clinic has its own protocol, a standard schedule ensures safety.
The 24 to 48-hour check
Many surgeons want to see you the day after or two days after the procedure. This is a quick check to look for signs of infection or unusual swelling. They might help you with your first proper cleaning to show you the right pressure to use.
The one-week milestone
This visit usually coincides with the end of the strict downtime. Your provider will assess the re-epithelialization. If you are healing well, they will clear you to stop the heavy ointment and switch to a non-comedogenic moisturizer. They will also give you the green light for makeup.
The long-term checks
You should plan for a follow-up at one month and three months. This is when you evaluate the aesthetic results. The provider can check for any hyperpigmentation issues and prescribe topical lighteners if necessary. How Long Do Results Last After CO2 Laser Treatment depends heavily on how you manage this phase. These visits are great for tracking your collagen progress.
Protecting Your Investment
You have survived the hard week. Now you need to protect the results. The skin is fresh, but it is also sensitive.
Reintroduce actives slowly
Do not rush back to your retinol or glycolic acid. Your skin barrier is intact but thin. Wait at least 4 to 6 weeks before introducing strong active ingredients, and always ask your provider first. Vitamin C is usually the first active you can add back because it helps with UV protection, but even that can sting if started too early.
Sunscreen is a religion
I will say it again because it is that important. Daily SPF 50 is mandatory. If you spend money on CO2 laser and then skip sunscreen, you are wasting your investment. The laser removed the old sun damage. Don’t invite it back.
You Are in Charge
The most important tool you have is your voice. You know your body better than anyone. While discomfort is normal, extreme pain is not.
When to speak up
If you feel heat that gets worse instead of better after day 2, call your doctor. If you see yellow pus or spreading redness that looks like a map, call your doctor. If you have a fever over 100.4°F, call your doctor. Cold sores can spread rapidly on laser-treated skin, so if you feel that familiar tingle, demand antiviral support immediately. Early recognition of infection or complications prevents scarring. Do not be afraid to be “that patient” who calls the office. It is your face. You have done the work and endured the downtime. Now take ownership of your recovery to ensure you get the beautiful, smooth skin you paid for.
References
- How Long Do Results Last After CO2 Laser Treatment — Full results from CO2 laser skin resurfacing usually appear within three to six months as collagen rebuilds and strengthens the skin's structure …
- CO2 Laser Resurfacing: How Many Sessions? Results & Recovery … — Its improvement rate for deep scars is only 25% -40%, which is suitable for patients with mild problems who cannot accept the recovery period.
- CO2 Laser Treatments: What to Expect – ABCS — Most patients feel ready to resume video calls by day five and can return to in-office work, with makeup, by the end of week one.
- Best CO2 Laser Resurfacing Chicago, IL — CO2 Laser Recovery Timeline It may take about 1-2 weeks for the skin to heal after a CO2 laser resurfacing treatment. You must avoid wearing makeup until the …
- Laser Skin Resurfacing Recovery Explained — Most patients need 7 to 14 days before their skin is healed enough to be considered "socially presentable." On the other hand, non-ablative …
- Laser Skin Resurfacing Recovery — Recovery times will vary depending on your treatment CO2 laser resurfacing: Generally up to two weeks. Erbium laser resurfacing: One full week.
- Recovery Time After Laser Skin Therapy – Dr. Cory Torgerson — iPixel erbium laser usually requires 3 to 5 days for recovery time, and CO2 fractionated laser requires 5 to 7 days.
- Laser Carbon Dioxide Resurfacing – StatPearls – NCBI Bookshelf – NIH — Re-epithelialization typically occurs 6 to 7 days after treatment. Following the procedure, crusting and serous exudate may develop over denuded …
- Special considerations, risks and recovery | ASPS — Recovery times will vary depending on your treatment: CO2 laser resurfacing: Generally up to two weeks. Erbium laser resurfacing: One full week. Camouflage …
- A Prospective Survey of Patient Experiences After Laser Skin … — After 30 months, 18 patients (75%) would recommend the procedure, 17 (71%) would have LSR again, 21 (88%) felt that their appearance was improved, and final …
Legal Disclaimers & Brand Notices
The content provided in this article is for informational purposes only and does not constitute professional medical advice, diagnosis, or treatment. Always seek the advice of a qualified physician or other healthcare provider with any questions you may have regarding a medical condition or aesthetic procedure. Never disregard professional medical advice or delay in seeking it because of something you have read in this content.
All product names, logos, and brands are the property of their respective owners. All company, product, and service names used in this article are for identification purposes only. Use of these names, logos, and brands does not imply endorsement. This includes, but is not limited to, the following trademarks:
- Botox® and Juvederm® are registered trademarks of Allergan Aesthetics (an AbbVie company).
- Dysport® and Restylane® are registered trademarks of Galderma.
- Aquaphor® is a registered trademark of Beiersdorf.
- Vaseline® is a registered trademark of Unilever.