Under-eye (tear trough) fillers can transform tired eyes but commonly cause bruising and puffiness. This guide explains why these reactions happen, evidence-based immediate aftercare, recovery timelines, and how aftercare differs across Botox, lasers, chemical peels, and body-sculpting procedures. Follow practical steps to minimize risks, speed healing, and know when to contact your clinician.
Why bruising and puffiness happen after under eye fillers and what to expect
Understanding what’s happening beneath your skin is the first step to a smooth recovery. Bruising and puffiness after under-eye filler are not just common; they are an expected part of the healing process. This is largely due to the unique and delicate anatomy of the tear trough area.
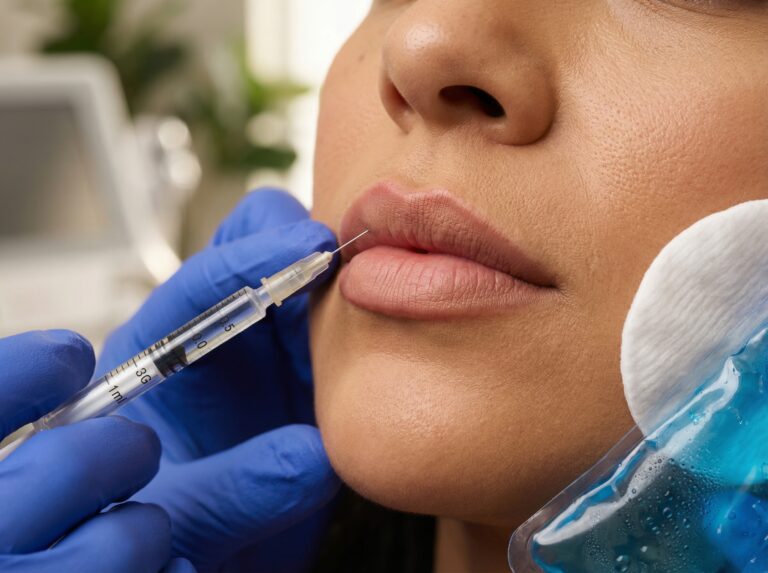
The skin under your eyes is among the thinnest on your entire body. Directly beneath it lies the orbicularis oculi, a circular muscle responsible for closing your eyelids. This muscle is highly vascular, meaning it is dense with tiny blood vessels. The area is also home to a complex network of key arteries and veins. Any injection, whether with a sharp needle or a blunt-tipped cannula, must navigate this intricate web. A punctured vessel, even a microscopic one, is what causes a bruise to form as blood leaks into the surrounding tissue.
Furthermore, the under-eye region has a very specific lymphatic drainage system. Lymphatics are responsible for clearing excess fluid from tissues. In this area, the system is less robust and can be easily overwhelmed. The trauma of the injection, combined with the introduction of a new substance, can temporarily disrupt this delicate fluid balance, leading to puffiness, also known as edema. The orbital septum, a thin membrane that holds back the fat pads around the eye, can also be affected, contributing to swelling.
The type of hyaluronic acid (HA) filler used plays a significant role in how much swelling you might experience. Hyaluronic acid is hydrophilic, which means it attracts and holds onto water. This property is what gives filler its plumping effect, but it also directly contributes to post-procedure swelling. Different fillers have varying degrees of hydrophilicity, particle size, and crosslinking (the way the HA molecules are bonded together). A filler that is highly hydrophilic will draw in more water, potentially causing more initial puffiness. Your injector chooses a specific filler based on its ability to provide support without causing excessive swelling in this sensitive area.
Injection technique is just as critical. Placing the filler at the correct depth, typically deep on the bone and beneath the muscle, helps avoid visible lumps and the Tyndall effect, a bluish discoloration that can occur if filler is placed too superficially. The choice between a needle and a cannula also impacts recovery. A needle, being sharp, has a higher chance of piercing a blood vessel. A microcannula, which has a blunt, flexible tip, is often preferred as it can navigate around vessels, theoretically reducing the risk of bruising. However, the skill of the injector is paramount regardless of the tool used.
Certain personal factors can make you more susceptible to bruising and swelling.
- Medications and Supplements: Blood-thinning medications like aspirin, clopidogrel, and NSAIDs (ibuprofen, naproxen) significantly increase bruising risk. The same is true for many common supplements, including fish oil, vitamin E, ginkgo biloba, and garlic.
- Lifestyle Factors: Consuming alcohol within 24 to 48 hours of your appointment can thin the blood and increase swelling. Smoking can impair healing. Uncontrolled high blood pressure also raises the risk.
- Individual Anatomy: Factors like age and genetics mean some people simply have thinner, more transparent skin or more fragile blood vessels, making them more prone to bruising.
- Previous Procedures: Prior facial surgeries or trauma in the area can alter the normal anatomy and lymphatic drainage, potentially affecting your recovery.
Setting realistic expectations for the recovery timeline is essential. The process is variable, but a typical progression looks like this:
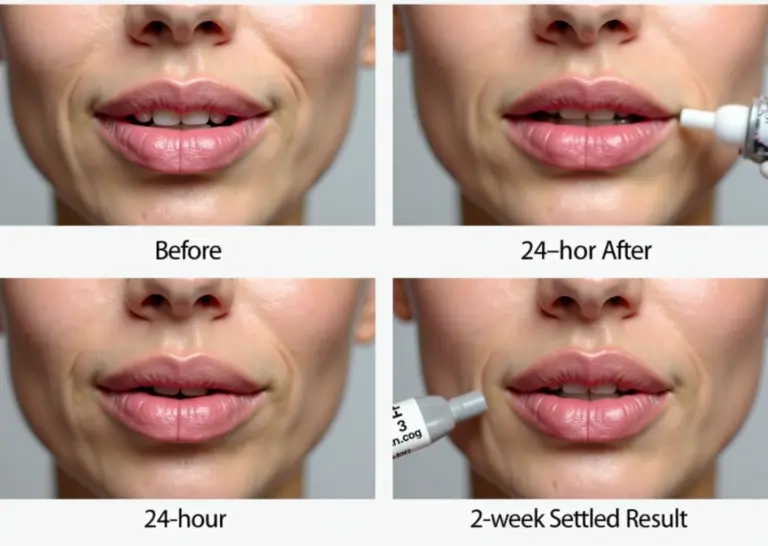
- Immediate (0–48 hours): You will leave your appointment with some degree of swelling. This is a combination of the filler volume itself, the body’s inflammatory response to the injections, and the hydrophilic nature of the HA filler beginning to draw in fluid.
- Peak Bruising (48–72 hours): Bruises may not be immediately obvious. They often emerge and become darkest around the second or third day as the blood settles in the tissue.
- Bruise Resolution (7–14 days): Most visible bruising will fade over one to two weeks, often changing color from purple and blue to green and yellow before disappearing. In some cases, a stubborn bruise can linger for up to three weeks.
- Swelling Resolution (2 weeks to 3 months): While the most noticeable puffiness subsides within the first week or two, subtle edema can persist for much longer. It can take up to three months for the filler to fully integrate with your tissue and for the lymphatic system to normalize, revealing the final result.
- Late-Onset Edema: Though rare, some individuals may experience intermittent swelling months after the procedure. This is a known complication that should be discussed with your provider if it occurs.
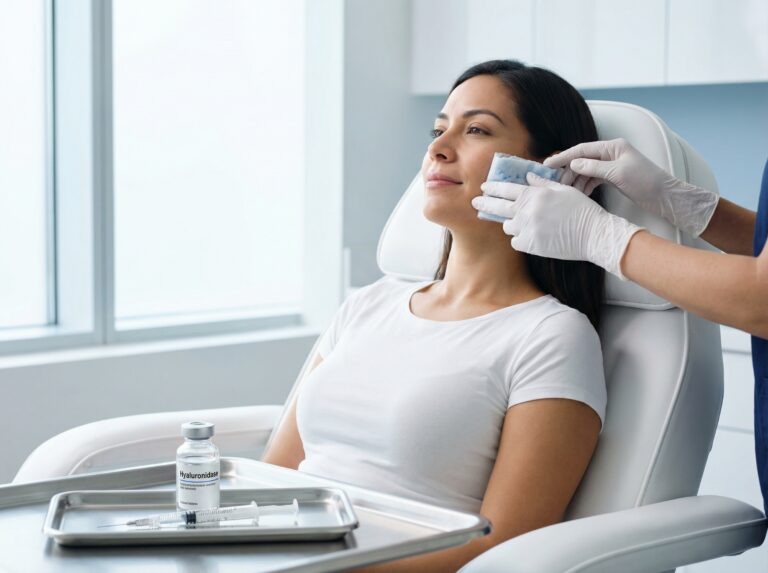
It’s important to remember that asymmetry in swelling and bruising between the two eyes is completely normal. Lumps and bumps felt in the first couple of weeks are also common and usually soften over time. However, if you have concerns, a follow-up is always recommended. As major professional bodies like the Aesthetic Society and the American Society of Plastic Surgeons (ASPS) emphasize, patient safety is paramount. One of the key safety features of HA fillers is that they are reversible. In the event of a complication or an undesirable aesthetic outcome, an enzyme called hyaluronidase can be injected to dissolve the filler.
Immediate and short term aftercare to minimize bruising and reduce puffiness
The first two weeks after your under-eye filler treatment are crucial for managing the immediate side effects and protecting your results. Following a structured aftercare plan can significantly reduce bruising and control puffiness, leading to a smoother recovery. Here is a practical guide to navigate the immediate and short-term healing process.
Your First 48 Hours: A Step-by-Step Checklist
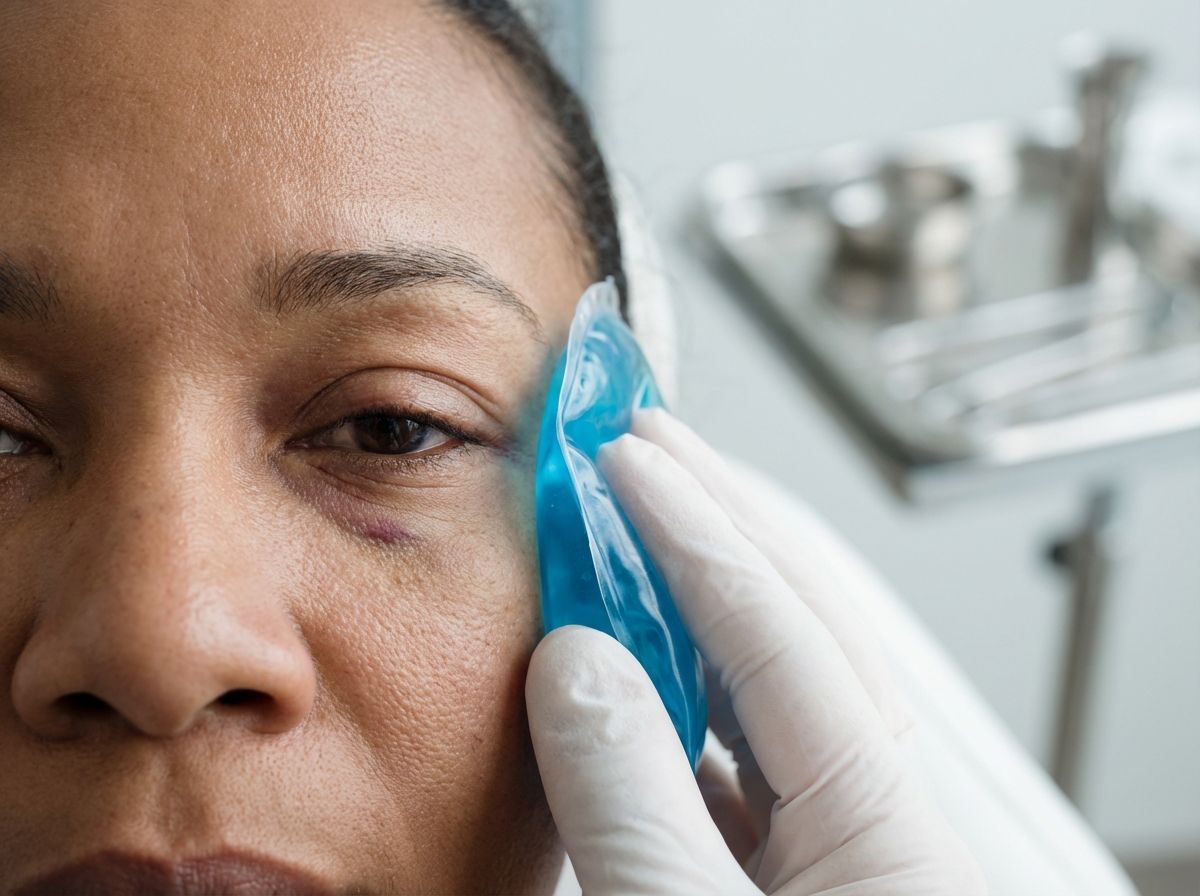
Your actions in the first two days set the stage for your entire recovery. The goal is to minimize initial swelling and prevent any new bruising from forming.
- Apply a Cold Compress. Use a soft gel pack or a bag of frozen peas wrapped in a thin cloth. Apply it to the under-eye area intermittently for the first 24 to 48 hours. A good rhythm is 15 minutes on, followed by 15 minutes off. This constricts blood vessels, which helps reduce both bleeding under the skin and the influx of fluid that causes swelling. Never apply ice directly to your skin.
- Avoid Vigorous Exercise and Air Travel. Skip the gym, heavy lifting, and any strenuous activity for at least 24 to 72 hours. Anything that significantly raises your heart rate and blood pressure can increase blood flow to the face, potentially worsening swelling or causing a new bruise to form at the injection sites. Similarly, it is wise to wait 24 to 48 hours before flying to ensure you are close to your provider if a rare complication arises and to avoid pressure changes that may aggravate swelling.
- Postpone Alcohol and Certain Supplements. Refrain from drinking alcohol for at least 48 hours, as it can thin the blood and increase swelling. You should also continue to avoid blood-thinning supplements like fish oil, vitamin E, and ginkgo biloba for this period, as discussed with your provider before the treatment.
- Sleep with Your Head Elevated. For the first two to three nights, use an extra pillow or two to prop your head up. This uses gravity to help drain fluid away from your face and can make a noticeable difference in morning puffiness.
- Avoid Intense Heat. Stay out of saunas, hot tubs, steam rooms, and very hot showers for one to two weeks. Heat causes blood vessels to dilate, which is the opposite of what you want during the initial healing phase. It can increase swelling and prolong your recovery.
Beyond 48 Hours: Managing Swelling and Bruising
After the initial two days, your focus shifts from prevention to management. This is when you can introduce gentle techniques to help your body clear away residual swelling and bruising.
Gentle lymphatic drainage massage can be beneficial, but timing is everything. You should wait at least 48 to 72 hours, or until the initial tenderness has subsided. The goal is to gently encourage fluid movement, not to move the filler itself. Using one or two fingers with very light pressure, make slow, sweeping motions from the inner corner of your eye outward toward your temple, and then down toward your ear. The pressure should be just enough to move the surface of the skin. Do not press hard or massage deeply, as this could displace the filler. Avoid this step entirely if you have broken skin, signs of infection, or significant pain.
When it comes to supplements and topicals, some options are commonly used, though clinical evidence varies.
- Arnica and Bromelain. Both are popular homeopathic and natural supplements believed to help with bruising. Arnica is available in topical gels and oral forms, while bromelain is an enzyme found in pineapple. While many patients feel they help, scientific support is limited. Always check with your injector before starting any new supplement.
- Topical Vitamin K. Some studies suggest that topical vitamin K oxide creams can help the body reabsorb the blood from a bruise more quickly. It can be applied gently to the bruised skin, avoiding the injection points themselves for the first day.
- Compress Temperature. Stick with cold compresses for the first 48 hours. After that, some providers may suggest switching to warm compresses to boost circulation and help clear bruising, but you should only do this with explicit instruction from your injector. Applying heat too early can worsen swelling.
- Anti-Inflammatories. Avoid non-steroidal anti-inflammatory drugs (NSAIDs) like ibuprofen and aspirin immediately after your treatment due to their blood-thinning effects. If you need pain relief, acetaminophen is generally a safer choice. Your provider may approve NSAIDs after a few days if inflammation is a concern, but do not take them without consulting them first.
Camouflage, Skincare, and Follow-Up
You can typically apply makeup 24 hours after your procedure. Use clean brushes or sponges to minimize infection risk. A high-coverage mineral concealer can be effective for hiding bruises. A green-toned color corrector applied before your concealer can help neutralize the purple and red tones of a fresh bruise, while a peachy or yellow corrector works well for older, yellowish-green bruises.
Sunscreen is essential. Bruised skin is susceptible to hyperpigmentation when exposed to UV light, so apply a broad-spectrum SPF 30+ sunscreen daily. Regarding other facial treatments, it is generally recommended to wait at least two weeks before getting facials, laser treatments, or facial massages to allow the filler to settle.
Your injector will likely schedule two follow-up appointments. The first is often at the 48 to 72-hour mark to check for any immediate concerns. A second appointment is typically scheduled for two weeks post-treatment. By this time, most of the swelling and bruising should have resolved, allowing your provider to assess the final aesthetic result and determine if any touch-ups are needed.
Red Flags: When to Seek Urgent Attention
While most side effects are mild and temporary, it is vital to know the signs of a serious complication. Contact your injector’s office or emergency line immediately if you experience any of the following:
- Severe or Escalating Pain. Discomfort that is out of proportion to typical post-injection soreness.
- Sudden Vision Changes. Any blurriness, double vision, or loss of sight.
- Prolonged Blanching or a Mottled Skin Pattern. If the skin near the injection site turns white, pale, or develops a lace-like, purplish pattern (livedo reticularis) that doesn’t resolve quickly, it could signal a vascular compromise. This means the filler may be blocking a blood vessel.
- Signs of Infection. Increasing redness, severe swelling, warmth, tenderness, or pus at the injection site.
These symptoms require immediate evaluation. If a vascular issue is suspected, your provider may need to administer hyaluronidase, an enzyme that dissolves hyaluronic acid filler, on the same day to restore blood flow. Prompt action is critical to prevent permanent tissue damage.
When to escalate care and options for persistent bruising or prolonged edema
While most people sail through recovery with just a bit of temporary bruising and swelling, sometimes these side effects linger longer than expected. Understanding when to be patient and when to call your provider is key. If your recovery isn’t following the typical two-week timeline, it doesn’t automatically mean something is wrong, but it does mean it’s time for a professional evaluation to figure out the next steps.
Persistent bruising that lasts beyond the 7 to 10-day mark can sometimes leave behind a faint, yellowish-brown discoloration. This is called hemosiderin staining, caused by iron deposits left over from the breakdown of red blood cells. While it usually fades on its own over several months, it can be frustrating. For this stubborn residual discoloration, your clinician might suggest in-office treatments. Light-based therapies are particularly effective.
- Pulsed Dye Laser (PDL) or Intense Pulsed Light (IPL) These treatments use specific wavelengths of light to target and break down the pigment left behind by the bruise. A session is quick, and it can significantly speed up the resolution of the discoloration. This is typically considered only after the initial bruising phase has passed, usually after the first week or two.
Your provider may also recommend specific topical creams or supplements to help, but these interventions are best guided by a professional assessment of your specific situation.
Prolonged puffiness, or edema, that doesn’t resolve after a few weeks is more complex than simple bruising. It requires a careful diagnosis to determine the cause before starting any treatment. Several factors can contribute to persistent swelling.
- Filler Properties Hyaluronic acid (HA) fillers are hydrophilic, meaning they attract and hold onto water. Some fillers are more “thirsty” than others. If the product is drawing in too much water, it can lead to a puffy, swollen appearance.
- Lymphatic Disruption The under-eye area has a delicate network of lymphatic vessels that drain fluid. Filler, especially if placed incorrectly or in large amounts, can sometimes compress or block these channels, causing fluid to back up.
- Overcorrection or Malposition Too much filler, or filler placed too superficially under the thin under-eye skin, can lead to visible lumps and puffiness.
- Inflammatory Reactions In rare cases, the body can form an inflammatory nodule or granuloma around the filler. Even rarer is a low-grade infection or biofilm. These present as firm, sometimes tender, lumps and require specific medical management.
When dealing with persistent edema, your injector will likely follow a graduated approach, starting with the least invasive options.
- Watchful Waiting The first step is often patience. It can take 4 to 12 weeks for the filler to fully integrate with your tissue and for all swelling to subside. Your body may just need more time to adjust, especially if you are prone to fluid retention.
- Professional Manual Therapies If swelling is linked to lymphatic issues, a series of gentle lymphatic drainage massages performed by a trained therapist can be very effective. This is different and more specialized than the simple massage you might do at home.
- Steroid Injections For confirmed inflammatory nodules (and only after infection has been ruled out), a small injection of a corticosteroid can help reduce the inflammation and shrink the lump. This is a targeted treatment for a specific problem, not a general solution for puffiness.
- Hyaluronidase Injections For issues directly related to the filler itself, such as overcorrection, persistent nodules, or the Tyndall effect (a bluish hue from superficially placed filler), hyaluronidase is the gold standard. This enzyme specifically dissolves hyaluronic acid fillers. The injection is placed directly into the area of concern. You may see results within hours, but it can take a day or two for the full effect. Swelling from the injection itself is common but usually resolves quickly. Sometimes, more than one session is needed to achieve the desired result. While generally safe, risks include allergic reactions and the potential to dissolve some of your body’s natural hyaluronic acid, which can cause temporary hollowness.
A crucial part of managing complications is accurate diagnosis. If your provider suspects an infection (signs include increasing pain, redness, heat, and pus), they will prescribe antibiotics. Inflammatory nodules, on the other hand, are treated differently, often with steroids or hyaluronidase. In complex cases, high-frequency ultrasound is an invaluable tool. It allows your clinician to see the exact location, size, and type of filler, identify fluid collections, and assess blood flow, ensuring that any intervention, like a hyaluronidase injection, is precise and effective.
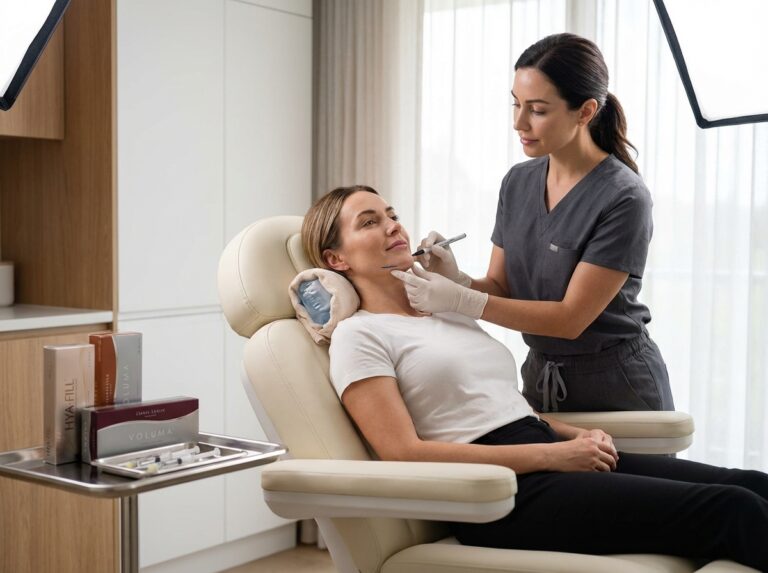
Finally, after any corrective treatments and once all swelling has resolved, you may need a cosmetic revision to rebalance the area. This underscores the importance of choosing a highly experienced injector from the start. A skilled provider not only has the anatomical knowledge to minimize risks but also keeps meticulous records of the exact product and amount used. This documentation is critical if you ever need follow-up care or corrective work, ensuring any future treatments are safe and well-informed.
Wrapping up key takeaways and recovery checklist
Navigating the recovery period after under-eye filler is just as important as the treatment itself. Your actions in the hours, days, and weeks that follow directly influence your final results, helping to minimize downtime and ensure a smooth healing process. Think of this as your final roadmap, summarizing the essentials and providing a clear checklist to guide you from the moment you leave the clinic to enjoying your fully settled, refreshed look.
Let’s consolidate the key takeaways for a successful recovery. The most common side effects, bruising and swelling, are temporary and manageable. Bruising typically peaks within the first 48 hours and resolves over 7 to 14 days, while significant swelling usually subsides within 3 to 5 days, though minor puffiness can persist for a couple of weeks as the filler integrates with your tissue. The most effective immediate actions are simple but powerful: applying a cold compress intermittently for the first two days, keeping your head elevated (even while sleeping), and avoiding strenuous exercise, alcohol, and blood-thinning supplements like fish oil and vitamin E for at least 48 hours. These steps help constrict blood vessels and reduce fluid accumulation, directly impacting the severity of bruising and swelling.
To make things even clearer, here is a practical recovery checklist:
Your Under-Eye Filler Recovery Checklist
- Immediately After (First 4 Hours):
- Avoid touching, rubbing, or applying pressure to the treated area.
- Keep your head upright; do not lie down flat.
- Refrain from applying makeup.
- Day 1-2 (First 48 Hours):
- Apply a cold compress (wrapped in a thin cloth) to the area for 10 minutes at a time, several times a day. Do not apply ice directly to the skin.
- Sleep on your back with your head elevated on an extra pillow to help drain fluid and minimize morning puffiness.
- Avoid intense physical activity, saunas, and hot tubs. Increased heart rate and heat can worsen swelling and bruising.
- Continue to avoid alcohol and blood-thinning medications or supplements, unless prescribed by your doctor.
- Day 3-7:
- You can typically resume gentle exercise. Listen to your body and avoid anything that causes strain or significant pressure to your face.
- It is generally safe to apply makeup to cover any residual bruising. Use clean brushes and a gentle touch.
- Be gentle when cleansing your face. Avoid harsh scrubs or facial massage devices near the eyes.
- Week 2-4:
- The filler will be settling into its final position. Any lumpiness or unevenness should be resolving.
- This is the ideal time for your follow-up appointment. Your provider can assess your results, address any concerns, and determine if a touch-up is needed.
- You can safely resume other aesthetic treatments like facials, lasers, or microneedling, but only after getting clearance from your provider.
While most recoveries are straightforward, it’s vital to know the red flags for rare but serious complications. Contact your provider immediately if you experience severe or escalating pain, skin that looks pale, white, or mottled (like a lace pattern), dusky or blue discoloration outside of a typical bruise, or any changes in your vision. These can be signs of a vascular occlusion, which requires urgent medical attention. Similarly, increasing redness, warmth, tenderness, or pus-like discharge could indicate an infection. Remember that hyaluronic acid fillers have a built-in safety feature: they can be dissolved with an enzyme called hyaluronidase. This is used by your provider to reverse the filler in the event of a vascular complication or if you are unhappy with the aesthetic outcome after the initial swelling has fully subsided.
If you are incorporating under-eye fillers into a broader non-invasive treatment plan, coordination is key. A good rule of thumb is to space out treatments. For example, wait at least two to four weeks after getting fillers before having a laser treatment, chemical peel, or microneedling session in the same area. This gives the filler time to settle and reduces the risk of inflammation. Open communication between all your providers is essential. Ensure your dermatologist knows about the fillers you received from your plastic surgeon, and vice versa. Before any procedure, have a comprehensive discussion with your primary injector about your entire aesthetic plan. They can help you create a safe and effective timeline and advise you on which medications and supplements to pause to minimize risks.
Finally, setting realistic expectations is fundamental to a positive experience. The goal of tear trough filler is improvement, not perfection. It aims to soften shadows and reduce hollowness for a more rested appearance. Results are long-lasting but not permanent; most patients find their under-eye fillers last between 9 and 18 months before a touch-up is needed. However, recent MRI studies suggest that fillers can persist in the tissue much longer than initially thought, sometimes for years, making ongoing care and conservative retreatment schedules important to avoid overfilling. To protect your investment long-term, commit to daily sun protection with a broad-spectrum SPF and maintain a consistent skincare routine. The single most important factor in your success and safety is the person holding the syringe. Choose a board-certified, core aesthetic physician (like a dermatologist or plastic surgeon) with deep anatomical knowledge of the delicate under-eye area and extensive experience with this specific procedure. A skilled injector will not only deliver beautiful, natural results but will also know how to prevent and manage potential complications. With this knowledge and a clear plan, you can feel confident in managing your recovery and enjoying the benefits of your treatment for months to come.
Legal Disclaimers & Brand Notices
The information provided in this article is for informational and educational purposes only and does not constitute medical advice, diagnosis, or treatment. Always seek the advice of a board-certified physician or other qualified health provider with any questions you may have regarding a medical condition or specific aesthetic procedure. Never disregard professional medical advice or delay in seeking it because of something you have read in this content.
All product names, logos, and brands are the property of their respective owners. All company, product, and service names used in this article are for identification purposes only. Use of these names, logos, and brands does not imply endorsement. The following trademarks mentioned in this text are acknowledged:
- Botox® is a registered trademark of Allergan Inc.