Recovering from a Fraxel fractional laser treatment involves a distinct ‘coffee grounds’ peeling phase—tiny dark micro-crusts that form before healthy skin reveals itself. This guide explains the biological causes of that appearance, provides a realistic day-by-day recovery timeline, outlines evidence-based aftercare steps, and details how to distinguish normal healing from complications.
What the coffee grounds phase is and why it happens
When patients look in the mirror two or three days after a Fraxel treatment, the most common reaction is a mix of fascination and mild alarm. The skin takes on a texture and appearance frequently described as having been rubbed with wet coffee grounds or coarse sandpaper. In clinical settings, this phenomenon is not a side effect; it is the primary visible endpoint of the healing process. Understanding exactly what this debris is—and why your body produces it—is the single most important factor in navigating recovery without panic.
Defining the “Coffee Grounds” Phenomenon
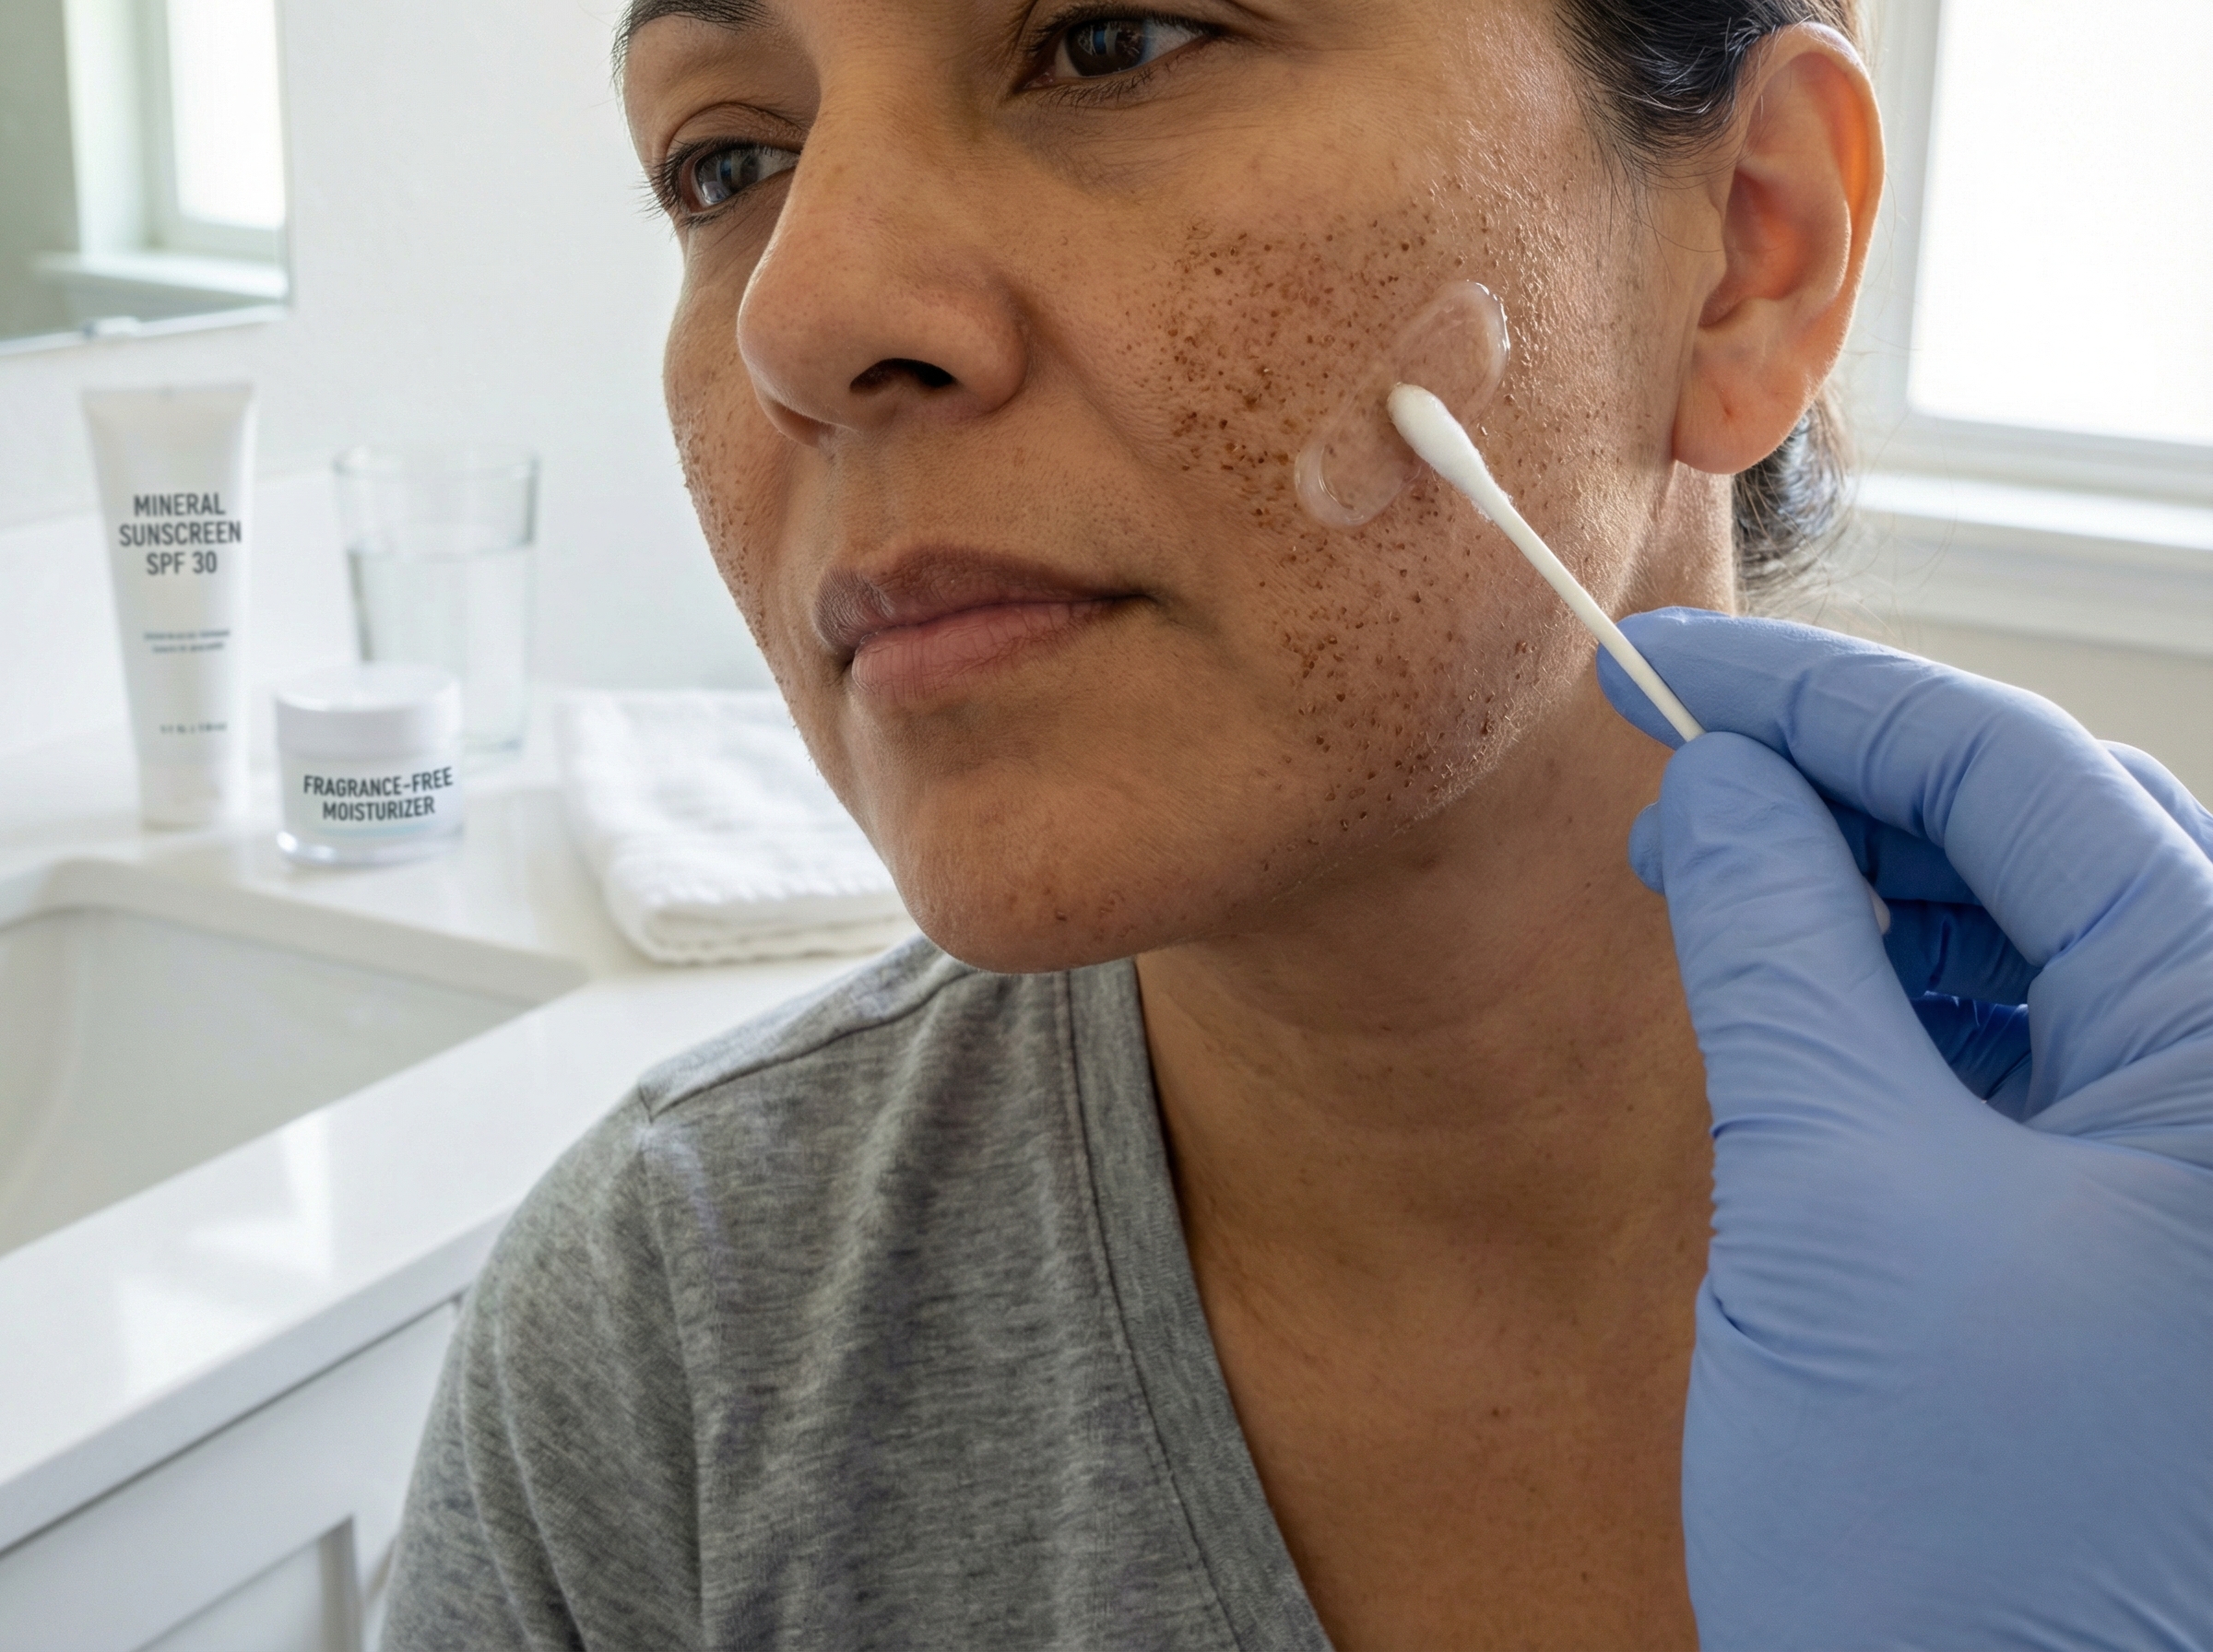
The term “coffee grounds” refers to thousands of microscopic, dark brown spots that appear on the skin’s surface shortly after treatment. While they may look like dirt or dried blood, they are actually composed of dead skin cells and coagulated pigment. Dermatologists and laser technicians refer to these spots as MENDs (Microscopic Epidermal Necrotic Debris).
To understand why MENDs form, we must look at how fractional photothermolysis works. Unlike older ablative lasers that remove the entire top layer of skin, Fraxel is fractional. It targets only a fraction of the skin surface at a time. The laser handpiece delivers high-precision energy to create thousands of narrow, deep columns of tissue coagulation called Microthermal Zones (MTZs).
Think of these zones as microscopic injuries. The laser vaporizes or heats these specific columns, destroying old collagen and breaking up pigment clusters. However, the tissue surrounding each column remains untouched and healthy. This surrounding healthy tissue is what allows for rapid healing, acting as a bridge to supply nutrients and new cells to the injured zones.
The Biological Mechanism: Why the Spots are Dark
The darkness of these spots is not accidental; it is largely due to melanin. When the laser energy hits the skin, it targets water and pigment. In the process of creating the MTZ, the melanin within that column is coagulated—essentially cooked—and trapped within the dead epidermal tissue.
The body views this coagulated tissue as waste. Through a natural biological process known as transepidermal elimination, the healthy skin cells at the bottom of the column begin to regenerate and push the debris upward. It works somewhat like an elevator: the new, healthy skin pushes the dead, pigmented debris to the surface. Once it reaches the stratum corneum (the outermost layer of skin), it oxidizes and hardens, creating that characteristic dark, granular crust.
This explains why the “coffee grounds” are often darker on patients with significant sun damage or brown spots. The laser has successfully targeted the excess pigment, and your body is now physically pushing that pigment out of your skin. The more sun damage you have, the denser the coffee grounds often appear.
Variables Influencing Intensity and Density
Not every patient experiences the same density of peeling. The appearance of the coffee grounds depends heavily on the specific settings used during the procedure. Fraxel Dual, the most common device used in 2025, operates on two wavelengths, and they produce different shedding patterns.
- 1927 nm Wavelength (Thulium): This setting targets the superficial layers of the skin and is specifically designed for pigmentation and sun damage. Because it works on the surface where pigment lives, it typically produces a very heavy, dense layer of coffee grounds. The entire face may feel like rough sandpaper.
- 1550 nm Wavelength (Erbium): This wavelength penetrates much deeper to target wrinkles and acne scars. While it still produces MENDs, the reaction is often less about surface pigment and more about deep structural remodeling. The peeling might be more subtle, but the swelling is usually more pronounced.
Beyond wavelength, the treatment density plays a massive role. Density refers to the percentage of skin surface covered by the laser spots. A treatment set to 30% density will leave 70% of the skin intact, resulting in fewer coffee grounds than a high-density treatment. Clinicians adjust this based on downtime tolerance and safety profile. For those interested in how these settings impact the overall timeline, recovery expectations vary based on intensity, but the biological mechanism of shedding remains consistent regardless of the specific energy level.
Distinguishing Normal Crusting from Complications
One of the biggest anxieties during recovery is distinguishing between the expected coffee grounds phase and abnormal healing. The coffee grounds phase is a dry process. The spots should feel rough and dry, similar to 400-grit sandpaper. They should not be painful after the first 24 hours.
Abnormal scabbing looks different. If you see yellow or honey-colored crusts, oozing liquid, or red streaks spreading from a treated area, this is not MENDs. This indicates a potential infection or a burn where the laser energy was too high for the skin to tolerate, leading to bulk tissue necrosis rather than fractional coagulation. Normal coffee grounds are individual dots; abnormal scabbing often forms a confluent, sticky plaque.
Fitzpatrick Skin Types and Pigment Risk
Your skin type (Fitzpatrick I-VI) significantly dictates how this phase looks and how it must be managed. The contrast of the coffee grounds against the background skin tone changes the visual experience.
Fitzpatrick Types I-III (Lighter Skin): The coffee grounds appear as distinct, dark brown or black specks against a pink or red background. The contrast is high, making the “dirty” look very obvious.
Fitzpatrick Types IV-VI (Darker Skin): The presentation is often described as “bronzing.” Because the natural melanin content is higher, the coagulated columns may not look like distinct black dots but rather a general darkening or muddying of the skin tone. The risk here is higher. In darker skin, the laser settings must be carefully controlled to avoid overheating the surrounding tissue. If the inflammation is too intense, the body may respond by producing more pigment (Post-Inflammatory Hyperpigmentation) rather than just shedding the old pigment.
In darker skin types, the shedding phase might be less visually dramatic in terms of “dots,” but the bronzed, dead layer will still peel off to reveal lighter skin underneath. The timeline for this shedding can sometimes be slightly extended in darker skin types as the cellular turnover rates can vary, and clinicians often use lower densities which may alter the shedding pattern.
Expected timeline and stages of healing
Understanding the progression of your skin’s recovery helps manage anxiety. You look in the mirror two days post-procedure and see a face covered in dark, gritty specks. This is not a complication. It is the biological certainty of fractional laser resurfacing doing its job. The timeline for Fraxel is relatively predictable, though individual biology and treatment intensity dictate the exact speed of healing.
Recovery is rarely linear. You might feel fine on day two and look your worst on day four. The process moves from inflammation to shedding and finally to tissue remodeling.
The Immediate Aftermath: Hours 0 to 24
The clock starts the moment the handpiece leaves your skin. The anesthesia wears off within an hour or two, and the immediate sensation is intense heat. Most patients describe this as a severe sunburn that pulses. The skin retains heat because the laser has deposited thermal energy deep into the dermis.
Physical appearance:
- Erythema: Your skin will be bright red or deep pink. The severity depends on how many passes the provider performed.
- Edema: Swelling begins almost immediately. It typically peaks the next morning. You might notice puffiness around the eyes, even if the laser did not treat the eyelids directly, as fluid follows gravity.
- Pinpoint Bleeding: This is less common with non-ablative Fraxel (Dual 1550/1927) than with ablative lasers, but high-energy settings can cause tiny spots of bleeding. These usually clot before you leave the clinic.
The skin feels tight and dry. It is vital to understand that the “coffee grounds” are not visible yet. The microscopic epidermal necrotic debris (MENDs) are still forming beneath the stratum corneum.
The Bronzing Phase: Days 2 to 3
By the second day, the heat subsides, but the visual changes accelerate. The redness may begin to fade into a bronze or tan shade. This bronzing effect is the hallmark sign that the coagulated tissue is moving upward.
Pigmented spots darken significantly during this window. If you had sun damage or freckles, they will look much darker now than they did before the treatment. This is often alarming for first-time patients, but it indicates the laser successfully targeted the melanin.
Texture changes:
The skin loses its smoothness. If you touch your face (which you should avoid), it feels like fine sandpaper or dry velvet. This roughness is the emergence of the coffee grounds. They are now sitting on the surface, trapped in the old skin cells that are preparing to slough off.
The Shedding Window: Days 4 to 7
This is the core of the “coffee grounds” phase. Between days 4 and 7, the old tissue separates from the new, healthy skin underneath.
The shedding usually starts around the mouth and nose because these areas move the most when we speak or eat. It then progresses outward toward the cheeks and forehead. The appearance is patchy. You will have areas of fresh, pink skin next to areas of dark, crusty debris.
What to expect:
- Itching: As the skin heals and dries, itching is common. It is a sign of nerve activation and histamine release during healing.
- Flaking: The coffee grounds do not fall off all at once. They flake off gradually during cleansing or moisturizing.
- Variable timeline: By day 6, the texture often feels better to the touch, but visual flaking may persist on the perimeter of the face or the hairline.
Re-epithelialization and Maturation: Weeks 2 to 6
Once the last of the coffee grounds have shed, usually by day 10, the re-epithelialization phase is complete. The barrier is intact, but the skin is not fully healed. The underlying collagen remodeling continues for months, but the visible recovery shifts to managing sensitivity. The new skin is often pinkish and extremely sensitive to UV light and active ingredients.
The “Fraxel Glow”:
Patients often see a significant improvement in tone and texture immediately after the shedding finishes. However, the skin remains vulnerable. The pinkness (residual erythema) can last for several weeks, especially in fair-skinned individuals.
Variables That Shift the Timeline
The standard 5-to-7-day social downtime is an average. Two main factors can stretch or compress this schedule.
1. Energy Density and Treatment Level
The settings chosen by your provider determine the depth and density of the microscopic wounds.
| Treatment Type | Typical Recovery Impact |
| Fraxel 1927 (Pigment) | Produces more surface peeling and darker coffee grounds. The shedding phase is often more visually dramatic but superficial. |
| Fraxel 1550 (Texture/Scars) | Targets deeper layers. Less surface crusting, but significantly more swelling (edema) that can last 4 to 5 days. |
| High Density/Multiple Passes | Recovery time ranges from a few days to one week, but aggressive treatments for deep acne scars can extend redness and minor flaking up to 10 or 12 days. |
2. Skin Type and Melanin
Patients with higher Fitzpatrick skin types (IV-VI) experience a different visual recovery. The “coffee grounds” may not look like dark specks against a pale background. Instead, the skin may take on a grayish or dusky hue.
Hyper-pigmentation is a higher risk here. Darker skin may show temporary darkening (post-inflammatory hyperpigmentation) that lasts weeks longer than the physical peeling. This is not scarring, but a reaction to the heat. It usually resolves but requires strict sun avoidance.
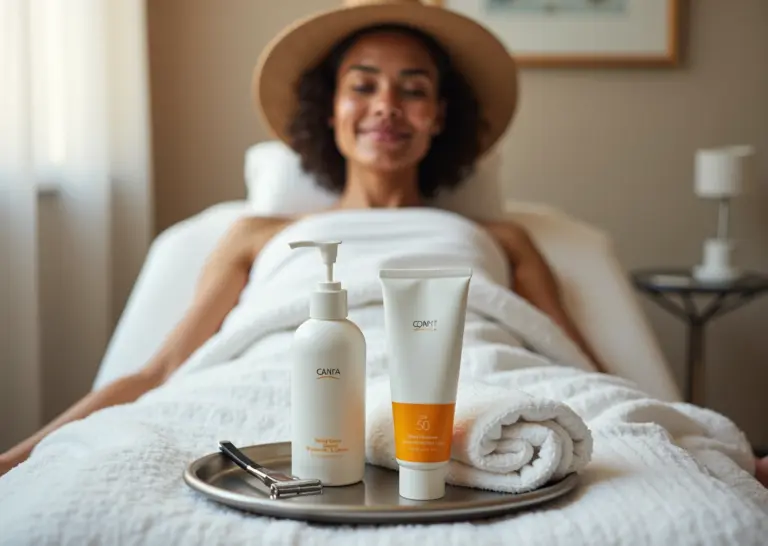
Day to day aftercare during the coffee grounds phase
Navigating the days following a Fraxel treatment requires patience and a strict adherence to protocol. The skin barrier is temporarily compromised. Your goal is to protect the microscopic wounds created by the laser while the body pushes out the damaged tissue. This debris manifests as the characteristic bronze, rough texture often compared to sandpaper or coffee grounds. How you handle this specific phase directly influences your final cosmetic result.
Core Rules for the Healing Phase
Before establishing a daily routine, you must understand the absolute prohibitions. Violating these rules can lead to scarring, infection, or hyperpigmentation.
- No picking or scrubbing. The rough texture is dead skin that acts as a natural bandage. Removing it prematurely exposes raw skin that is not ready for the environment. Do not use washcloths, sponges, or sonic cleansing brushes.
- No heat exposure. Hot showers, saunas, and steam rooms increase inflammation. Keep water tepid or cool.
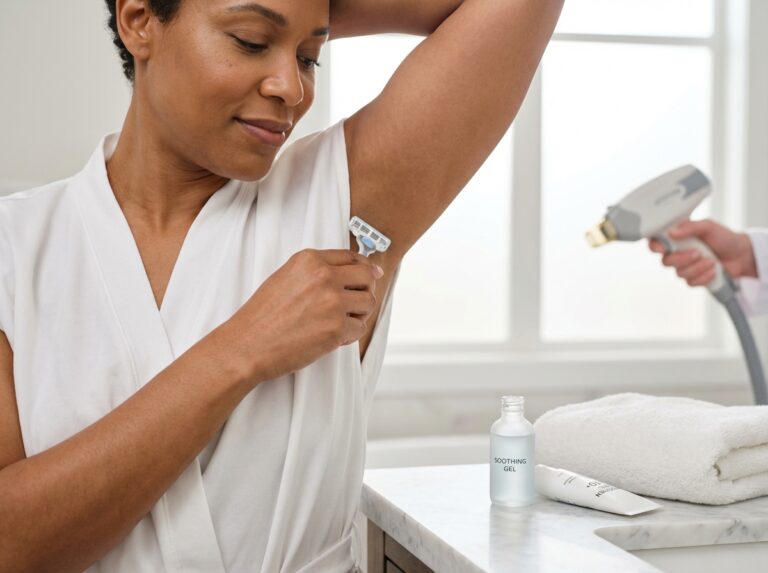
- No swimming. You must avoid swimming pools, hot tubs, lakes, and the ocean until you are fully healed (typically 7 to 10 days). Chlorine and salt can cause severe irritation, and natural bodies of water contain bacteria that pose a significant infection risk while your skin barrier is permeable.
- No heavy sweating. Intense exercise can trap bacteria under the occlusive ointments and cause breakouts or infection.
- No makeup (initially). Avoid cosmetics until the skin has fully healed and the crusts have flaked off naturally.
- No active ingredients. Retinoids, glycolic acid, salicylic acid, and vitamin C must stay on the shelf until your provider gives the all-clear.
Cleansing and Application Techniques
Friction is the enemy during the first week. When washing your face, use a “cat paw” technique. Apply a generous amount of cleanser to your fingertips and gently glide over the skin. Rinse by splashing cool water against the face. Pat dry with a clean, lint-free towel or air dry. Do not rub.
Applying products requires a similar approach. Warm the ointment or moisturizer between your palms to soften it. Press it onto the skin rather than dragging it across the surface. This ensures coverage without dislodging the protective micro-crusts.
Phase 1: The Occlusive Stage (Days 1 to 3)
In the first 72 hours, the skin is likely swollen and red. The micro-channels are open or just beginning to close. The priority is keeping the tissue moist to prevent hard scabbing.
Morning Routine
- Cleanse: Use a saline solution or a non-foaming, fragrance-free cleanser. If the skin feels tight or hot, cool water is sufficient.
- Soak (Optional): Some providers recommend vinegar soaks to prevent infection and soothe yeast buildup. Mix one teaspoon of plain white vinegar with two cups of distilled water. Soak clean gauze in the solution and lay it on the face for ten minutes.
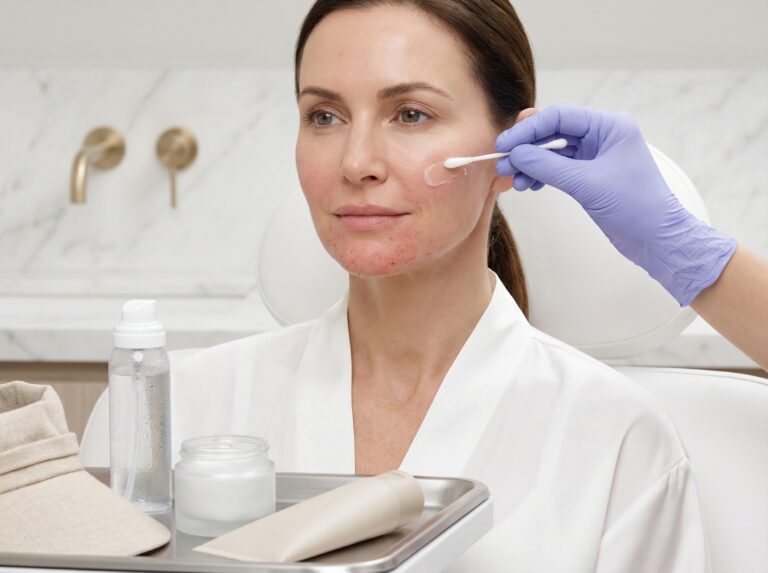
- Treat: Apply any prescribed topical antibiotics or steroid creams exactly as directed.
- Moisturize: Apply a thin layer of an occlusive ointment. Petrolatum-based products create a seal that locks in moisture and speeds up re-epithelialization.
Evening Routine
- Cleanse: Repeat the gentle cleansing process to remove old ointment and debris.
- Treat: Apply prescribed topicals.
- Moisturize: Reapply the occlusive ointment. You may want to use an old pillowcase as these products can be greasy.
Phase 2: The Shedding Stage (Days 4 to 10)
Around day three or four, the swelling subsides and the “coffee grounds” appear. The skin will feel tight and itchy. This indicates that the old pigment and damaged cells are lifting. You can transition from heavy ointments to lighter, barrier-repairing creams.
Morning Routine
- Cleanse: Continue with a gentle, pH-neutral cleanser.
- Moisturize: Switch to a humectant-rich cream. Look for ingredients like ceramides, hyaluronic acid, and panthenol (Vitamin B5). These components support the skin barrier without trapping heat.
- Protect: Sun protection is non-negotiable once the heavy ointment is discontinued. Use a broad-spectrum mineral sunscreen with SPF 30 or higher. Mineral formulas containing zinc oxide or titanium dioxide sit on top of the skin and are less likely to cause irritation than chemical filters.
Evening Routine
- Cleanse: Thoroughly remove sunscreen and environmental pollutants. A double cleanse with a gentle oil balm followed by a cream cleanser works well if done without scrubbing.
- Moisturize: Apply a generous layer of your barrier-repair cream. If the skin feels exceptionally dry or itchy, you can apply a very thin layer of petrolatum over the cream in specific dry spots.
During this window, the bronzed skin will begin to flake off. It often starts around the mouth and nose where facial movement is frequent. In less than a week my skin had almost entirely healed is a common sentiment, but the timeline varies based on treatment intensity. Do not pull at hanging skin. You can carefully trim large flakes with sterile scissors if they are bothersome, but never pull.
Makeup Considerations: If you must wear makeup during this phase, mineral powder is the superior choice. It sits on top of the skin rather than sinking into the micro-channels, allows the skin to breathe, and often contains zinc oxide which provides additional soothing properties. Liquid foundations often look uneven and cakey over the rough texture.
Phase 3: Normalization (Weeks 2 to 6)
Once the peeling is complete, the new skin will look pink and feel smooth. It is fresh and highly sensitive to UV damage. Hyperpigmentation risks are highest during this period.
Routine Adjustments
- Hydration: Continue using fragrance-free moisturizers. The new skin may be drier than usual for several weeks.
- Sun Protection: Maintain strict SPF usage. Wear wide-brimmed hats when outdoors. Avoid direct sun exposure during peak hours.
- Reintroducing Actives: Do not rush back to your anti-aging products. Wait until your provider confirms the skin barrier is restored. This is usually around the two to three-week mark for mild treatments or longer for aggressive settings. Start with lower concentrations of retinoids or acids and use them every other night to test tolerance.
- Injectables: It is generally best to wait until the skin has fully healed before introducing other injectables. Most practitioners recommend waiting two weeks after Fraxel before getting Botox or dermal fillers. This ensures that any swelling from the laser has subsided, allowing the injector to see your true facial anatomy.
Product Selection for Post-Laser Skin
The market is flooded with skincare, but post-procedure skin requires specific formulations. Avoid anything with “parfum” or “fragrance” listed in the ingredients. These are common irritants. Avoid denatured alcohol which dries the skin.
Focus on these ingredients:
- Ceramides: Lipids that help form the skin’s barrier and retain moisture.
- Hyaluronic Acid: A humectant that draws water into the skin to combat tightness.
- Panthenol (Vitamin B5): Known for its soothing and anti-inflammatory properties.
- Centella Asiatica: A botanical extract that promotes healing and reduces redness.
- Petrolatum: The gold standard for occlusion in the early days of healing.
If you have a history of cold sores, your provider likely prescribed an antiviral medication. Start this one day before treatment and continue for the duration prescribed. Reactivation of the herpes simplex virus can cause scarring if not managed correctly. If you notice any blistering or significant pain, contact your clinic immediately.
Recovery timelines are estimates. Recovery time after a Fraxel® laser treatment typically ranges from a few days to one week, but your skin’s response is unique. Listen to your body. If the skin feels irritated, simplify your routine. If it feels dry, moisturize more frequently. The goal is to support the biological process of renewal without interference.
Managing symptoms, complications, and when to call the clinician
You have your skincare routine set and your bathroom counter is stocked with gentle cleansers. Now we need to talk about what is actually happening to your face. The recovery process involves physical sensations that can range from annoying to alarming. Knowing the difference between a normal healing response and a complication is vital for your safety and your final results.
Managing Common Symptoms at Home
Most patients experience a predictable set of symptoms during the first 72 hours. These are signs that the laser has effectively triggered the body’s repair mechanisms. You do not need to suffer through them without help.
Swelling and Edema
Swelling is the most common immediate side effect. It usually peaks on the second day. You might look puffy, particularly around the eyes and cheeks. This fluid buildup is a natural inflammatory response to the thermal injury caused by the laser.
Strategy: Gravity is your friend here. Sleep with your head elevated on two pillows for the first three nights. This simple adjustment prevents fluid from pooling in the delicate under-eye area. Apply cold compresses or ice packs wrapped in a clean, lint-free cloth. Do this for 10 to 15 minutes every hour while awake during the first day. Do not apply ice directly to the skin. Direct freezing temperatures can damage the compromised barrier.
Heat and Pain
The treated area will feel hot. Many patients describe it as a severe sunburn that radiates heat for several hours after the procedure. This sensation typically subsides significantly by the next morning.
Strategy: A cool air fan directed at the face provides immediate relief. For pain management, over-the-counter analgesics are generally sufficient. Acetaminophen (Tylenol) is often preferred to reduce discomfort without increasing bleeding risk. If your clinician approves, non-steroidal anti-inflammatory drugs (NSAIDs) like Ibuprofen can help with both pain and swelling. Data shows that recovery timelines vary, but significant pain should not persist beyond the first 24 hours.
Pruritus (Itching)
As the “coffee grounds” (micro-epidermal necrotic debris) begin to form and the skin tightens, itching becomes the predominant symptom. This usually starts around day three or four. It is a positive sign of re-epithelialization and nerve ending recovery.
Strategy: Do not scratch. Scratching removes the protective crusts too early and leads to scarring. Oral antihistamines like diphenhydramine (Benadryl) at night or non-drowsy loratadine (Claritin) during the day can reduce the urge to scratch. Keeping the skin constantly moisturized with the occlusives mentioned in the previous chapter also soothes the itch. If the itching is unbearable, applying a cold compress offers temporary relief without breaking the skin.
Recognizing Complications and Action Triggers
While discomfort is normal, certain signs indicate that the healing process has derailed. You need to monitor your skin closely for these red flags. Prompt communication with your provider prevents minor issues from becoming permanent scars.
Signs of Infection
The skin barrier is temporarily compromised after Fraxel. This leaves you vulnerable to bacterial, viral, or fungal infections. Bacterial infections often present as increasing pain rather than decreasing pain after day two.
Call your clinician immediately if you see:
- Yellow or green purulent drainage (pus).
- Honey-colored crusting that looks different from the dry, brown coffee grounds.
- Spreading erythema (redness) that moves beyond the treated area.
- Fever greater than 100.4°F (38°C) or chills.
- Heat returning to the skin after it had previously cooled down.
HSV Reactivation
Herpes Simplex Virus (cold sores) reactivation is a serious complication. The laser heat can wake up the dormant virus even if you have not had a breakout in years. This can lead to widespread facial scarring if untreated.
Action Trigger: Watch for clusters of small, painful blisters or vesicles. They often appear around the mouth but can occur anywhere on the treated skin. A sensation of tingling or burning often precedes the blisters. Call the office the moment you suspect a cold sore.
Allergic Contact Dermatitis
Post-procedure skin is hypersensitive. Products you normally tolerate might cause a reaction now. This often looks like intense redness, swelling, and itching that corresponds exactly to where a product was applied.
Action Trigger: If you apply a topical antibiotic or moisturizer and feel immediate, intense burning or see a rash developing, wash it off gently with cool water and contact your provider.
Prolonged Erythema or Hyperpigmentation
Redness usually fades within a week or two. Pigmented spots darken before shedding, which is normal. However, new dark patches that appear after the peeling phase are a sign of Post-Inflammatory Hyperpigmentation (PIH).
Action Trigger: Contact your clinic if redness persists unchanged for more than four weeks or if you notice distinct brown patches forming on the new, pink skin.
Clinical Interventions
When you call your clinician with these symptoms, they have specific protocols to manage them. Understanding these interventions helps you know what to expect during an office visit or telemedicine call.
Antibiotics: If a bacterial infection is suspected, the doctor will prescribe oral antibiotics (such as cephalexin or doxycycline) or a prescription-grade topical antibiotic (like mupirocin). They may take a culture swab to identify the specific bacteria.
Antiviral Therapy: For HSV outbreaks, high-dose oral antivirals like valacyclovir (Valtrex) are started immediately. If you have a history of cold sores, you likely started these prophylactically, but the dosage may need adjustment if a breakthrough infection occurs.
Steroids: For severe allergic reactions or excessive inflammation that threatens to cause scarring, a provider might prescribe a short course of oral prednisone or a mild topical steroid. This is done cautiously to avoid impeding the healing process.
Pigment Mitigation: If PIH is developing, the clinic may recommend starting a tyrosinase inhibitor (like hydroquinone or non-hydroquinone alternatives) sooner than usual. They might also advise stricter sun avoidance.
Special Populations and Cautions
Certain factors change the risk profile and management of Fraxel recovery. Your biological background dictates how your skin responds to thermal injury.
Skin of Color
Patients with Fitzpatrick skin types IV-VI have a higher density of active melanocytes. The risk of hyperpigmentation is significantly elevated. For these patients, “normal” redness can quickly turn into lasting brown pigment. Prophylactic use of pigment inhibitors is often standard. Any sign of inflammation must be treated aggressively to prevent PIH.
History of Keloids
If you have a history of keloid or hypertrophic scarring, the inflammatory phase of healing requires careful monitoring. The neck and jawline are particularly susceptible areas. Your provider might use lower energy settings initially, but during recovery, you must watch for any raised, thickened areas that do not flatten out.
Immunosuppression
Patients on immunosuppressive medications or with compromised immune systems heal slower. The risk of infection is higher. The standard timeline for the “coffee grounds” to shed might extend from 7 days to 10 or 14 days. Patience is required. Do not force the peeling, as the skin underneath takes longer to mature.
Pregnancy and Breastfeeding
Fraxel is generally contraindicated during pregnancy. However, if you discover you are pregnant during the recovery phase, your options for symptom management change. Many oral antibiotics and antivirals are safe, but topical retinoids and hydroquinone for pigment control are not. You must consult your obstetrician before taking any medication for laser complications.
Final takeaways and practical recovery checklist
We have covered the technical side of those microscopic wounds and the medical management of the peeling process. Now it is time to condense everything into a usable strategy. When you are standing in front of the mirror on day three, looking at skin that resembles sandpaper, you do not need a biology lesson. You need a plan.
The success of a Fraxel treatment relies heavily on how you handle the days following the procedure. The laser does the damage, but your body does the repair. Your job is simply to create the perfect environment for that repair to happen without interference.
The Core Recovery Priorities
If you remember nothing else, remember these three rules. They are the non-negotiables for navigating the coffee grounds phase without compromising your investment.
1. Hydration is your barrier
The rough, bronzed skin on your face is essentially a biological dressing. It protects the fresh, raw tissue underneath. If this layer dries out too quickly, it can crack or peel prematurely, which increases the risk of scarring. You must keep the skin pliable. This does not mean drowning your face in heavy oils that might clog pores, but rather maintaining a constant shield of moisture using a bland, fragrance-free moisturizer or a doctor-recommended ointment.
2. Friction is the enemy
The “coffee grounds” (MENDs) must fall off on their own timeline. Any attempt to speed this up through scrubbing, rubbing with a towel, or picking with your fingernails can pull off the new skin before it is ready. This leads to raw spots, potential infection, and hyperpigmentation. Treat your face like a delicate silk fabric. Pat it dry; never rub.
3. The sun is off-limits
Your skin has temporarily lost its natural protection. UV exposure during the healing phase does not just cause sunburn; it triggers melanin production in the traumatized tissue. This leads to post-inflammatory hyperpigmentation, which is often the very thing patients are trying to treat with Fraxel in the first place.
Your Practical Recovery Checklist
Print this out or keep a screenshot on your phone. This checklist breaks down the recovery into manageable actions rather than vague advice.
Days 1-2: The Heat and Swelling Phase
- Cooling: Apply ice packs wrapped in a clean cloth for 10 minutes every hour if you feel heat or significant swelling. Do not apply ice directly to the skin.
- Sleeping: Sleep with your head elevated on two pillows. This uses gravity to help drain fluid and reduce morning puffiness, particularly around the eyes.
- Cleansing: Wash your face twice a day with cool water and a gentle, non-soap cleanser. Use only your fingertips.
- Topicals: Apply the prescribed ointment or moisturizer frequently. If your skin feels tight, it is time to reapply.
Days 3-5: The Bronzing and Peeling Phase
- Texture Management: The skin will feel like sandpaper. Do not use washcloths or exfoliating brushes. Continue gentle cleansing with fingertips only.
- Moisture: Switch from heavy ointments to a lighter, restorative moisturizer if the doctor permits, but ensure the skin never looks “dry.”
- Itch Control: Itching is a sign of healing, but scratching is forbidden. If the urge is strong, take an over-the-counter antihistamine or apply a cool compress.
- Sun Protection: If you must go near a window or outside, apply a broad-spectrum physical sunscreen (zinc oxide or titanium dioxide) of SPF 30 or higher. Chemical sunscreens may sting during this phase.
Days 6-7: The Reveal
- Residual Flaking: Most of the dark spots will have sloughed off. You might see some lingering flakes on the edges of the face or hairline. Let them be.
- Pinkness: The fresh skin will look pink and feel sensitive. This is normal and indicates increased blood flow for collagen remodeling.
- Makeup: You can usually reintroduce mineral makeup now to cover the pinkness, but ensure your brushes are clean to avoid introducing bacteria.
For a realistic look at how this timeline plays out visually, you can look at patient experiences regarding Fraxel laser skin treatment recovery, which often highlight that by day six, the texture significantly improves even if redness persists.
Reintroducing Skincare and Actives
One of the biggest mistakes patients make is rushing back to their anti-aging routine. Your new skin is permeable and highly reactive. Putting strong acids on it too soon can cause chemical burns or contact dermatitis.
Follow this stepwise reintroduction plan:
Step 1: The “Bland” Phase (Days 1-7)
Stick strictly to gentle cleanser, moisturizer, and physical sunscreen. No serums, no toners, no masks.
Step 2: The “Safe” Actives (Day 8-14)
Once the peeling is 100% complete and the skin no longer feels tender to the touch, you can reintroduce hyaluronic acid and stable Vitamin C serums (if they are non-irritating forms like tetrahexyldecyl ascorbate). Test a small area first.
Step 3: The Power Players (Day 14+)
Wait at least two full weeks before bringing back retinoids (Retin-A, retinol), glycolic acid, salicylic acid, or exfoliating scrubs. If your skin is still pink or sensitive at the two-week mark, wait longer. Listen to your skin, not the calendar.
Optimizing Long-Term Results
The peeling phase is just the beginning. The collagen stimulation initiated by the laser continues for months. To get the most out of the procedure, your long-term habits matter just as much as the immediate aftercare.
Strict Sun Avoidance
New collagen is incredibly susceptible to UV damage. If you go back to sunbathing or skipping sunscreen, you will undo the results rapidly. Make daily SPF 50 a permanent habit, regardless of the weather.
Maintenance Treatments
Fraxel is rarely a “one and done” solution, especially for pigmentation or acne scarring. Most clinical protocols suggest a series of treatments. You need to wait 2-3 weeks between treatments in a series, though many providers prefer waiting 4 to 6 weeks to allow the skin to fully recover and for the initial collagen production to become visible.
Topical Maintenance
Work with your clinician to establish a maintenance skincare routine. This often includes tyrosinase inhibitors (to prevent pigment from returning) and retinoids (to keep stimulating collagen) once the skin has fully healed.
By adhering to these guidelines, you move from simply “recovering” to actively enhancing your results. The coffee grounds phase is temporary and unsightly, but it is the necessary bridge to the smoother, clearer skin you signed up for. Respect the process, keep it simple, and let your body do the work.
References
- Fraxel Laser in Texas | Elite Dermatology & Plastic Surgery — Recovery time after a Fraxel® laser treatment typically ranges from a few days to one week, depending on the intensity of the treatment. You may experience mild …
- Fraxel Laser in London | Costs, Downtime & Results – Cranley Clinic — Downtime and Recovery ; Day 1: Redness and mild swelling (feels like sunburn) ; Days 2–3: Pigmented spots darken; gentle flaking begins ; Days 3–5: …
- Fraxel Laser – How Long Does It Take to See Improvement in a … — You need to wait 2-3 weeks between treatments. And, because it is milder than an ablative treatment, you need to wait several months to see results.
- Laser Skin Resurfacing Recovery Explained — For instance, data shows that having multiple sessions with lower-energy settings can mean an average downtime of just 4.3 days.
- What Is Recovery From Fraxel Treatment Like? — Some swelling, tenderness, and redness in the affected area is normal and should fade within a couple of weeks.
- Fraxel Laser Treatment and Effective Tips for Your Faster Recovery — By day five, your skin should be getting close to normal. Although you may still experience minor skin imperfections after reaching this point, …
- Fraxel Laser San Diego & Newport Beach | La Jolla Skin — Because of the self-renewing cycle of collagen production, your results will last and continue to improve for up to six months. It is possible to receive …
- Fraxel Laser Skin Treatment + Recovery – Deep Blue Med Spa — In less than a week my skin had almost entirely healed, and looked visibly brighter. The texture on day 6 felt better to the touch and my skin tone was more …
Legal Disclaimers & Brand Notices
The information provided in this article is for informational and educational purposes only and does not constitute professional medical advice, diagnosis, or treatment. Always seek the advice of a physician or other qualified health provider with any questions you may have regarding a medical condition or aesthetic procedure. Never disregard professional medical advice or delay in seeking it because of something you have read in this content.
All product names, logos, and brands are property of their respective owners. All company, product, and service names used in this article are for identification purposes only. Use of these names, trademarks, and brands, including but not limited to Botox® and Fraxel®, does not imply endorsement or affiliation.