Lip filler swelling is normal and follows predictable stages. This article walks you through a detailed day-by-day recovery timeline with photo guidance, practical aftercare tips, when to seek help, and how to document progress for yourself or a clinic. It ties lip-specific recommendations into broader aftercare principles used for non-invasive cosmetic procedures in the United States.
Immediate reaction and what to expect in the first 24 hours
The first few minutes after the needle leaves your lips are often a mix of relief and immediate scrutiny. You grab the hand mirror, and while the volume is instantly visible, so is the body’s reaction to the trauma. Understanding exactly what happens biologically and physically during these first 24 hours is the best way to avoid unnecessary panic.
Immediate Sensations and Visuals (0–4 Hours)
Right after the procedure, your lips will likely feel numb, especially if your provider used a topical anesthetic or if the filler product contained lidocaine. This numbness can last for one to two hours, making your lips feel heavy or “fat” regardless of the actual visual size.
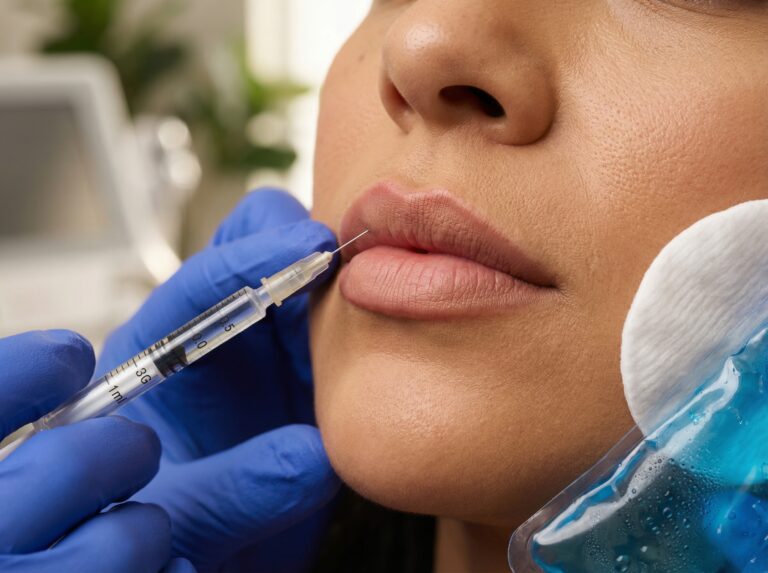
Visually, you will see immediate fullness. However, a significant portion of this initial volume is not the final result—it is a combination of the product itself and the tissue’s inflammatory response to the needle or cannula. You might notice pinpoint bleeding at the injection sites, which usually stops within minutes. Small red spots or “track marks” where the needle entered are standard.
Subjectively, patients often report a sensation of tightness or internal pressure. This is the filler taking up space within the tissue layers. A stinging or tingling sensation is also common as the anesthesia wears off.
The Physiology of Early Swelling
To manage your recovery, you need to understand why your lips are reacting this way. The swelling in the first 24 hours is driven by three main factors:
- Mechanical Trauma: Even with the most gentle technique, the needle or cannula disrupts tissue, causing a rush of blood and lymphatic fluid to the area to repair the “injury.”
- Osmotic Effect: Most fillers used in the US are made of Hyaluronic Acid (HA). HA is hydrophilic, meaning it binds to water. Once injected, it acts like a sponge, drawing water from the surrounding tissues. This is necessary for hydration and volume, but it causes an initial surge in size.
- Inflammatory Response: The body recognizes a foreign substance and increases blood flow to the area, leading to redness and heat.
The degree of this reaction varies. High-viscosity fillers (thicker gels used for structure) tend to swell less than thinner, more fluid fillers used for hydration, though this depends heavily on the specific brand technology. Deeper injections generally show less surface irregularity but can cause more deep-tissue aching.
Acute Care: The First 24 Hours
Your actions in the first day significantly influence the severity of bruising and the duration of swelling. The goal is to minimize blood flow to the area without freezing the filler or damaging the skin.
Cold Compress Protocol
Ice is your best friend, but it must be used correctly. Apply a cold compress or an ice pack wrapped in a thin cloth to the lips for 10 to 15 minutes, then remove it for 10 to 15 minutes. Do not apply ice directly to the skin, as the numbing agents might prevent you from feeling frostbite. Repeat this cycle for the first few hours.
Positioning and Sleep
Gravity affects fluid accumulation. For the first night, sleep with your head elevated on two pillows. Keeping your head above your heart helps drain lymphatic fluid away from the face. Sleeping on your face is strictly off-limits; the pressure can displace the product before it settles.
Lifestyle Adjustments
Avoid vigorous exercise for at least 24 hours. An elevated heart rate increases blood pressure, which can worsen swelling and increase the risk of bruising. You should also avoid alcohol and high-sodium foods, as both contribute to systemic dehydration and local fluid retention.
Red Flags vs. Normal Side Effects
While swelling and tenderness are expected, you must be able to distinguish between a normal recovery and a medical emergency.
Normal symptoms include:
- Tenderness to the touch.
- Firmness or “lumps” that feel like small peas (usually resolving in days).
- Asymmetry (one side swelling more than the other).
- Mild bruising that is blue or purple.
When to Call the Injector Immediately
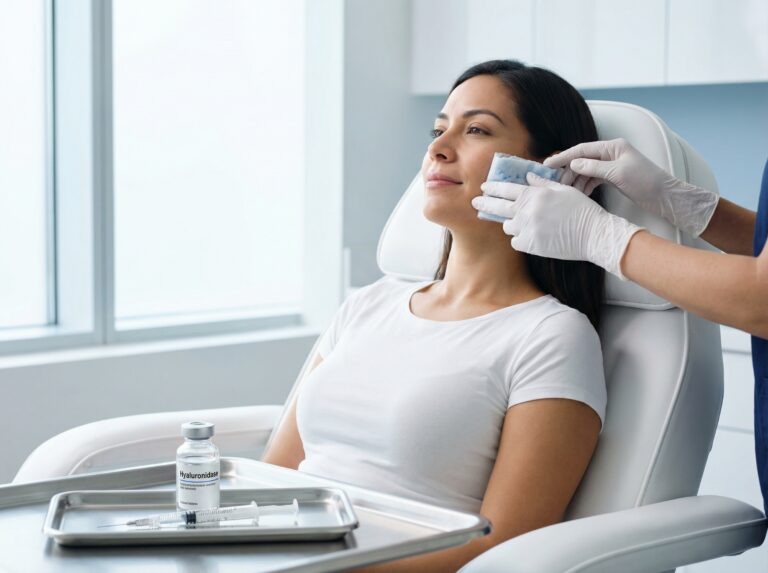
If you experience severe pain that is out of proportion to the procedure (often described as a deep, throbbing ache), or if you see a change in skin color that looks pale, white, or mottled (like a net-like pattern), contact your clinician instantly. These can be signs of a vascular occlusion, where filler blocks a blood vessel. This is rare but requires urgent treatment with hyaluronidase to dissolve the filler and restore blood flow.
Day 1: Expect immediate swelling and tenderness, but severe pain is never part of the normal healing process.
Managing Expectations
It is vital to document your baseline. Take a photo in good lighting immediately after the appointment. This serves as your reference point.
Clinicians should be transparent: “What you see tonight is not your final result. You will likely look uneven and feel bumpy. This is the ‘freak out’ phase. Do not judge the symmetry or size until the swelling resolves.”
Remember that Hyaluronic Acid fillers are reversible. If, after the swelling settles (usually 2 weeks), you are unhappy with the outcome, the product can be dissolved. However, in these first 24 hours, patience and adherence to aftercare protocols are the only things required of you.
Day-by-day recovery timeline with expected appearance and sample photo captions
Recovery is rarely a straight line. You might feel fine leaving the clinic and then wake up the next morning looking completely different. This timeline breaks down exactly what happens to your face day by day so you know when to be patient and when to call your provider.
Immediate Post-Procedure (1 to 4 Hours)
The numbing cream is wearing off. You will likely feel your lips getting bigger by the minute. This is not just the filler volume. It is the trauma from the needle and your body rushing fluid to the area to protect it. The shape often looks distorted right now.
- Swelling Level: Rapid increase. You are seeing about 40% to 60% of your potential peak swelling.
- Bruising: Pinpoint red spots or needle marks are visible. Darker bruising may start forming if a vessel was nicked.
- Firmness: The tissue feels tight and hard due to the volume and fluid pressure.
- Asymmetry: Very common. One side often swells faster than the other.
- Visual Expectation: The lips look glossy and tight. The upper lip often swells more than the lower lip regardless of where the injector placed the most product.
Photo Caption Ideas:
- Immediate post-procedure. Uneven swelling is normal. We assess symmetry after 2 weeks.
- 1 hour post-injection. Redness and tightness are present. Ice applied intermittently.
Day 1 (The First 24 Hours)
This is often the “panic morning.” You wake up and the lips feel heavy. Hyaluronic acid is hydrophilic. It pulls in water from surrounding tissues overnight. This creates significant expansion. Do not judge the shape yet.
- Swelling Level: 60% to 90% of peak. It increases throughout the day.
- Bruising: Red spots turn purple or blue. This is more likely if you take blood thinners or fish oil.
- Firmness: Lips feel like firm sausages. They might feel stiff when you try to talk or drink.
- Asymmetry: High. It is rarely the filler placement. It is usually uneven fluid retention.
- Visual Expectation: The vermillion border (the lip edge) looks blurred. The cupid’s bow might disappear temporarily under the puffiness.
Photo Caption Ideas:
- 24 hours after 1.0 mL HA lip filler. Mild swelling and pinpoint bruising. Expected peak is day 2 or 3.
- Day 1 recovery. Lips feel firm and sensitive. Keeping head elevated to help drainage.
Days 2 to 3 (The Peak)
This is the climax of the inflammatory response. Most patients say this is the hardest stage mentally. You might look “overfilled” or think the projection is too far forward. This is temporary water weight.
- Swelling Level: 100% peak. This is the biggest they will look.
- Bruising: Colors are darkest now. You might see deep purple or black if a hematoma formed.
- Firmness: Very hard. Small lumps or bumps are palpable. This is usually fluid pockets or hematomas rather than filler nodules.
- Asymmetry: Still very noticeable. Do not massage unless your provider specifically told you to do so.
- Visual Expectation: The “duck lip” look is common here due to projection swelling. Small hematomas might be visible on the mucosa.
Photo Caption Ideas:
- Peak swelling Day 2. Puffy and uneven appearance is expected. Continuing cold compresses.
- 48 hours post-treatment. Bruising is blooming. Swelling is at maximum capacity.
Days 4 to 7 (The Turnaround)
The lymphatic system starts draining the excess fluid. The scary size decreases rapidly. You begin to see the actual shape the injector intended. The stiffness fades.
- Swelling Level: Decreasing by 30% to 60% from the peak.
- Bruising: Colors shift to yellow or green. Makeup can easily cover this now.
- Firmness: Softening significantly. You might feel specific firm spots where the product was deposited.
- Asymmetry: Improving daily. The lips start to look like sisters again rather than strangers.
- Visual Expectation: The definition returns to the lip border. The projection drops to a natural level.
Photo Caption Ideas:
- Day 5 update. Swelling has subsided significantly. Bruising is fading to yellow.
- One week post-filler. Contour is emerging. Lips feel softer and move naturally.
Day 10 to 14 (Near-Settling)
By the two-week mark, the “social downtime” is over. Most people will not know you had work done recently. They will just think your lips look good. This is the standard time for a follow-up appointment in the US.
- Swelling Level: Residual fluid only. You are close to the baseline result.
- Bruising: Usually completely gone.
- Firmness: Integrated. The filler feels like part of your tissue.
- Asymmetry: Resolved. If asymmetry persists here, it might be a placement issue to address at your follow-up.
- Visual Expectation: Defined vermillion border. Natural texture returns.
Photo Caption Ideas:
- Two weeks healed. Shape is defined and symmetry is restored.
- 14 days post-injection. Final volume is settling. No residual bruising.
Weeks 3 to 4 (Integration)
The filler fully integrates with the tissue. Hyaluronic acid stabilizes its water-binding process. The lips feel soft. You can restart vigorous exercise or facials without worrying about increasing swelling.
- Swelling Level: Zero active swelling.
- Firmness: Soft and pliable.
- Visual Expectation: This is your result. It often looks slightly smaller than it did at week two.
Final Settling at 6 to 8 Weeks
Complete tissue healing takes time. While the visual result is ready at 4 weeks, the tissue inside is fully healed by 6 to 8 weeks. This is the safest time to add more volume if you want to build size. Layering filler too soon can lead to migration or stiffness.
Variables That Slow Resolution
Your lifestyle choices directly impact how fast the timeline moves. Certain factors keep fluid trapped in the face longer.
- High Sodium Intake: Eating salty foods like sushi or pizza in the first 3 days causes systemic water retention. This exacerbates the hydrophilic nature of the filler.
- Vigorous Exercise: Raising your heart rate and blood pressure too early pushes more blood to the face. This increases inflammation and throbbing.
- Blood Thinners and Alcohol: These increase bruising. More blood under the skin means more inflammation and a longer recovery time to clear the waste products.
- Sensitive Skin: Patients with reactive skin types or autoimmune conditions often hold fluid for 2 to 3 extra days.
Delayed Swelling and Late-Onset Concerns
Sometimes swelling appears long after the recovery period. This is not part of the normal healing timeline. It requires medical attention.
| Condition | Timeline | Signs |
|---|---|---|
| Inflammatory Nodules | 2 weeks to months later | Hard, painful lumps that feel active or hot. |
| Delayed Allergic Reaction | Days to weeks later | Sudden generalized puffiness, redness, or itching. |
| Biofilm (Infection) | Any time | Recurrent swelling in one spot, redness, or low-grade fever. |
| Product Migration | Months later | A “shelf” or shadow above the upper lip. The border looks ill-defined. |
If you experience sudden swelling after the two-week mark, do not ice it and wait. Contact your injector immediately. Late-onset edema is treatable but needs a professional diagnosis to rule out infection.
Evidence based aftercare strategies to minimize swelling and bruising
You have seen the daily timeline and know that swelling is an inevitable part of the process. The trauma from the needle and the hydrophilic nature of hyaluronic acid make some degree of inflammation unavoidable. However, the severity of that reaction often depends on how you treat your body before and after the appointment. Evidence-based aftercare focuses on controlling blood flow and reducing inflammation without interfering with the filler integration.
Pre-Appointment Preparation
Your recovery actually begins two to three days before you enter the clinic. The goal is to minimize bleeding. Bruising and swelling often go hand in hand. When you bleed more during the injection, the surrounding tissue reacts with more inflammation. Avoid alcohol for at least 48 to 72 hours prior to your treatment. Alcohol acts as a vasodilator. It relaxes blood vessels and increases the risk of bruising.
Review your medication list. Non-steroidal anti-inflammatory drugs (NSAIDs) like aspirin, ibuprofen, and naproxen inhibit platelet function. This makes it harder for your blood to clot. If your primary care physician agrees it is safe, stop taking these 3 to 7 days before your appointment. You should also look at your supplements. Vitamin E, fish oil, Ginkgo Biloba, and garlic supplements can increase bleeding time. Ask your injector if you should pause these. Schedule any elective dental work for at least two weeks before or after your appointment. Dental procedures release bacteria into the bloodstream, creating a small but unnecessary risk of infection or biofilm formation around your new filler.
Immediate and Ongoing Measures
The first few hours are critical. Your injector will likely apply ice immediately after the procedure. Continue this protocol at home. Use a cold compress or an ice pack wrapped in sterile gauze. Apply it for 10 to 15 minutes and then remove it for 10 to 15 minutes. Do not leave ice on continuously. You risk thermal injury to the skin if you freeze the tissue. Cold constricts the capillaries and reduces the fluid rush to the lips.
Pain management requires careful selection of medication. Acetaminophen is the preferred choice for the first 48 hours. It reduces pain without thinning the blood. Avoid ibuprofen or aspirin during this initial healing phase unless your doctor strictly requires it for another condition. These drugs can exacerbate bruising even after the injection is finished.
Topical treatments can support the healing process. Many practitioners in the USA recommend Arnica Montana. While clinical evidence varies, anecdotal data suggests it helps clear bruising faster. Bromelain is another option. This enzyme derived from pineapples has anti-inflammatory properties. You can take these as supplements or apply them topically. However, do not apply non-sterile creams to your lips until the injection points have sealed. This usually takes 24 hours.
What to Avoid
Heat is detrimental to your recovery in the first three days. High temperatures cause blood vessels to expand. This leads to more swelling. Avoid hot showers, saunas, steam rooms, and hot yoga for 72 hours. Keep your face cool.
Exercise increases your heart rate and blood pressure. This pushes more fluid into the facial tissues. Skip the gym and intense workouts for 24 to 72 hours. A light walk is acceptable. Do not massage your lips. You might feel lumps or firmness. This is normal. Massaging the area can displace the product before it settles. Only massage your lips if your injector specifically shows you how and tells you to do so.
Hygiene is paramount. Do not wear makeup on your lips or the surrounding skin for at least 24 hours. You need to keep the injection sites sterile to prevent infection. When you resume your skincare routine, be gentle. Avoid retinoids, glycolic acid, or aggressive exfoliants for three days. Your skin barrier is compromised and needs time to recover.
Sleep and Lifestyle Adjustments
Gravity influences where fluid collects. Sleep with your head elevated on two pillows for the first few nights. This encourages lymphatic drainage away from the face. Sleeping flat allows fluid to pool in the lips and results in significant morning swelling.
Your diet plays a role too. Sodium causes water retention. Hyaluronic acid fillers already attract water. A high-sodium diet will compound this effect. Eat fresh, whole foods and avoid processed salty snacks for a few days. Hydration is important but get it from water rather than sugary or alcoholic drinks.
Home Supply Checklist
Preparation prevents panic. Have these items ready at home so you do not need to go to the store with swollen lips.
- Ice packs or small bags of frozen peas
- Sterile gauze or clean washcloths
- Acetaminophen (Tylenol)
- Arnica gel or tablets (if approved by your provider)
- Fresh pillowcases
- Gentle, fragrance-free lip balm (for use after 24 hours)
Follow-Up and Documentation
The standard of care in the USA involves a follow-up assessment or touch-up appointment at the two-week mark. Do not judge your results before then. Asymmetry is common in the first week due to uneven swelling. Lip filler swelling stages vary by individual. Document your recovery with daily photos. This record is vital. It helps you see the gradual reduction in size and provides a baseline for your clinician if you suspect something is wrong.
How to take useful medical photos:
- Lighting: Use natural, indirect light. Face a window. Do not use bathroom downlighting, which casts shadows.
- Angle: Hold the phone level with your eyes. Take one photo from the front, one from a 45-degree angle (left and right), and one profile (side view).
- Consistency: Try to use the same location and lighting each day.
- Timing: Take photos at the same time daily, preferably in the morning before makeup.
If swelling worsens significantly after day four rather than improving, your photo log will help your provider assess the situation quickly.
Red flags complications and how to respond quickly
Most patients heal without a single issue, but knowing the difference between normal recovery and a medical emergency is critical. While the previous section covered standard swelling management, this part focuses on identifying complications that require immediate professional intervention. You need to know exactly when to stop icing and start dialing.
Vascular Occlusion: The Most Urgent Red Flag
Vascular occlusion (VO) happens when filler accidentally enters a blood vessel or compresses it, cutting off blood supply to the tissue. This is a time-sensitive emergency. If left untreated, it can lead to tissue necrosis (death) and scarring.
Signs to watch for:
- Intense Pain: Discomfort that is severe, throbbing, or disproportionate to the procedure. Note that some fillers contain lidocaine, so pain might be delayed by an hour or two.
- Blanching: The skin turns white or pale and does not return to pink when pressed.
- Livedo Reticularis: A mottled, fishnet-like pattern of discoloration (purple or blue) appearing on the skin, often extending toward the nose or forehead.
- Coolness: The affected area feels colder than the surrounding skin.
Immediate Response Protocol:
If you suspect VO, time is tissue. Do not wait until the next morning.
- Contact the Injector Immediately: Call their emergency line. State clearly: “I suspect a vascular occlusion.”
- Apply Warm Compresses: Unlike normal swelling where we use ice, heat helps dilate vessels and encourage blood flow.
- Massage (Only if Instructed): Vigorous massage can sometimes help dislodge a blockage, but only do this if your clinician guides you.
- Urgent Dissolving: The gold standard treatment is the immediate injection of high doses of hyaluronidase. This enzyme breaks down hyaluronic acid fillers instantly.
Acute Infection
Infections can appear a few days after the procedure. While mild redness is normal on day one, spreading redness later in the week is not.
Symptoms:
- Increasing pain or throbbing after 48 hours.
- Skin that feels hot to the touch.
- Spreading erythema (redness) moving away from the lips.
- Fever (over 100.4°F) or chills.
- Pus or visible discharge from injection points.
Response Protocol:
Do not try to treat this with home remedies. You need a prescription. Contact your clinic for an assessment. They will likely prescribe a course of oral antibiotics. If an abscess has formed, it may need to be drained. In rare cases, the filler must be dissolved to clear the infection completely.
Allergic Reactions
True allergies to hyaluronic acid are rare, but reactions to the lidocaine in the syringe or the cleansing agents used can occur.
Signs:
- Urticaria: Hives or itchy welts on the face or body.
- Angioedema: Massive swelling that extends well beyond the lips (e.g., eyes swelling shut).
- Systemic Symptoms: Difficulty breathing, wheezing, or throat tightness.
Response Protocol:
For mild itching or hives, an over-the-counter antihistamine may help, but you should still notify your provider. If you experience difficulty breathing or throat tightness, this is anaphylaxis. Call 911 or go to the Emergency Room immediately. Do not drive yourself.
Hematoma vs. Bruising
A bruise is flat and colorful. A hematoma is a collection of blood outside the blood vessels that forms a firm, painful lump.
Signs:
- A large, expanding, firm mass.
- Dark discoloration that appears rapidly.
- Tenderness that persists or worsens.
Response Protocol:
Small hematomas often resolve on their own, but large ones may need to be drained by a clinician to prevent infection or permanent staining of the skin. Contact your provider if a bruise seems to be growing or hardening.
Nodules and Lumps
Lumps felt during the first two weeks are often just swelling or firm filler that hasn’t integrated yet. However, persistent nodules require attention.
- Inflammatory Nodules: Red, tender, and appear weeks later. These may be a delayed immune response or low-grade infection.
- Non-Inflammatory Nodules: Hard lumps that don’t hurt. usually caused by filler placement technique.
When to Go to the ER vs. The Clinic
Knowing where to go saves time. Most ER doctors are not trained to dissolve lip filler, but they are equipped to save your life during a systemic reaction.
| Condition | Where to Go | Why |
| Vascular Occlusion (White/Purple skin, Pain) | Treating Clinic / Specialist | Requires Hyaluronidase immediately. ERs rarely stock this for cosmetic reversal. |
| Anaphylaxis (Can’t breathe, tongue swelling) | Emergency Room (911) | Life-threatening airway obstruction requires epinephrine and advanced monitoring. |
| Vision Changes (Blindness, blurry vision) | Emergency Room (Stroke Center) | Immediate specialized care is needed to attempt to save vision (rare but serious). |
| Infection (Fever, pus, heat) | Treating Clinic | Requires antibiotics and potential draining/dissolving by the aesthetic provider. |
Making the Call: What to Have Ready
When you call your injector or an emergency line, clear communication speeds up your care. Have the following information written down or memorized:
- Time of Injection: Exact date and time.
- Product Used: Brand and specific product name (e.g., Juvederm Ultra, Restylane Kysse) and the volume injected (e.g., 1.0 mL).
- Current Photos: Take clear photos in natural lighting. Capture the front view and 45-degree angles. Send these immediately if the clinic accepts text or email.
- Symptom Timeline: When did the pain/color change start? Is it getting worse?
Documentation is vital for your medical record. If you visit an ER or a different provider, bring your before photos and any records from your original appointment.
Always verify that your injector has emergency protocols in place before you even sit in the chair. A trained clinician in the USA should have a “crash kit” containing hyaluronidase and emergency medications. If you are unable to reach your original injector during a suspected occlusion, look for a local “complications management” specialist or a board-certified dermatologist or plastic surgeon immediately.
Lip Filler Swelling Stages: A Complete Guide – MySkyn Clinic offers visual references that can help you distinguish between normal heavy swelling and the warning signs discussed here.
Frequently Asked Questions
You’ve made it past the procedure and the immediate safety checks. Now you are back home, looking in the mirror, and the real questions start. It is completely normal to feel a mix of excitement and anxiety during the first week. Your lips are going to change shape, size, and color almost hourly for the first few days.
Below are the honest, evidence-based answers to the questions patients ask most frequently once the numbness wears off.
Can fillers be dissolved?
Yes, but only if they are made of hyaluronic acid (HA). Products like Juvéderm, Restylane, and Versa can be dissolved. Permanent fillers (like silicone) cannot be dissolved this way. Knowing you have an “exit strategy” often helps with recovery anxiety.
What is hyaluronidase and when is it used?
Hyaluronidase is an enzyme that breaks down hyaluronic acid. It is used in emergencies (like the vascular occlusions discussed previously) to dissolve filler instantly. It is also used for aesthetic corrections if the filler was placed incorrectly or migrated. It works within 24 to 48 hours, though it can cause temporary swelling itself.
Will swelling affect how much filler I need?
Absolutely. Swelling distorts the reality of your volume. During the first week, your lips might look 30-50% larger than the final result. This is why we never do “top-ups” or touch-ups until at least 4 weeks have passed. Adding more filler while you are still swollen is a recipe for overfilled, unnatural lips.
What if only one side is swollen?
Asymmetry is the number one panic trigger for patients in the first week. It is extremely common for one side of the lip to swell more than the other due to sleeping positions or slight differences in injection depth. We call this “uneven settling.”
Action: Do not massage it unless instructed. Wait the full 14 days. If it is still uneven after two weeks, your injector can correct it.
Is there anything that reduces long-term swelling?
Yes. Hydration is key. Drink 2-3 liters of water daily. Also, keep your sodium intake low (under 1500mg) for the first 3 days. Salt causes fluid retention, which will make your lips look puffier and feel tighter. Sleeping with your head elevated on two pillows for the first three nights helps drain fluid away from the face.
For a visual reference on what constitutes normal versus abnormal swelling, you can look at verified Lip Filler Swelling Stages Photos to compare your progress against typical recovery patterns.
If you are ever in doubt—if something feels “wrong” rather than just uncomfortable—err on the side of caution and contact your provider. It is always better to have a five-minute reassurance call than to ignore a developing issue.
Practical takeaways and final thoughts
Getting lip fillers involves a psychological journey just as much as a physical one. You leave the clinic feeling excited, but that excitement often turns to anxiety when the swelling hits its peak forty-eight hours later. Understanding the difference between a normal inflammatory response and a complication is the most important part of your aftercare.
Patient Checklist: The First 14 Days
You can actively influence your healing speed by following a strict routine. This checklist ensures you are doing everything possible to minimize fluid retention and prevent complications.
Days 1 to 3
- Sleep on your back with two pillows to keep your head above your heart.
- Drink at least 64 ounces of water daily to help your body heal.
- Avoid alcohol completely as it thins the blood and worsens bruising.
- Skip the gym. intense exercise increases heart rate and swelling.
- Take acetaminophen for pain if needed but avoid ibuprofen or aspirin.
- Take a photo in natural light each morning to track the trend.
Days 4 to 14
- Switch from ice to warm compresses if bruising persists.
- Apply a gentle, non-irritating lip balm to prevent chapping.
- Stop assessing symmetry in the mirror every hour.
- Wait until day 14 before deciding if you need a touch-up.
- Contact your clinic if you feel any hard nodules that do not soften.
Clinic Protocol for Patient Counseling
For practitioners, clear communication prevents panic calls. Clinics should standardize their patient education to manage expectations before the needle even touches the skin.
- Pre-Visit: Instruct patients to avoid blood thinners and alcohol for 3 to 7 days prior to the appointment.
- Documentation: Take high-quality baseline photos from front and profile angles before injection.
- Immediate Aftercare: Provide a written timeline of swelling stages so patients know Day 2 will be the hardest.
- Safety Net: Ensure the patient has an emergency contact number for after-hours concerns regarding vascular health.
- Follow-Up: Schedule a tentative two-week review to assess the final outcome and address any lingering asymmetry.
Final Thoughts on Recovery
The journey to your final result requires patience. It is completely normal to question your decision on the second day when swelling is at its worst. Trust the process and the timeline. Your body is healing exactly as it should in ninety-five percent of cases. The swelling will subside, the bruising will fade, and the final contour will emerge. Keep your aftercare routine simple, stay observant, and maintain open communication with your provider. You have a safety net in place, and knowing these stages ensures you reach your aesthetic goals safely.
Sources
- Lip Filler Swelling Stages: A Complete Guide – MySkyn Clinic — Lip Filler Swelling Stages Photos. If you want a clearer picture, here is a photo of lip filler swelling stages for your better understanding.
- Lip Filler Swelling Stages | Bruising Lip Injections – Dr. Majid Shah — Day 1: Expect immediate swelling and tenderness. Day 2: Peak swelling — lips may look uneven or overly full. Days 3–4: Swelling starts to go down, …
- Lip Filler Swelling Stages: What To Expect Day By Day – Dr. Gandolfi — The first 24 hours after lip filler injections are marked by noticeable swelling. The lips may appear significantly fuller than expected, and slight asymmetry …
- Lip Filler Swelling Stages | Central Texas Dermatology — Days 2-4: MORE swelling! You'll likely be the most swollen during Day 2 and Day 3 of the lip filler healing journey. The morning after lip …
- Lip Filler Results: What To Expect Day by Day – Skin by Lovely — Day 1: The Initial Hours After Treatment · Day 2–3: Peak Swelling Period · Day 4–5: Swelling Begins To Subside · Day 6–7: Near Normal Appearance.
- Lip Filler Swelling Stages: A Week-By-Week Guide — Let's dive into a detailed weekly timeline and guide on lip filler swelling stages and how to manage and minimize swelling after getting lip fillers.
- Lip Filler Healing Process Day-by-Day: A Timeline of What to Expect — The following lip filler healing process day-by-day guide is what the average person can expect to experience.
- Lip Filler Swelling Stages & Healing Timeline – The Pur Health — Lip Filler Swelling Stages: Day-by-Day Timeline · Day 1 – Immediately After Injection · Day 2 – Peak Swelling · Day 3–4 – Swelling Starts to Settle · Day 5–7 – …
- Navigating the Lip Filler Swelling Stages: A Day by Day Guide — Day 1: Immediately after lip filler … It's not uncommon to experience some redness, swelling, and bruising after lip fillers, especially in the target areas.