Cheek filler injections are common for restoring midface volume, but they cause predictable swelling and require focused aftercare. This article lays out recovery timelines, practical steps to control bruising and swelling, and proven sleeping-position strategies to protect your cheeks and results. It also places cheek filler recovery within broader aftercare guidance for non-invasive cosmetic treatments.
What to Expect After Cheek Fillers: Recovery Timeline and Common Reactions
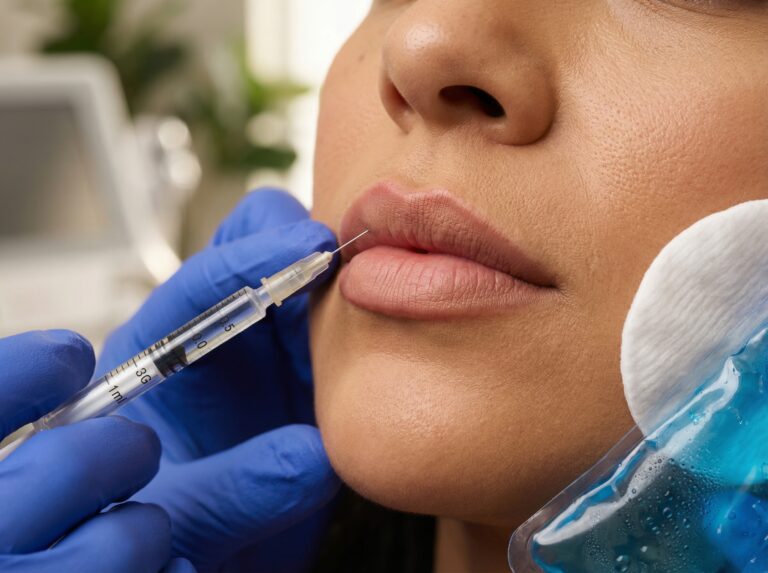
Walking out of the clinic after cheek filler injections usually feels different than patients anticipate. The immediate sensation is often a feeling of pressure or heaviness in the mid-face rather than acute pain. This occurs because the filler product physically occupies space deep within the tissue compartments. Lidocaine mixed into most modern hyaluronic acid (HA) fillers provides numbness that lasts for an hour or two post-procedure. Once this wears off, a dull ache or tenderness typically sets in.
The First 24 Hours: Inflammation and Volume
The body recognizes the injection process as a micro-trauma. Even with a skilled injector using a cannula, the movement of the instrument through tissue triggers an inflammatory response. You will likely see immediate volume, but a significant portion of this initial fullness is actually fluid retention and inflammation rather than the product itself.
Redness at the injection points is standard. It usually fades within a few hours. You might feel firm bumps or “boluses” where the product was placed deep on the bone. This is intentional structural support and not a mistake. These areas feel hard to the touch initially but soften over time.
The Peak Swelling Phase: 24 to 72 Hours
The most psychological distress usually happens between day two and day three. This is when swelling reaches its maximum point. The cheeks may look uneven, overly high, or distorted. This is not the final result.
Hydrophilic fillers attract water. This means they pull moisture from surrounding tissues, which temporarily expands the treated area. It is common to wake up on the second day looking puffier than when you went to bed. Sleeping flat exacerbates this fluid accumulation.
Typical reactions during this window include:
- Asymmetry: One side often swells more than the other due to differences in lymphatic drainage or slight variations in injection trauma.
- Stiffness: Smiling or laughing might feel tight or restricted.
- Tenderness: The area may feel bruised even if no discoloration is visible on the surface.
Dermal filler recovery is quick generally speaking, but this specific 72-hour window requires patience. Most acute swelling begins to subside after day three.
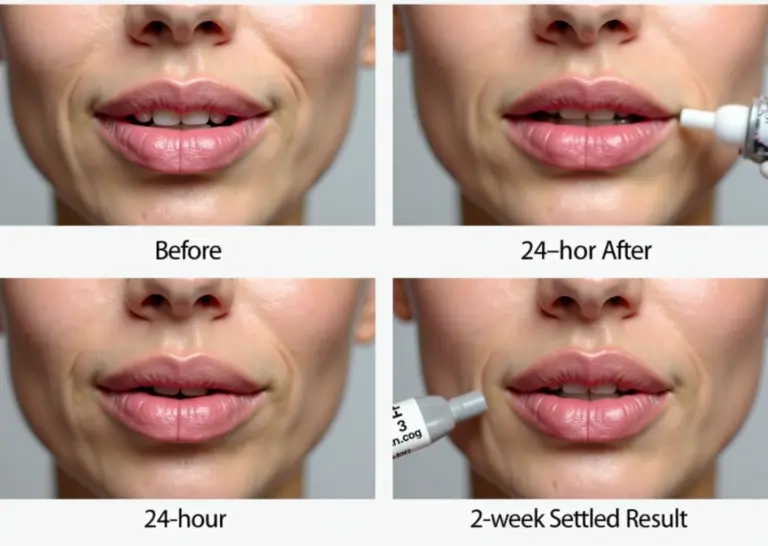
The Settling Period: 1 to 2 Weeks
By the end of the first week, the “chipmunk” appearance usually resolves. The filler begins to integrate with the cheek tissue. The sharp projection seen in the first few days softens into a more natural contour.
Bruising follows a specific color shift. It starts as red or purple, shifts to blue or black, and fades to yellow or green before disappearing. Deep hematomas may take up to two weeks to fully clear. Patients taking blood thinners, fish oil, or Vitamin E often experience more significant and longer-lasting bruising.
At the two-week mark, the result is close to accurate, but it is still not the final version. Minor lumps may still be palpable but should not be visible.
Long-Term Integration: 4 to 12 Weeks
Complete tissue integration takes time. Hyaluronic acid fillers continue to settle and hydrate for several weeks. Biostimulatory fillers like calcium hydroxylapatite or poly-L-lactic acid (Sculptra) work differently and rely on collagen production, meaning the results evolve over months.
For HA fillers, the final contour is typically evident between 4 and 12 weeks. The tissue feels soft again, and the filler moves naturally with facial expressions. Any residual firmness usually resolves by this stage without intervention.
Note on Biostimulators: If you received a biostimulatory filler, your aftercare may differ significantly. These are often injected as a liquid suspension, causing immediate fullness that dissipates quickly, leaving you looking like “nothing happened” until collagen builds weeks later. Providers often prescribe the “5-5-5” rule for these specific products: massage the area 5 times a day, for 5 minutes, for 5 days. This is the opposite of the advice for standard HA fillers, so always confirm your product type.
Why Recovery Varies
No two patients heal at the exact same speed. Several factors influence the timeline.
Filler Type and Depth
Thicker fillers used for cheekbone projection (like Juvéderm Voluma or Restylane Lyft) are placed deep on the periosteum. These tend to cause more deep-tissue soreness but less superficial bruising compared to softer fillers placed more superficially. Restylane cheek filler results are robust but pliable, often drawing more water initially than non-HA alternatives.
Patient Physiology
Older patients with thinner skin and slower cellular turnover often bruise more easily and retain swelling longer than younger patients with robust skin elasticity. Additionally, patients with autoimmune conditions (such as Hashimoto’s or Lupus) may have a hyper-reactive immune system. This can sometimes lead to more profound swelling or a slightly higher risk of delayed inflammatory nodules months later.
Injection Technique
Needle injections often cause more bruising due to multiple entry points. Cannula techniques typically result in less bruising but can cause more generalized swelling due to the blunt instrument moving through the tissue.
Serious Complications to Watch For
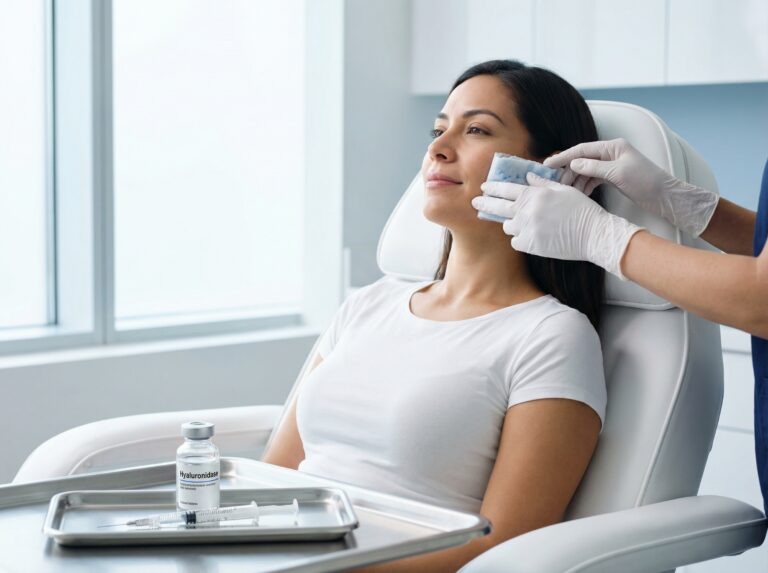
While mild side effects are expected, certain signs indicate a medical emergency. Vascular occlusion occurs when filler accidentally enters or compresses a blood vessel. This stops blood flow to the skin and requires immediate reversal with an enzyme called hyaluronidase.
Contact your provider immediately if you notice:
- Blanching: The skin turns pale, white, or dusky gray and does not return to a normal pink color when pressed.
- Mottling: A net-like red or purple pattern appears on the skin (livedo reticularis), often spreading away from the injection site.
- Severe Pain: Pain that is disproportionate to a needle poke, often described as burning or throbbing, that increases rather than decreases.
- Coolness: The skin feels cold to the touch compared to the surrounding area.
These symptoms can appear immediately or develop over the first 24 hours. They are not part of the normal healing process. Rapid treatment prevents permanent tissue damage.
Most patients navigate the recovery process with only minor social downtime. Understanding that the face you see in the mirror on day two is not the face you will keep is the most important part of the mental recovery. Following the specific aftercare protocols provided by your clinician ensures the tissue heals as intended.
Practical Aftercare for Minimizing Swelling and Bruising
The first two weeks after cheek augmentation require a specific approach to daily care. Your goal is to support the tissue as it integrates the hyaluronic acid or biostimulatory filler while minimizing the inflammatory response. This period is less about waiting and more about active management of the injection site.
Temperature Therapy Protocol
Temperature control is the most effective way to manage the initial physical trauma from the needle or cannula.
The First 48 Hours: Cold Therapy
Vascular constriction is necessary immediately following the procedure. Cold reduces blood flow to the area and limits the leakage of blood into surrounding tissues.
- Apply a cold compress or ice pack wrapped in a thin cloth to the cheek area.
- Hold the compress in place for 10 to 15 minutes.
- Remove the cold source for 10 to 15 minutes to prevent frostbite or skin damage.
- Repeat this cycle as often as possible during waking hours for the first day.
- Do not apply ice directly to the skin.
- Do not apply heavy pressure while icing.
Days 3 to 7: Transition to Warmth
Once the initial inflammatory phase subsides, usually after 48 to 72 hours, you can switch to warm compresses if bruising is present. Warmth dilates capillaries and increases circulation. This helps the body reabsorb trapped blood cells that cause discoloration. Apply a warm washcloth for 10 minutes, three times a day. If no bruising is visible, you can skip this step and simply discontinue icing.
Pain Management and Medications
Discomfort is typically mild, but how you manage it affects your bruising risk. Acetaminophen (Tylenol) is the safest option for pain relief. It reduces pain without affecting blood clotting mechanisms.
Avoid non-steroidal anti-inflammatory drugs (NSAIDs) for at least 3 to 5 days post-procedure unless a physician advises otherwise. This includes Ibuprofen (Advil, Motrin), Aspirin, and Naproxen (Aleve). These medications inhibit platelet function and can restart or worsen bleeding at the injection points.
Supplements often fly under the radar but can be potent blood thinners. Pause consumption of fish oil, excessive Vitamin E, gingko biloba, and garlic supplements for the first week. If you are on prescribed anticoagulants, do not alter your dosage without explicit clearance from your prescribing doctor.
Topical Treatments for Bruising
Topical agents can accelerate the clearance of bruises, though they are not miracle cures.
Arnica Montana and Bromelain
Arnica is a homeopathic remedy widely used to reduce swelling and bruising. You can apply medical-grade Arnica gel to the treated area three times a day. Bromelain, an enzyme found in pineapple, is another effective option that helps reduce inflammation. While clinical evidence varies, many practitioners observe faster resolution of discoloration in patients who use these agents.
Vitamin K Oxide
Creams containing Vitamin K oxide are clinically proven to help the body break down hemosiderin, the iron component of blood that stains the skin purple or yellow. Apply this gently to bruised areas after the injection ports have sealed.
Activity, Lifestyle, and Medical Restrictions
Your blood pressure directly influences swelling. Keeping your heart rate stable prevents the “pounding” sensation in the face that can exacerbate edema.
Exercise and Heat
Avoid vigorous exercise for 24 to 48 hours. Cheek fillers require just 24-48 hours of recovery regarding intense physical exertion. Heavy lifting, running, or high-intensity interval training increases intracranial pressure and blood flow to the face. Stay away from environments with extreme heat for two weeks. Saunas, steam rooms, and hot tubs cause widespread vasodilation, which can prolong swelling and potentially increase the risk of infection.
Dental Procedures
You should wait at least two weeks, preferably four, before any dental work, including routine cleanings. Dental procedures release bacteria into the bloodstream. Because the filler is a foreign body, bacteria can attach to it and create a biofilm or infection. Furthermore, the pressure from keeping your mouth open wide for an hour can displace settling filler in the mid-face.
Alcohol and Tobacco
Alcohol acts as a vasodilator and a diuretic. Drinking wine or spirits within the first 24 to 72 hours can increase fluid retention and the likelihood of late-onset bruising. Tobacco smoke constricts blood vessels and depletes oxygen in the tissue, which slows the healing process. Avoid smoking or vaping for at least 72 hours.
Cosmetics, Skincare, and Concurrent Treatments
The injection points are tiny wounds that need time to close. This usually takes 4 to 6 hours, but waiting 24 hours is the safest standard.
Makeup Application
Do not apply makeup immediately after the appointment. Wait until the next day. When you do resume wearing makeup, use clean brushes or sponges to avoid introducing bacteria into the pores near the injection sites. Mineral-based makeup is often recommended for its breathability.
Skincare Routine
You can wash your face the evening of the treatment with a gentle cleanser and lukewarm water. Avoid active ingredients like retinoids, glycolic acid, or exfoliating scrubs for 3 days. These can irritate the skin barrier while it is already sensitive.
Other Cosmetic Procedures
Botox is often done in the same appointment, usually in the upper face. However, for treatments that involve pressure or heat on the cheeks—such as radiofrequency microneedling, chemical peels, or laser resurfacing—you must wait. Generally, a two-week waiting period is required to ensure the filler is stable and the skin barrier is healed. Heat can theoretically increase inflammation around the filler, so spacing these treatments out is safer.
Massage and Lymphatic Drainage
A common misconception is that massaging the area helps the filler “settle.” This is incorrect and risky for HA fillers. Do not massage your cheeks. Manipulation can displace the filler product before it integrates with the tissue, leading to asymmetry or migration. If you feel a distinct, hard lump that is visible, contact your clinic rather than trying to rub it out yourself.
Lymphatic drainage should only be performed if your provider specifically instructs you to do so to manage edema. If advised, use extremely light, sweeping strokes moving away from the center of the face toward the ears. If your provider did not demonstrate this, do not attempt it at home.
Travel and Social Considerations
Air travel is generally safe immediately after fillers, but the dry cabin air and pressure changes can contribute to dehydration and slight swelling. Stay hydrated and apply moisturizer.
For work and social commitments, expect to look “done” for a few days. You may feel stiff when smiling. It is generally recommended that you resume most activities right away, but plan major social events carefully. Do not get treated the week of a wedding, a reunion, or a professional photoshoot. Even with the best technique, bruising can happen and may take 7 to 10 days to clear. It’s common to experience mild side effects such as swelling, redness, tenderness, or slight bruising, and you do not want to be stressing over concealer application before a big night.
When to Call the Office
Most side effects are normal, but specific symptoms require immediate medical attention. Contact your provider right away if you notice any of the following.
- Severe pain that is not relieved by Tylenol.
- Discoloration that looks like a pale, white, or dusky gray patch, or a net-like red pattern (livedo reticularis). This could indicate a vascular occlusion.
- Significant heat or redness that spreads after the first 24 hours.
- Fever or chills.
- Pustules or blisters forming near the injection site.
Sleeping Positions and Nighttime Strategies to Protect Fillers
Gravity works against you when you lie flat. Fluid accumulates in the facial tissues rather than draining away. This accumulation creates hydrostatic pressure. That pressure leads to increased swelling the next morning. Your sleeping position during the first few weeks is just as critical as the icing protocol you follow during the day.
The Gold Standard: Supine with Elevation
The only way to ensure symmetrical results and minimal fluid retention is sleeping on your back. We call this the supine position. It prevents the filler gel from shifting before it integrates with your tissue. It also stops unilateral pressure that happens when you press one side of your face into a pillow.
Elevation is the second part of this equation. Keeping your head elevated above your heart allows gravity to assist with lymphatic drainage.
Optimal Setup for the First 3–7 Nights:
- Angle: Aim for a 20 to 30-degree incline. This is high enough to reduce swelling but low enough to sleep comfortably.
- Support: Use a memory foam wedge pillow. Standard pillows often shift or flatten during the night. A firm wedge provides consistent elevation.
- Stabilization: Add a cervical roll or a U-shaped travel pillow around your neck. This keeps your head facing forward and prevents you from unconsciously rolling onto your cheek.
Most patients need to maintain this strict elevation for at least 3 to 7 nights. If you notice persistent puffiness in the mornings, extend this period until the fluid balance normalizes.
Managing Side and Stomach Sleeping
Side and stomach sleeping pose significant risks during the integration phase. The pressure from the mattress or pillow can flatten the filler product. This physical compression may lead to asymmetry or displacement of the hyaluronic acid gel.
You must avoid side and stomach sleeping for a minimum of 1 to 2 weeks. The filler material is malleable during this window. It needs time to settle into the tissue lattice. If you are a heavy sleeper who tends to mash their face into the pillow, waiting a full two weeks is safer.
Strategies for Habitual Side Sleepers:
- The Pillow Fortress: Place large, firm pillows on both sides of your body. This creates a physical barrier that stops you from rolling over.
- Zero-Gravity Recline: If you have an adjustable bed, use the zero-gravity setting. Elevating the legs slightly while raising the head takes pressure off the lower back. This makes back sleeping more sustainable for people who usually find it uncomfortable.
- Weighted Blankets: A weighted blanket can provide a sense of security and reduce the urge to toss and turn.
Dermal filler recovery is quick, but the tissue integration takes time. Returning to face-down sleeping too early can compromise the aesthetic outcome.
Nighttime Accessories and Environment
Your sleep environment involves more than just pillows. Anything that touches your face or restricts blood flow needs evaluation.
Clothing and Masks:
Avoid pajamas with tight collars or hoods that could bunch up around the jawline. Keep the neck area clear. Sleep masks are generally discouraged for the first week. The elastic strap puts pressure on the temporal region and the upper cheeks. If you must use one for light sensitivity, choose a contoured mask that vaults over the eyes and cheeks without touching the skin.
CPAP Machines:
Patients who use CPAP machines for sleep apnea face a specific challenge. The straps often cross directly over the mid-face. Do not stop using your medically necessary device. Instead, speak with your injector before the appointment. They might adjust the injection placement slightly or recommend padding the straps to distribute pressure.
Skincare Adjustments:
Your nighttime skincare routine requires a lighter touch. Do not massage creams into the skin. Apply products with a gentle patting motion. Avoid mechanical exfoliation or tools like gua sha stones before bed. These increase circulation and can exacerbate swelling right before you lie down.
Handling Restless Sleep and Travel
Anxiety about ruining results often leads to poor sleep. Sleep deprivation increases cortisol, which can actually worsen inflammation.
If you are a restless sleeper, consider using a gentle alarm on your phone set for the middle of the night for the first two days. This allows you to check your position and correct it if you have rolled over. If you wake up on your side by accident, do not panic. Just gently massage the area only if your provider instructed you to do so; otherwise, simply resume back sleeping the next night. Short-term use of sleep aids like melatonin or magnesium might help, but clear this with your provider first.
Flying After Treatment:
Air travel dehydrates the body and alters pressure. This combination frequently triggers a flare-up in swelling.
Flight Protocols:
- Hydration: Drink significantly more water than usual the day before and during the flight.
- Compression: Wear compression socks to help overall circulation, even though the injection is in the face.
- Timing: Try to schedule flights at least 48 to 72 hours after injection. If you must fly sooner, apply a cool compress before boarding and immediately after landing.
Cheek fillers require just 24-48 hours of recovery for the initial healing, but internal settling continues for weeks. Protecting the area from pressure and gravity during sleep ensures the product stays exactly where your injector placed it.
Conclusion and Key Takeaways for Safe Recovery
Successful recovery from cheek filler isn’t just about waiting for the clock to tick down. It is an active process where your daily habits directly influence how quickly you heal and how the final result settles. Patience is the most difficult part of this process. You might leave the clinic feeling great, only to wake up the next morning looking far more swollen than you expected. This is the body’s natural inflammatory response to the trauma of the needle or cannula and the hydrostatic nature of the hyaluronic acid drawing in water.
Most patients see the most significant swelling within the first 24 to 48 hours. It can be asymmetrical, meaning one cheek might look larger or higher than the other. This does not mean the injector made a mistake. It usually means one side is reacting more strongly to the injection. Dermal filler recovery is quick—swelling and redness fade in 1–2 days for many, but residual puffiness often lingers for two weeks. You need to give the product time to integrate with your tissue before judging the outcome.
Your injector’s aftercare plan supersedes general advice. They know exactly which product was used, how deep it was placed, and your specific anatomy. If their instructions differ from what you read online, follow their lead. Recovery is a short phase for a long-lasting result. If you feel anxious about a symptom, never hesitate to call the office. Aesthetic providers prefer a patient who calls with a false alarm over a patient who ignores a real problem until it worsens. Trust the process, keep your head up, and give your body the time it needs to heal.
Sources
- Cheek Lift Recovery Timeline: What to Expect Week by Week After … — Minor swelling and bruising may occur but typically resolve within 3-7 days. However, results last only 12-24 months compared to the 10-year average duration of …
- What's the Recovery Time After Getting Dermal Fillers? — Dermal filler recovery is quick—swelling and redness fade in 1–2 days, bruising may last up to a week, and full results settle in about 2 weeks.
- Recovery Time And Downtime After Cheek Fillers. – Injectco — Cheek fillers require just 24-48 hours of recovery!. Enhance volume & rejuvenate your look with expert care at Injectco. Book your appointment today!
- Cheek Filler Before and After: What to Expect from Your Treatment — It's common to experience mild side effects such as swelling, redness, tenderness, or slight bruising at the injection sites. These effects are temporary and …
- Restylane Cheek Filler: Elevate Natural 2025 – Ideal Face and Body — Restylane cheek filler results are long-lasting but not permanent, which allows for adjustments as your face and preferences change over time.
- Dermal Fillers Recovery – American Society of Plastic Surgeons — Recovery time varies for each patient and for each type of filler injected. You can resume most activities right away, but it is generally recommended that you …
- How Long Do Dermal Fillers Last? The Definitive Guide — Filler results can last for years! In fact, at MFI, we see patients retaining up to 80% of their initial results even after a full year without treatment.
- How Long Does Cheek Filler Last? What to Expect – Syra Aesthetics — Recovery involves minor swelling and bruising, which may take up to a week, with normal activities resuming immediately. Avoid strenuous …
Legal Disclaimers & Brand Notices
This content is for informational purposes only and does not constitute medical advice, diagnosis, or treatment. Always seek the advice of your physician or another qualified healthcare provider with any questions you may have regarding a medical condition or specific cosmetic procedure. Never disregard professional medical advice or delay in seeking it because of something you have read in this article.
All product names, logos, and brands mentioned in this text are the property of their respective owners. Use of these names, trademarks, and brands does not imply affiliation, endorsement, or certification by the trademark holders. These include, but are not limited to:
- Botox®
- Juvéderm®
- Restylane®
- Sculptra®